---
title: Create a Client Record
description: "Create a client record in Otuvy QM: enter client details, assign an SP org chart division, and set contact visibility and inspection defaults."
---
[Skip to content](https://help.otuvy.com/kb/create-a-client-record#main-content)
[More support](https://help.otuvy.com/kb/kb-tickets/new?hsLang=en)

Open main navigation
Close main navigation
- [More support](https://help.otuvy.com/kb/kb-tickets/new)
- [Contact us](mailto:vip@otuvy.com)
[Contact us](mailto:vip@otuvy.com)
How can we help you?
- There are no suggestions because the search field is empty.
1. [Otuvy Knowledge Base](https://help.otuvy.com/kb?hsLang=en)
2. [Otuvy QM - Setup & Administration](https://help.otuvy.com/kb/otuvy-qm-setup-administration?hsLang=en)
# Create a Client Record
# Create a Client Record
## Video Transcript
In this video I will show you how to manually create a **client record** within CleanTelligent.
Hover over the **Clients** tab to bring up the option to create a **New Client**. You can also **click** the tab and press the **New Client** button above the results list. As always, required fields are flagged. Enter the **name of the company** that you will be servicing — in this case, **RDJ Stark Hospital**. You can then add information to the record, such as the client **Email Address**, **Website** and **Address**.
You will notice a red flag next to the **SP Division**. This is where you decide where it is going on the **SP Org. Chart**. In our company, only the administrator needs access to the client records, so we can assign it to the **Admin** division in the SP Org. Chart.
Click **Save** to see the new Client record. At any time, you can find this record in the list of clients by clicking the **Clients** tab.
## ---
## What is a Client Record?
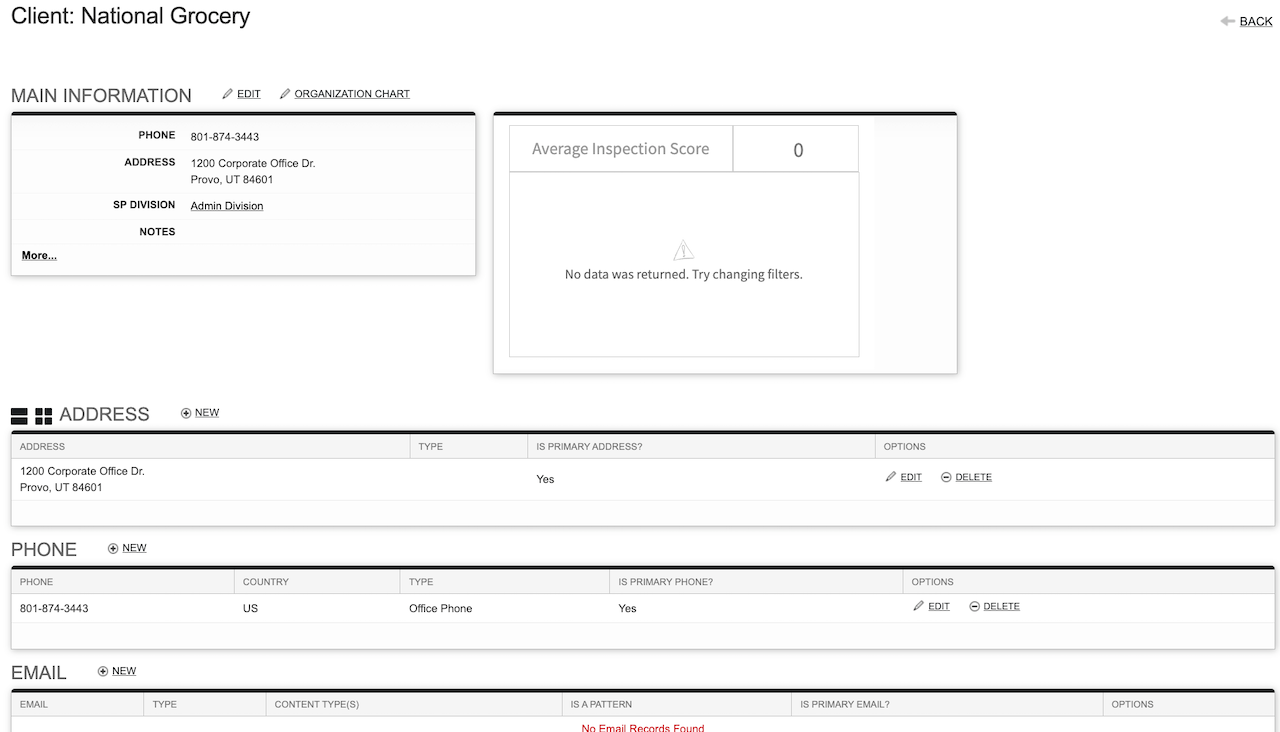
**Client Records** hold information about your customers. **Service Location records** and **Contact records** reside within a **Client record**. Several locations and contacts can belong to one Client. For example, a Client would be a grocery store chain where you service three locations in the area, then each store is set up under different Service Location records.
## How to Create a Client Record
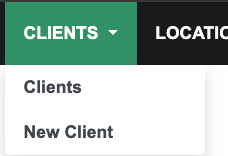
Start by *hovering* over the **Client Tab** and click **New Client**. You can also *click* the **Client tab** and click **New Client** above the search results list.
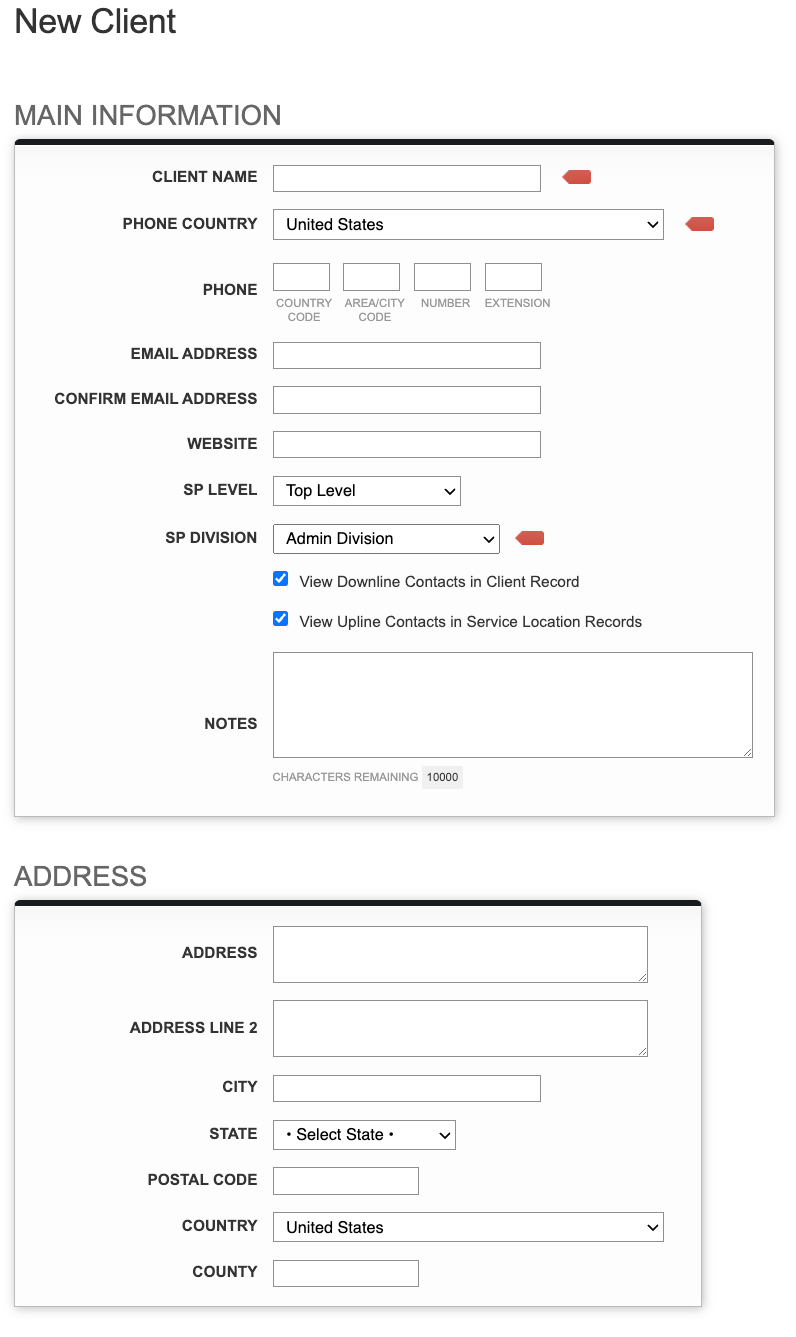
On the **New Client page**, required fields are flagged with a red tag. The **Client Name**, **Phone Country**, and **SP Division** are each required, but additional information like the **phone number**, **email address**, **website**, **address**, and **notes** can also be entered here.
> 
>
> Remember to double check the **SP Organization Chart** to know ahead of time where you’ll be placing this record. If a new division is required, it will need to be setup before creating the Client Record. For more information on the SP. Org. Chart, see our article [Build a Basic SP Organization Chart in the Knowledge Base.](https://help.otuvy.com/kb/build-a-basic-service-provider-organization-chart?hsLang=en)
Above the **Notes** box are two checked items: **View Downline Contacts in Client Record** and **View Upline Contacts in Service Location Records**.
These options refer to **Contact visibility** within the **Client Record** and **Location Records**. If both boxes are left checked, all contacts entered for this client will be visible when viewing the Client Record and Contacts with positions placing them upline and within a division for a selected location on a Service Location Record. If both boxes are unchecked, the contacts will only be visible on the records where they have been specifically assigned. Unless there are specific reasons to prevent contacts from being visible on the Client Record, these boxes can both be left checked.
Other information that can be setup while creating the Client Record is the defaults for inspections (if used in your system).
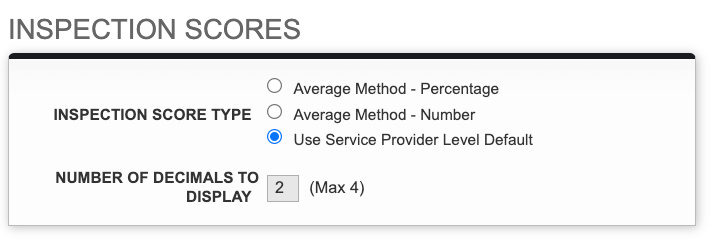
You can select **Average Method – Percentage**, **Average Method – Number**, or keep the default selection of **Use Service Provider Level Default**. Changing the selection will change whether the scores will be displayed as numbers or a percent. For consistency, most often, you'll leave this option as the default.
The option for **Number of Decimals to Display** refers to how many numbers to display to the right of the decimal in the inspection score. This can only be adjusted by an admin user through the **SP Info** edit menu.
After entering all information needed, click **Save**. You’ll be taken to the newly created Client Record and you can add Service Location Records and Contacts.
- [Otuvy QM - Getting Started](https://help.otuvy.com/kb/otuvy-qm-getting-started?hsLang=en)
- [Otuvy QM - Setup & Administration](https://help.otuvy.com/kb/otuvy-qm-setup-administration?hsLang=en)
- [Otuvy QM - Contact Access](https://help.otuvy.com/kb/otuvy-qm-contact-access?hsLang=en)
- [Otuvy QM - Inspections](https://help.otuvy.com/kb/otuvy-qm-inspections?hsLang=en)
- [Otuvy QM - Work Orders](https://help.otuvy.com/kb/otuvy-qm-work-orders?hsLang=en)
- [Otuvy QM - Mobile App](https://help.otuvy.com/kb/otuvy-qm-mobile-app?hsLang=en)
- [Otuvy QM - Reports & Dashboards](https://help.otuvy.com/kb/otuvy-qm-reports-dashboards?hsLang=en)
- [Otuvy QM - Advanced Features](https://help.otuvy.com/kb/otuvy-qm-advanced-features?hsLang=en)
- [Otuvy Frontline](https://help.otuvy.com/kb/otuvy-frontline?hsLang=en#main-content)
- [Getting Started](https://help.otuvy.com/kb/otuvy-frontline?hsLang=en#getting-started)
- [Mobile App](https://help.otuvy.com/kb/otuvy-frontline?hsLang=en#mobile-app)
- [Admin Portal](https://help.otuvy.com/kb/otuvy-frontline?hsLang=en#admin-portal)
- [Uncategorized](https://help.otuvy.com/kb/uncategorized?hsLang=en)
[](https://www.otuvy.com/)
[mailto:email@email.com](mailto:email@email.com)
Copyright © 2026, Otuvy, Inc.