
Filtered Views and Scheduled Reports on the Dashboard
Otuvy’s dashboard offers powerful tools to streamline data analysis and reporting. With filtered views, users can customize their dashboard experience by applying specific criteria to display only the most relevant data. Additionally, scheduled reports ensure that key stakeholders receive automated insights at regular intervals, reducing manual effort and enhancing decision-making. In this guide, we’ll explore how to leverage these features to optimize your workflow and maximize the value of your Otuvy dashboard.
Saving a Filtered View
1. Select and set your filters above the dashboard
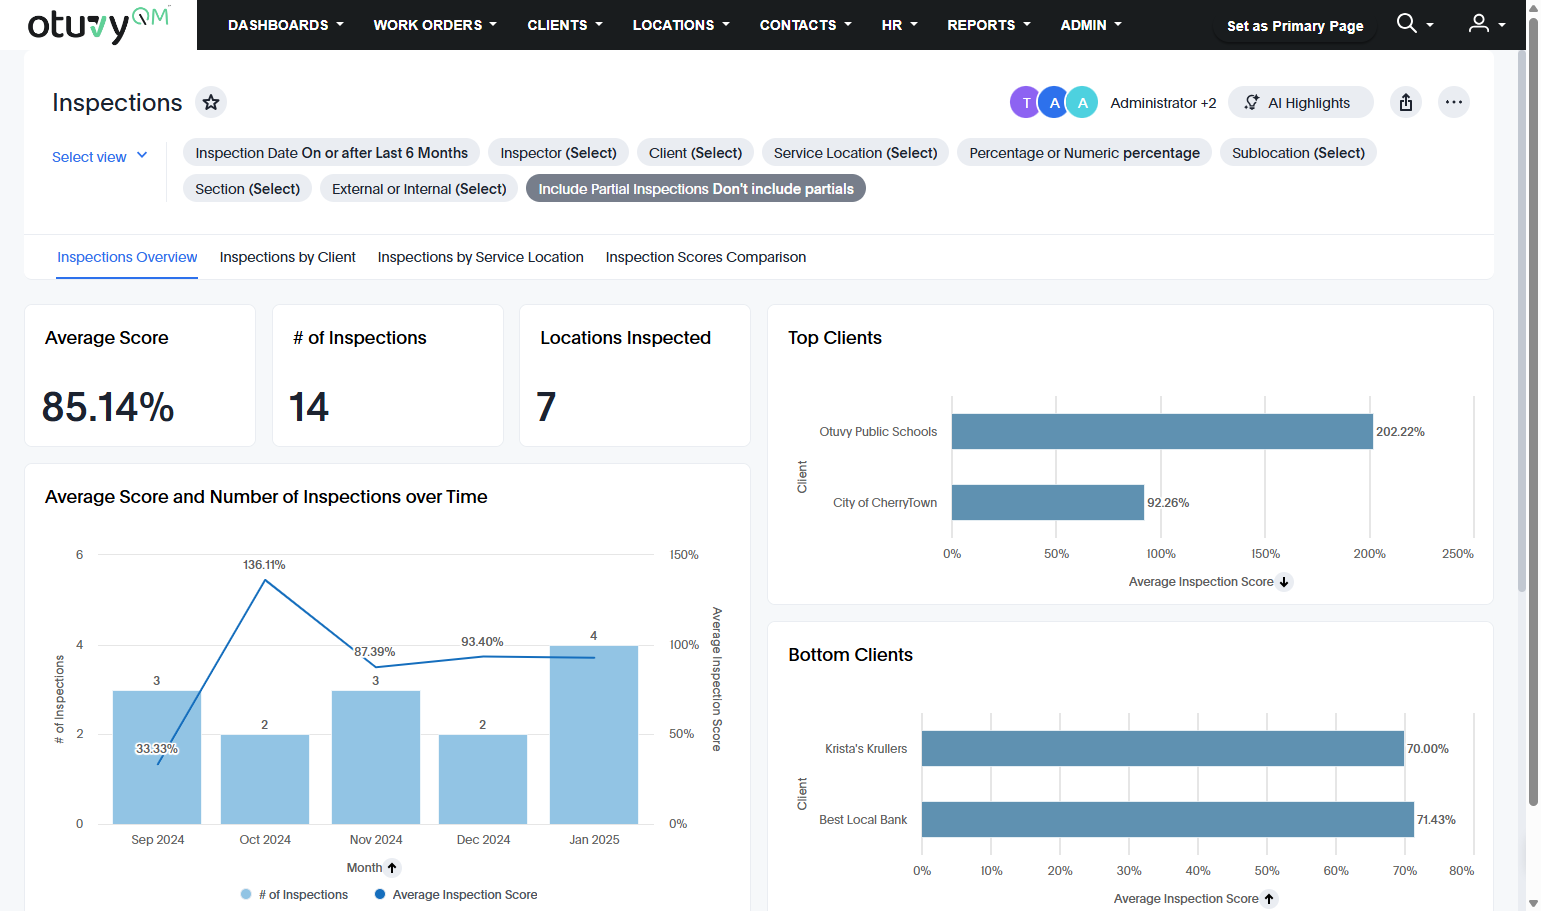
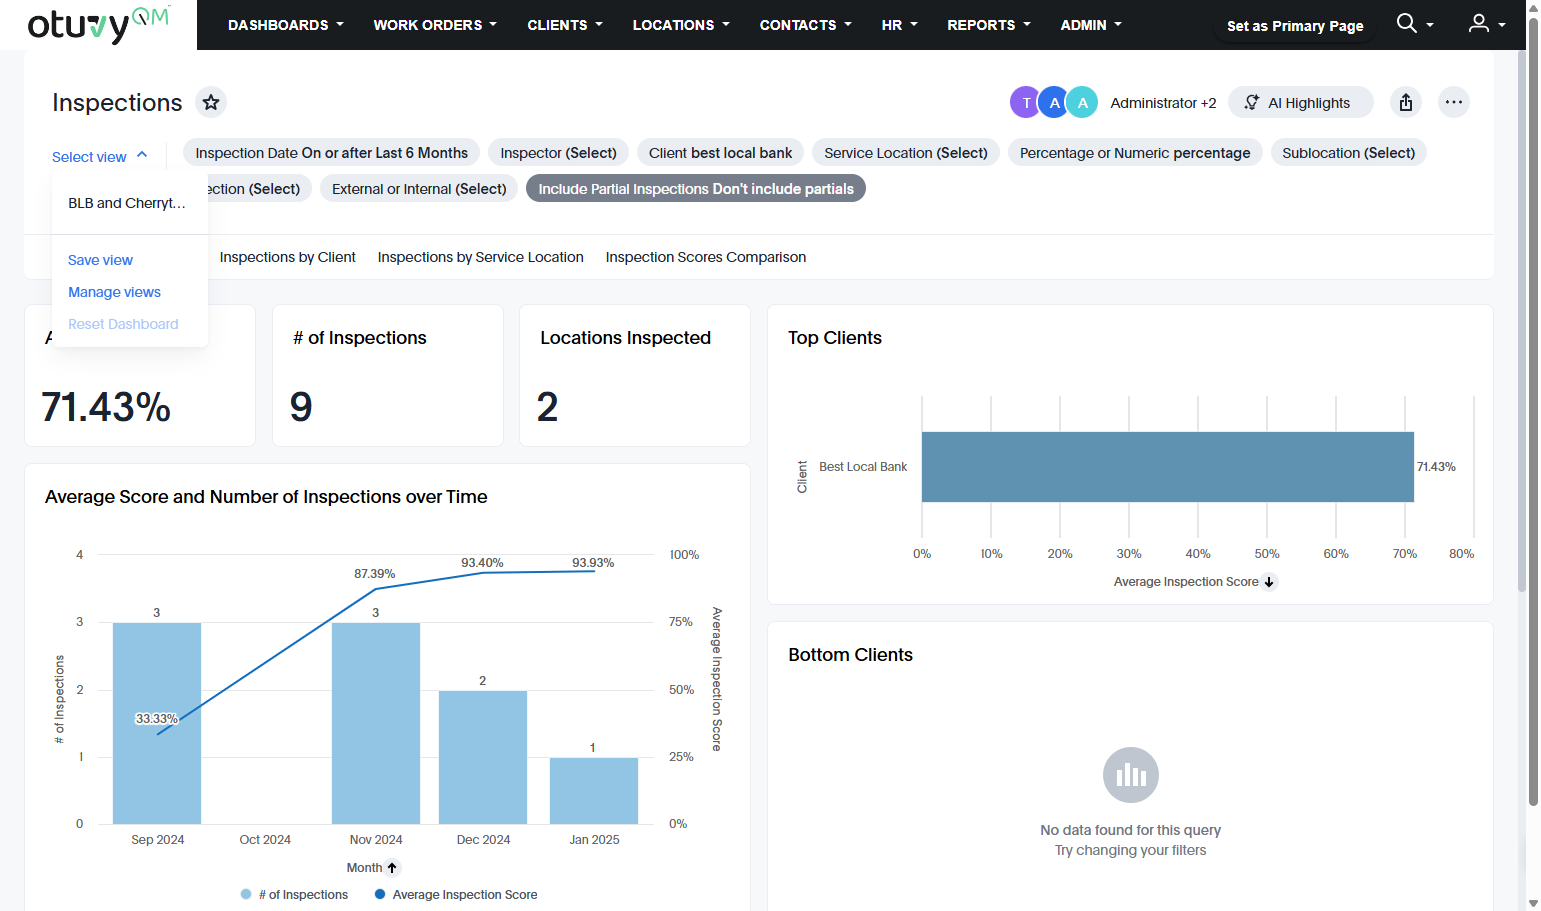
2. Once you've set your filters either click Save View (if no other views are saved) or use the Select View menu then select Save View
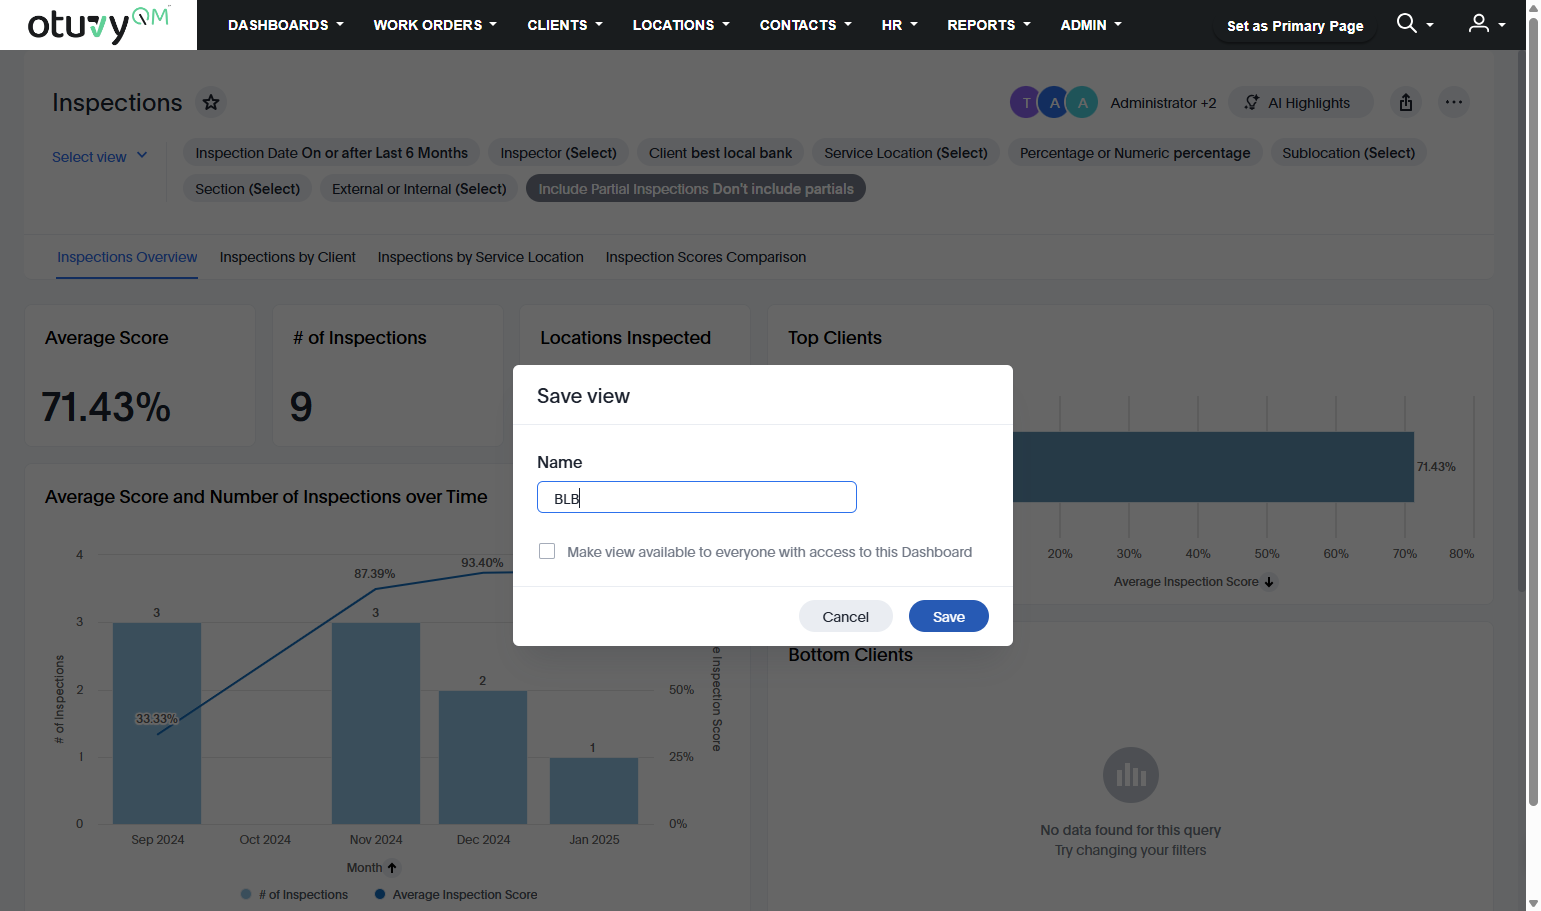
3. give your view a name and click Save
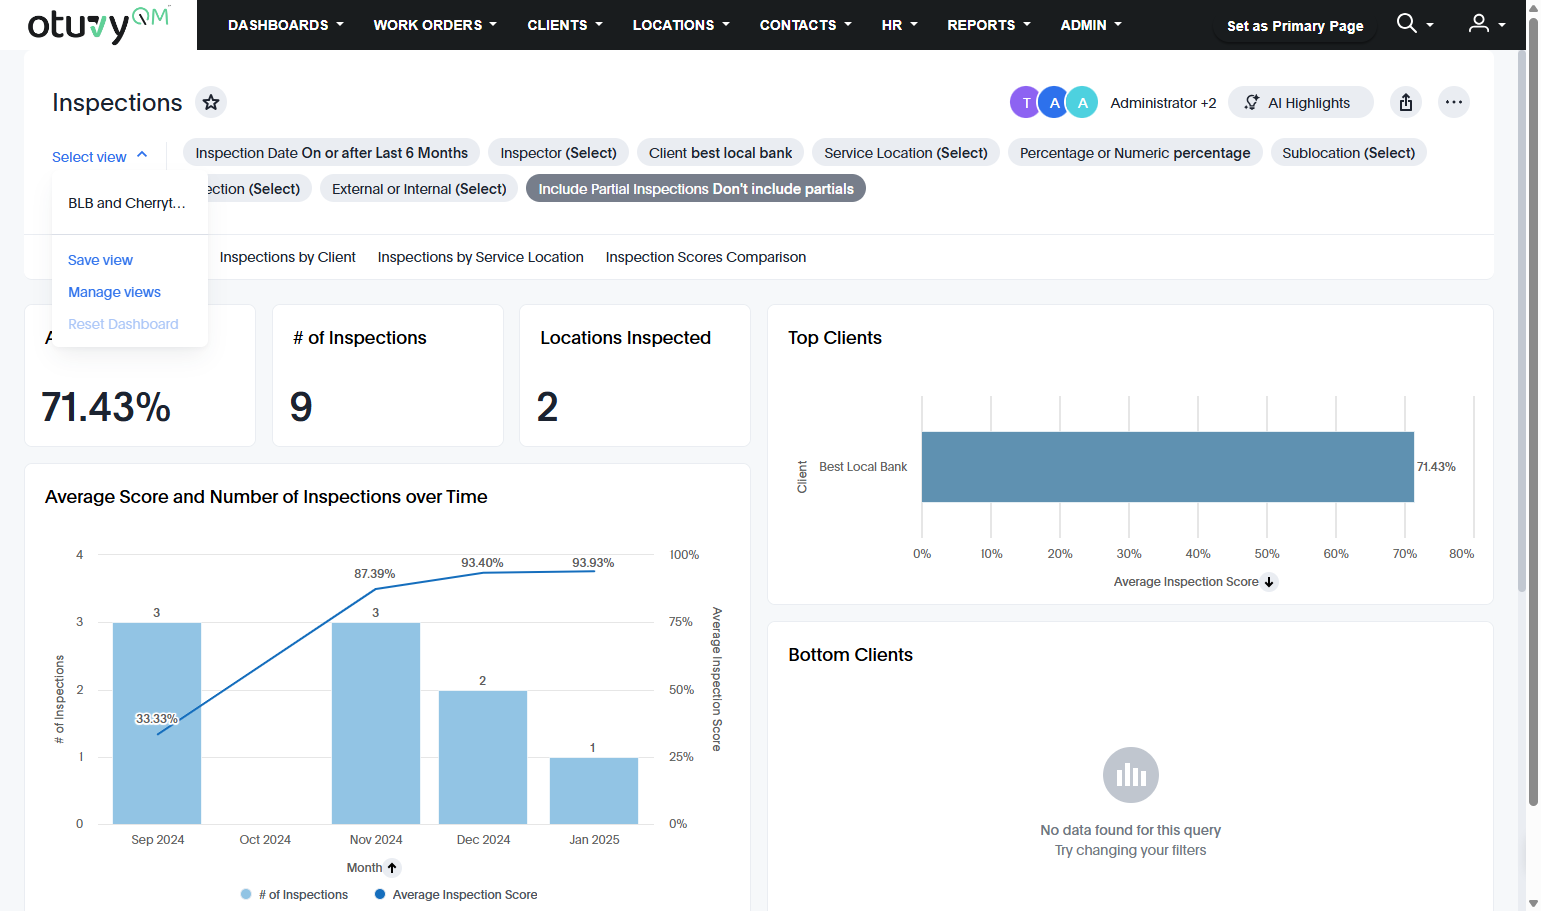
Once you have a saved view you are ready to create a scheduled report to send out periodically. You can also see that view any time by selecting it from the Select view menu
Create a Scheduled Report
1. From the dashboard you wish to create a scheduled report for, click the More icon at the top right of the screen
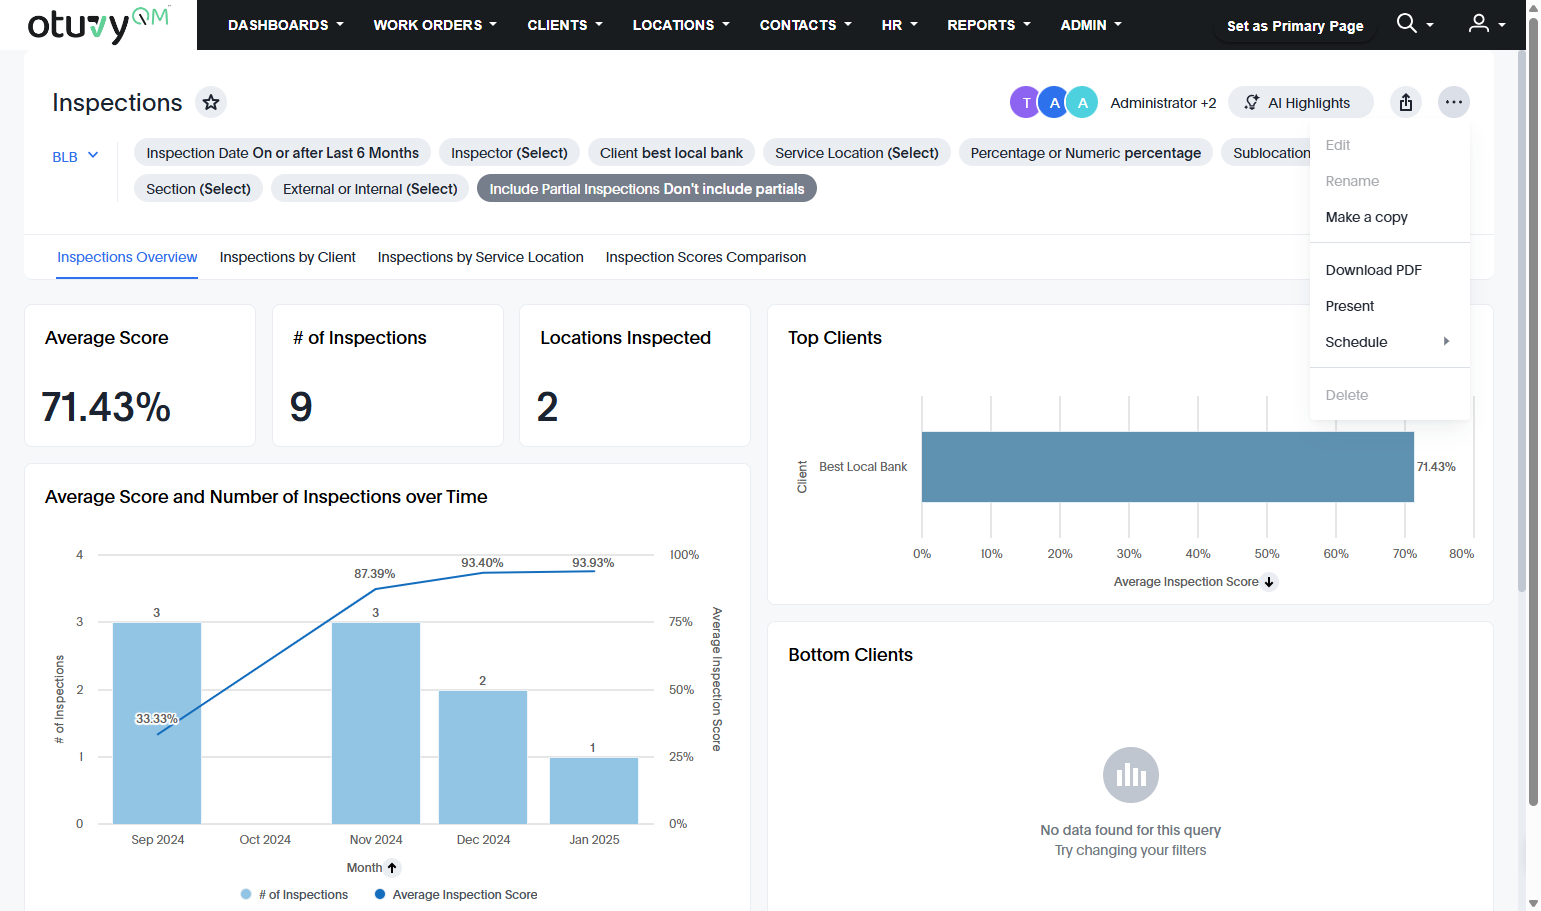
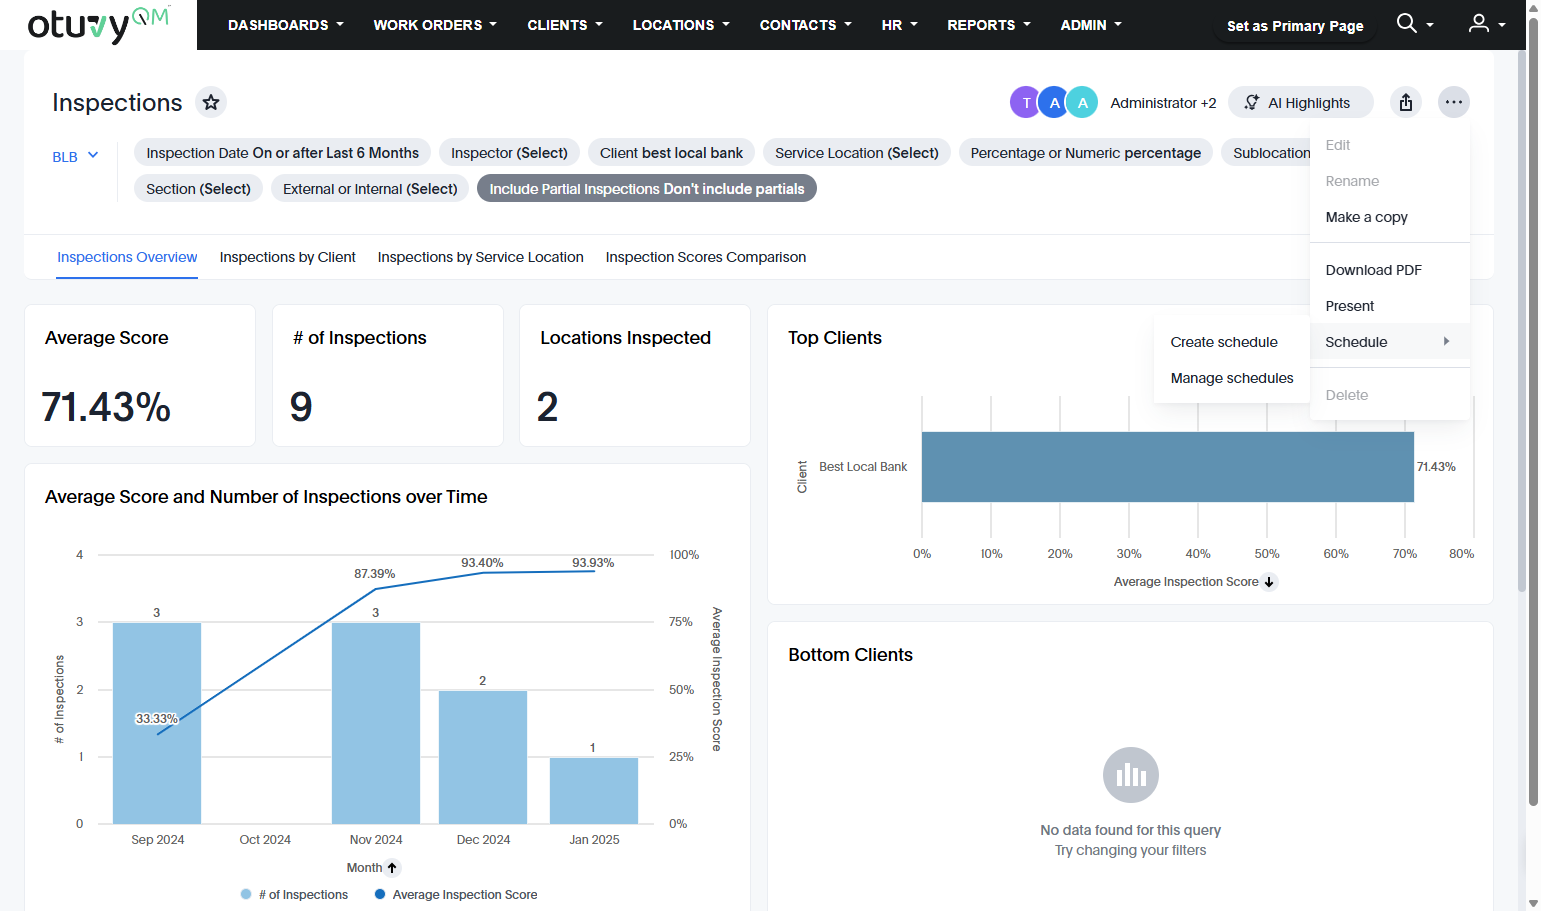
2. Hover over Schedule and click Create Schedule
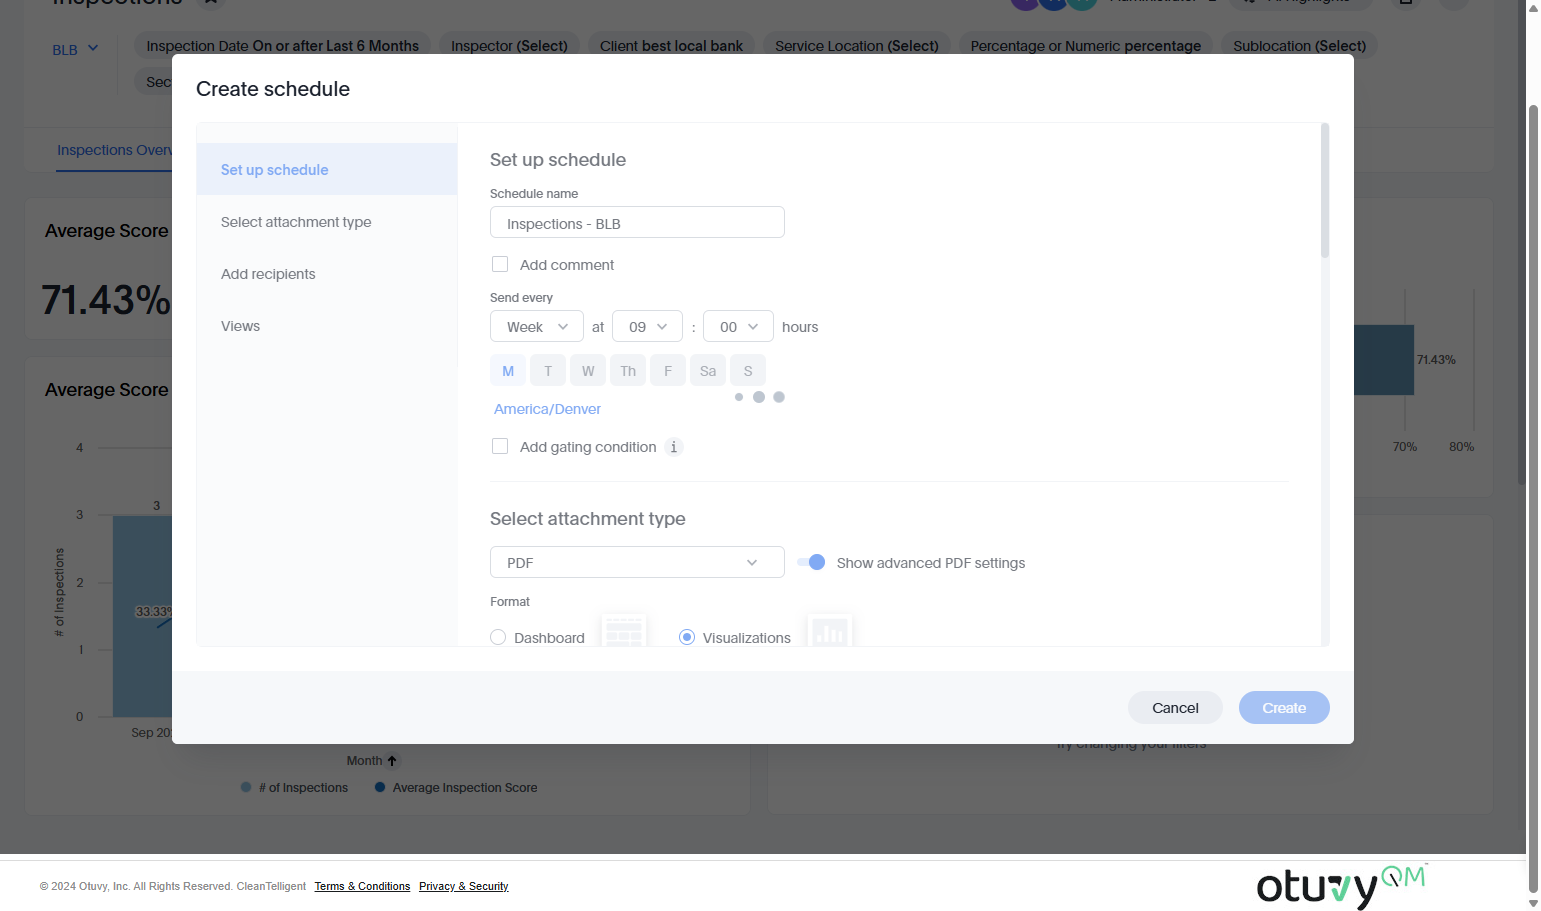
3. Inside this window you can set all of your scheduled report parameters
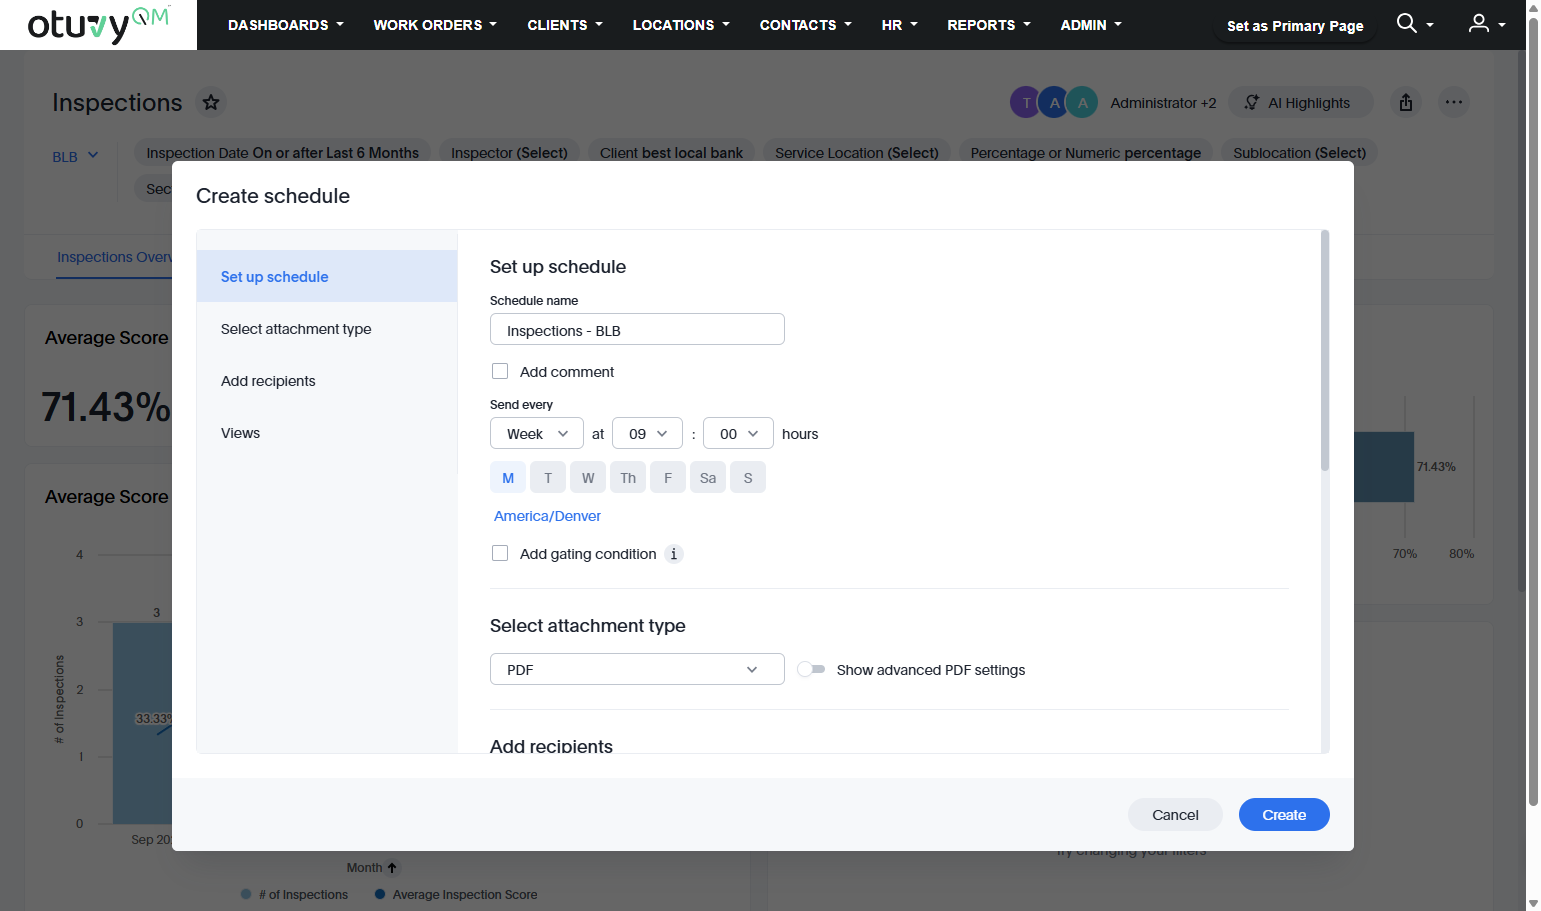
4. Click on or scroll to Set up schedule to set up the frequency and time of the scheduled report
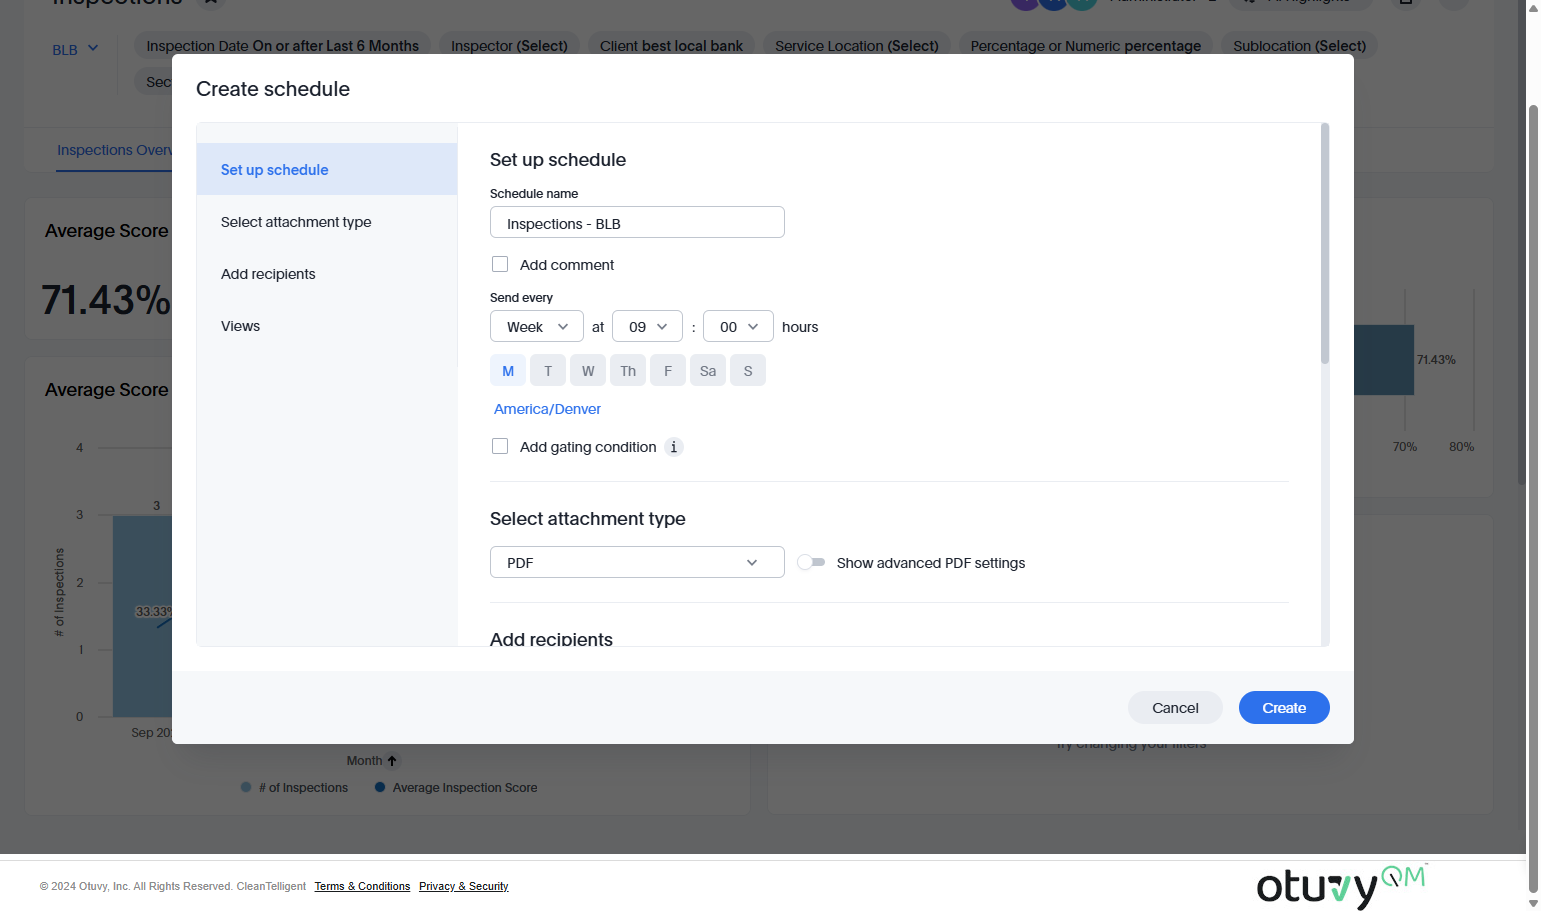
5. Click on or scroll to Select attachment type
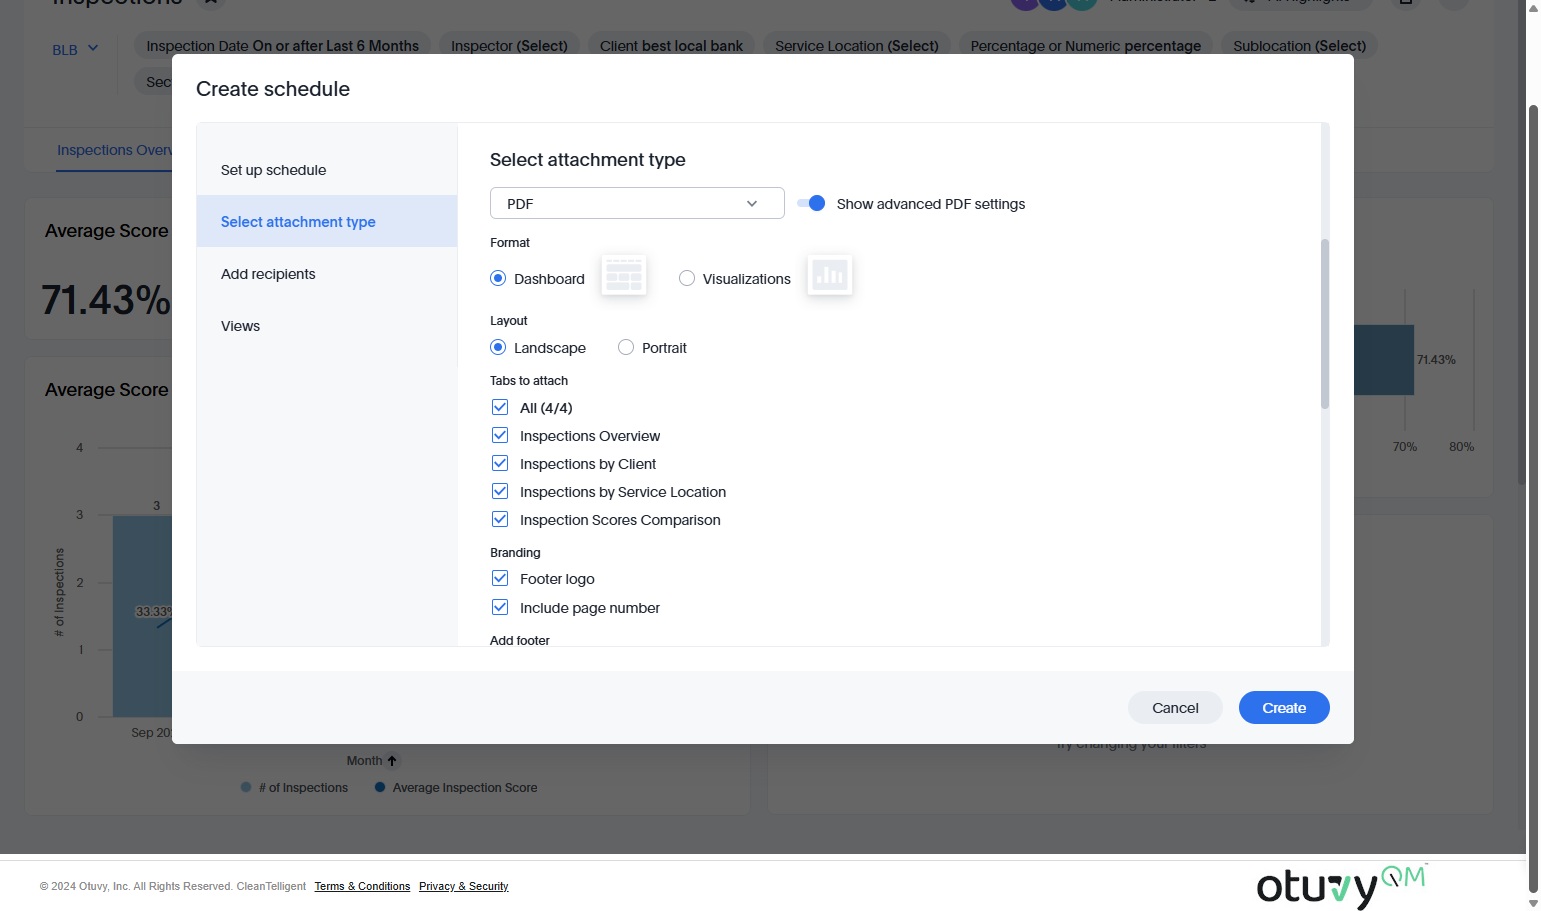
If you select the PDF attachment type, you will see the option to Show advanced PDF settings. By selecting Dashboard under the advanced PDF settings, you can choose to include all of the visualizations or charts on each of this dashboard's tabs
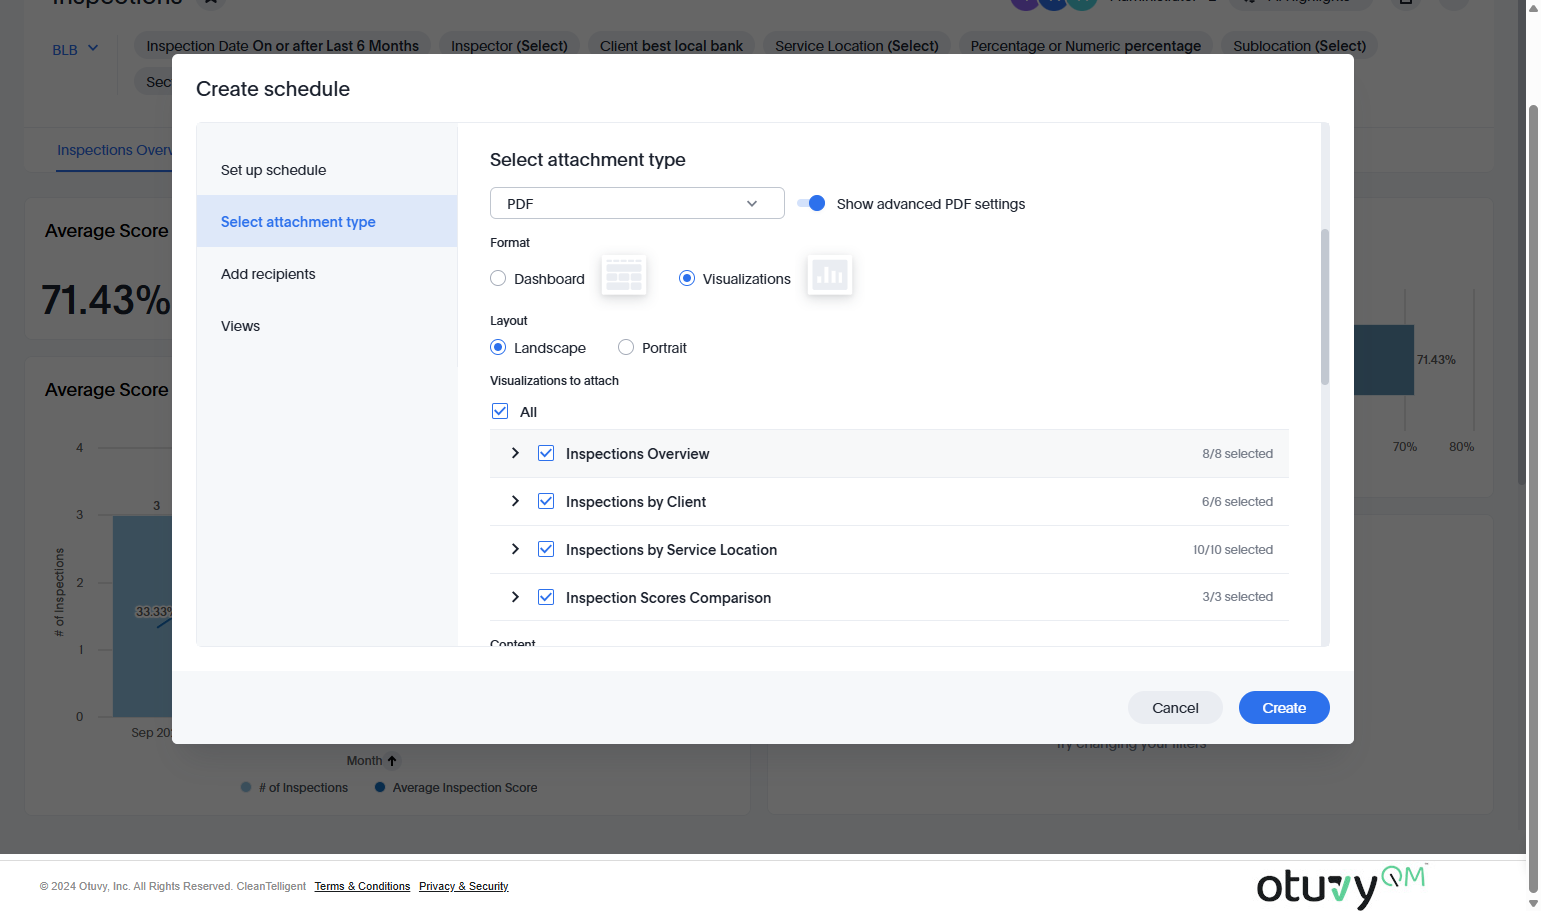
Alternatively, you can select the Visualizations option so you can pick and choose which individual visualizations or charts to include in your PDF report
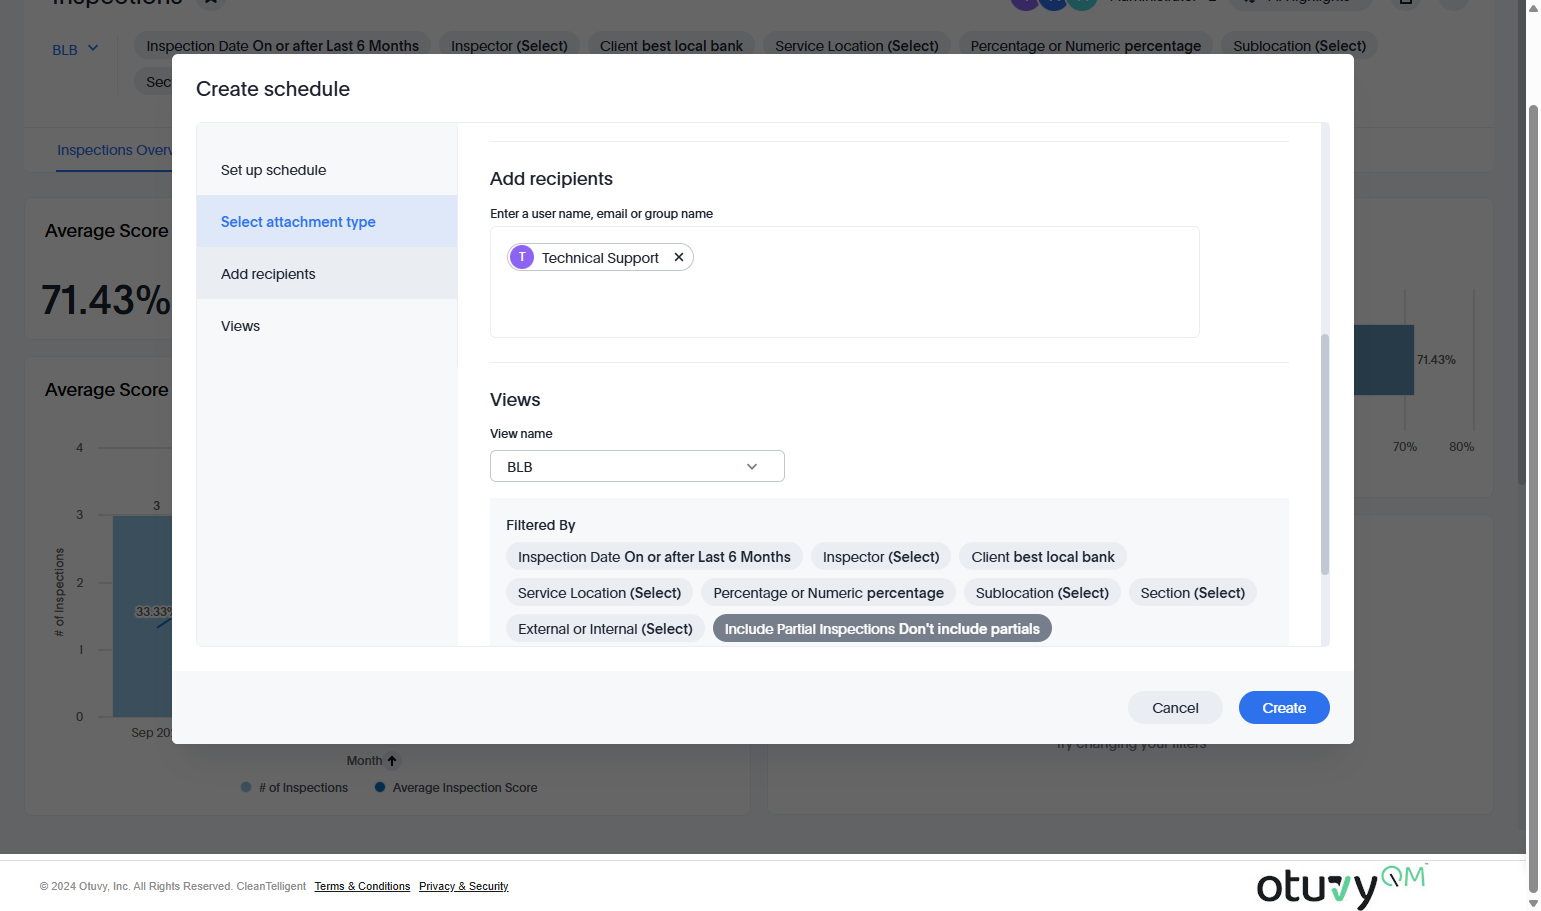
6. Click on or scroll to Add recipients to choose who to send the report to
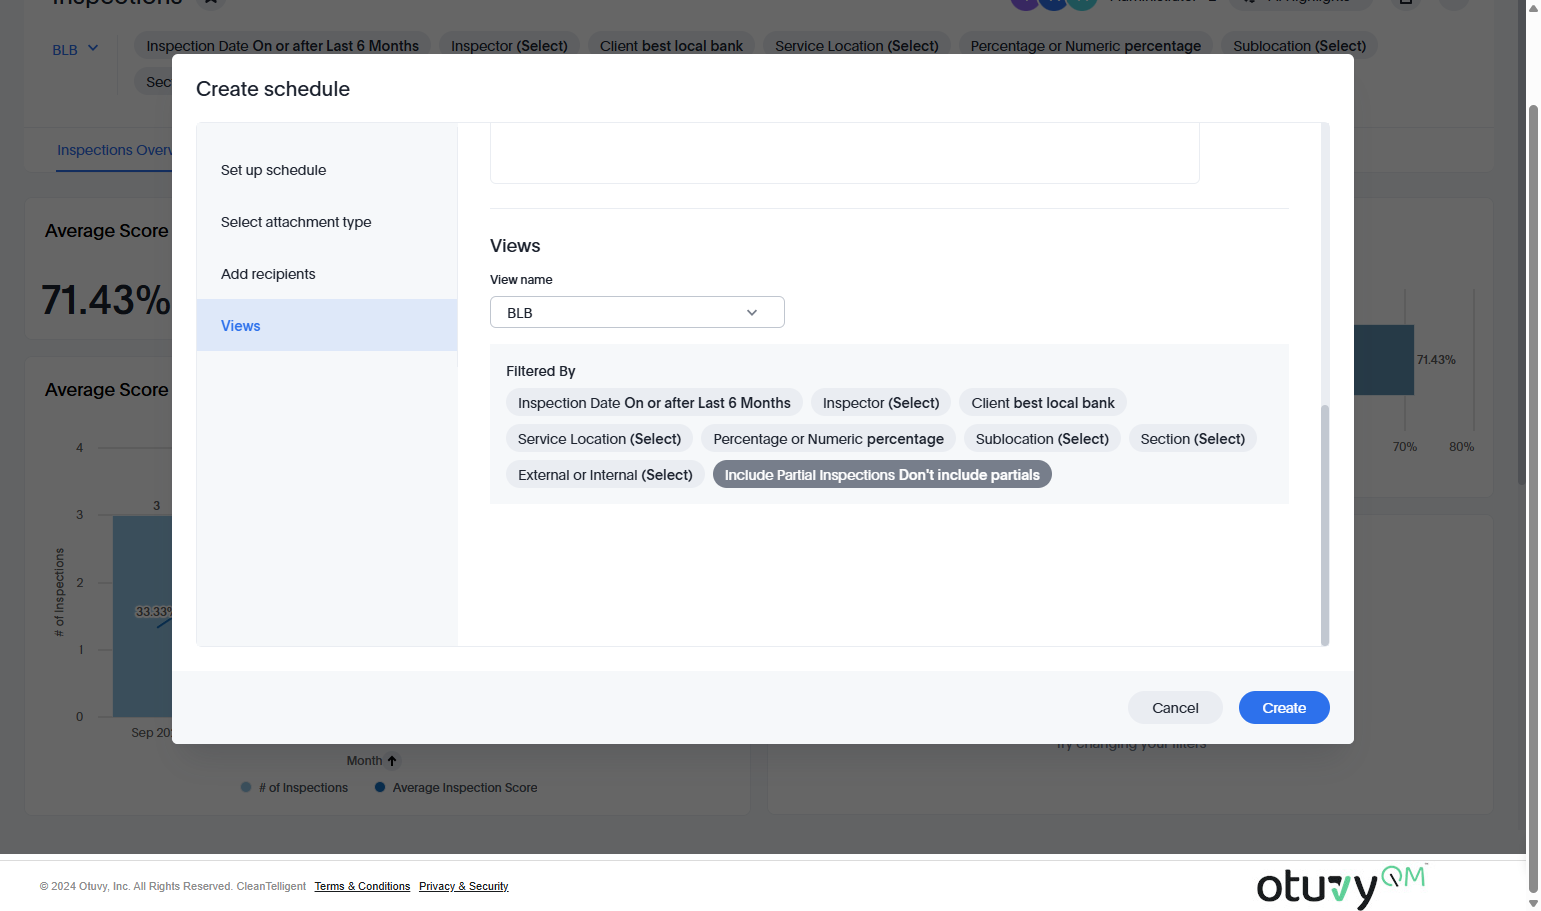
7. Click on or scroll to Views to choose which saved view to base the report on using the View name dropdown
8. Click on Create to create the scheduled report
Once you've finished this, the report will automatically be sent based on your settings at the next specified time.