---
title: Notification Settings in the Otuvy QM Mobile App
description: "Learn how to manage push notification settings in the Otuvy QM mobile app: toggle alerts, set delays, choose events, and filter by message type."
---
[Skip to content](https://help.otuvy.com/kb/notification-settings-in-the-otuvy-qm-mobile-app#main-content)
[More support](https://help.otuvy.com/kb/kb-tickets/new?hsLang=en)

Open main navigation
Close main navigation
- [More support](https://help.otuvy.com/kb/kb-tickets/new)
- [Contact us](mailto:vip@otuvy.com)
[Contact us](mailto:vip@otuvy.com)
How can we help you?
- There are no suggestions because the search field is empty.
1. [Otuvy Knowledge Base](https://help.otuvy.com/kb?hsLang=en)
2. [Otuvy QM - Mobile App](https://help.otuvy.com/kb/otuvy-qm-mobile-app?hsLang=en)
# Notification Settings in the Otuvy QM Mobile App
# Notification Settings in the Otuvy QM Mobile App
The push notification experience in the **Otuvy QM** mobile app remains familiar, but settings are now easier to access and manage in one centralized location.
This update is part of the overall redesign focused on improving clarity and reducing friction, while keeping the workflows your team already knows.
## How to Access Notification Settings
1\. From anywhere in the app, tap the menu button (bottom right corner) sometimes called the Hamburger Menu.

2\. Tap **Notification Settings**.
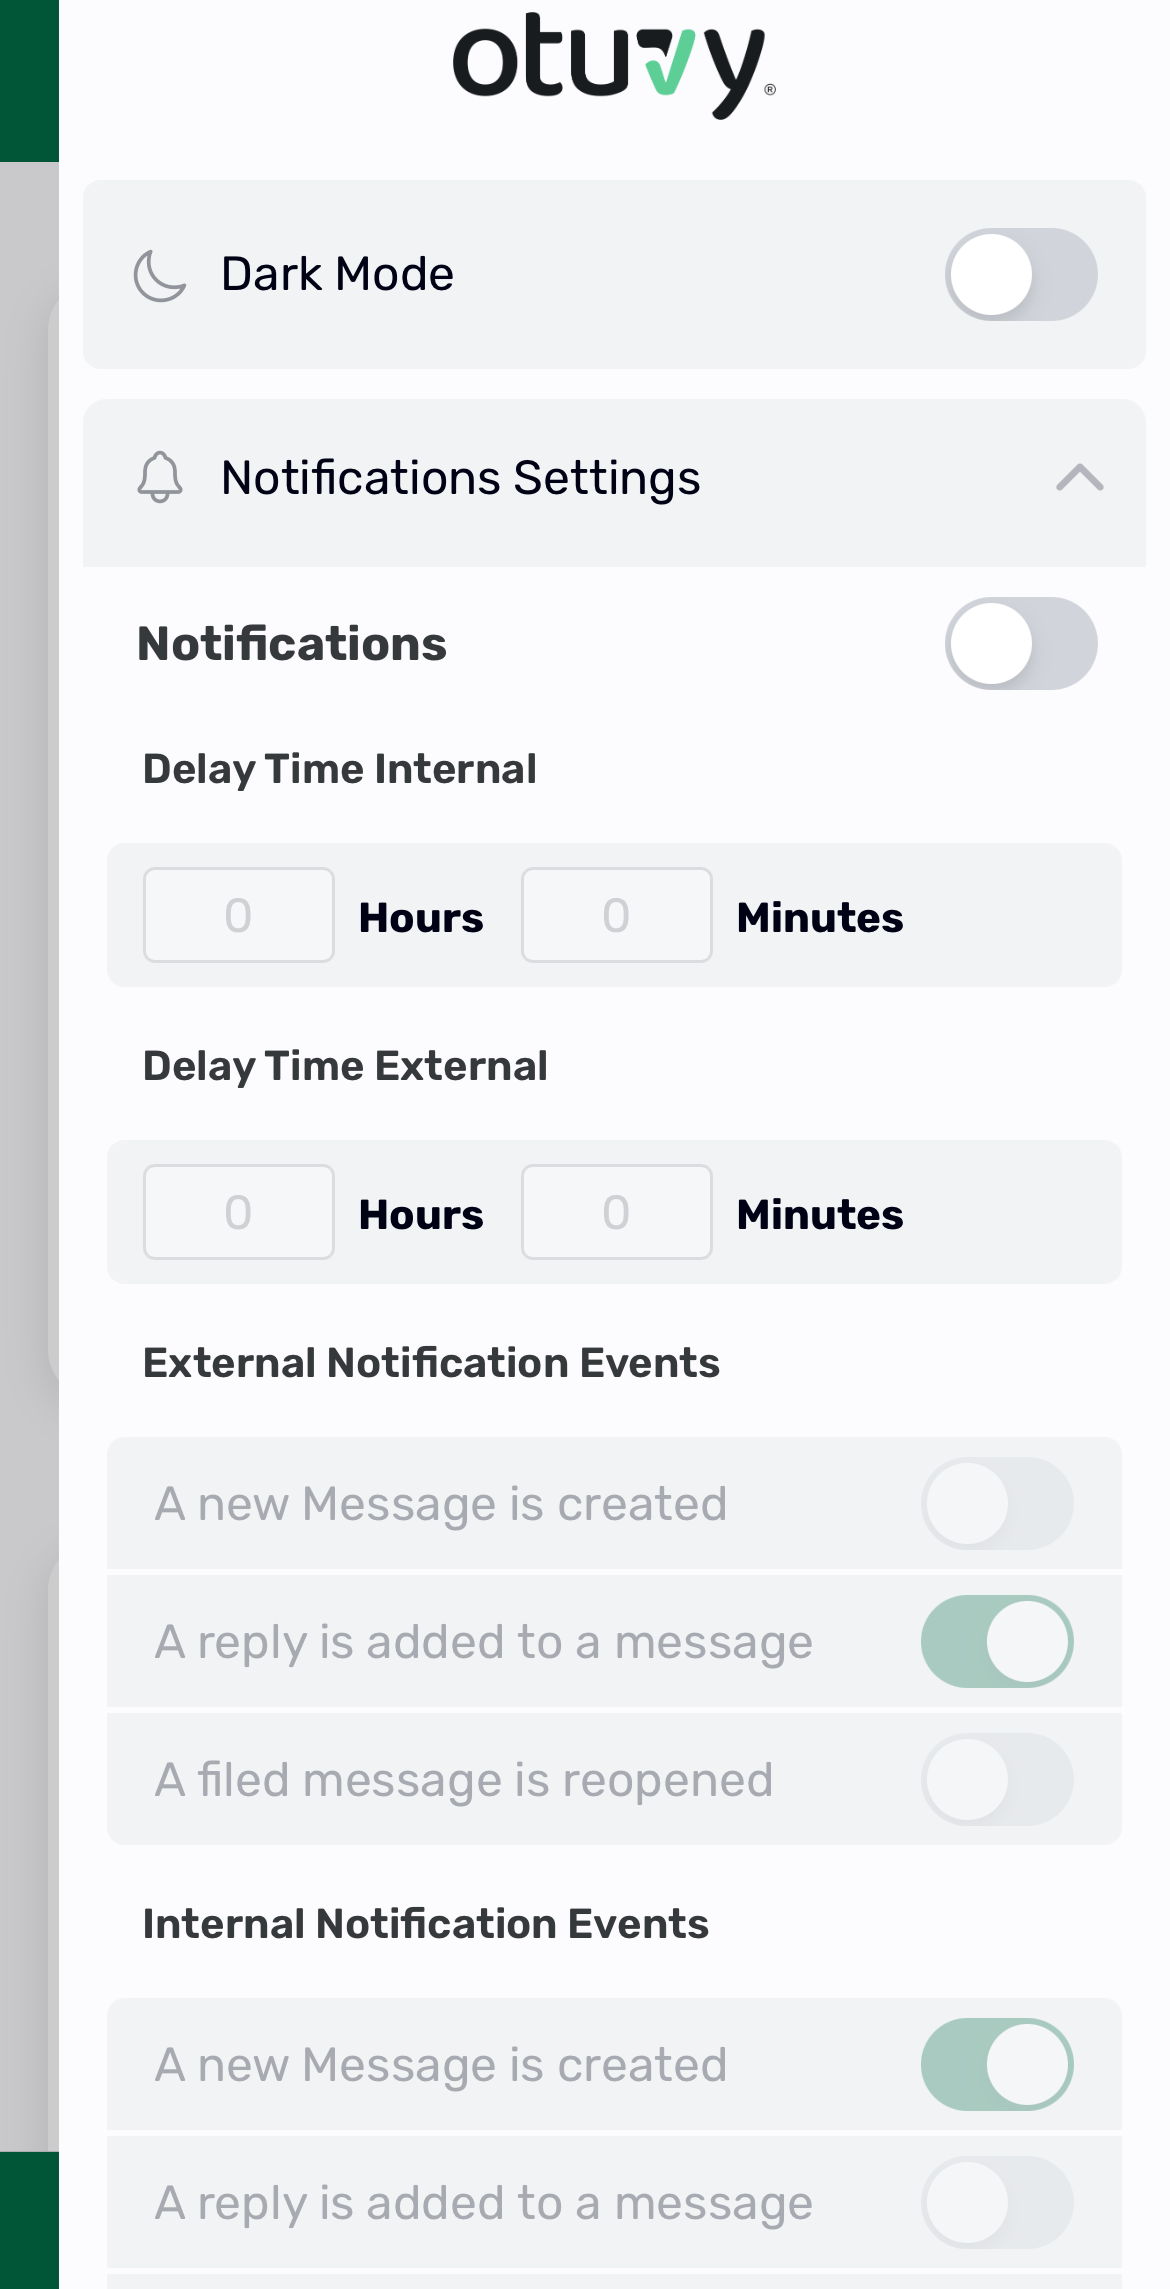
You will now see all notification controls in one place.
## Enable or Disable Notifications
At the top of the Notification Settings screen:
- Toggle Notifications on or off
- When ON, you will receive push notifications
- When OFF, all notifications are disabled
## Set Notification Delays
You can control how quickly notifications are sent after an event occurs.
### Internal Delay
Applies to messages created by your team.
- Set delay in hours and minutes
### External Delay
Applies to messages created by client users.
- Set delay in hours and minutes
This allows you to avoid being notified immediately and instead receive grouped or delayed updates.
## Choose Notification Events
You can control exactly which events trigger notifications.
### External Notification Events
*(Triggered by client users)*
- A new message is created
- A reply is added to a message
- A filed message is reopened
### Internal Notification Events
*(Triggered by your team)*
- A new message is created
- A reply is added to a message
- A filed message is reopened
- A message is forwarded to you
Toggle each option on or off depending on what you want to be notified about.
## Filter Message Types
If you only want notifications for specific types of messages:
1. Under **Message Types**, choose:
- **All** → receive notifications for all message types
- **Selected** → choose specific types
2. Select the message types you want, such as:
- Cleaning
- Inspection
- Billing
- Job Schedule
- Internal message types
Only selected types will trigger notifications when using the **Selected** option.
## Internal vs External Events
- **Internal events** = created by your service provider team
- **External events** = created by client users
This distinction helps you fine-tune what matters most for your role.
## Summary
- Notification functionality works the same as before
- Settings are now located in the menu (bottom right)
- You can control delays, event types, and message filters in one place
This centralized setup makes it easier to stay informed without being overwhelmed.
- [Otuvy QM - Getting Started](https://help.otuvy.com/kb/otuvy-qm-getting-started?hsLang=en)
- [Otuvy QM - Setup & Administration](https://help.otuvy.com/kb/otuvy-qm-setup-administration?hsLang=en)
- [Otuvy QM - Contact Access](https://help.otuvy.com/kb/otuvy-qm-contact-access?hsLang=en)
- [Otuvy QM - Inspections](https://help.otuvy.com/kb/otuvy-qm-inspections?hsLang=en)
- [Otuvy QM - Work Orders](https://help.otuvy.com/kb/otuvy-qm-work-orders?hsLang=en)
- [Otuvy QM - Mobile App](https://help.otuvy.com/kb/otuvy-qm-mobile-app?hsLang=en)
- [Otuvy QM - Reports & Dashboards](https://help.otuvy.com/kb/otuvy-qm-reports-dashboards?hsLang=en)
- [Otuvy QM - Advanced Features](https://help.otuvy.com/kb/otuvy-qm-advanced-features?hsLang=en)
- [Otuvy Frontline](https://help.otuvy.com/kb/otuvy-frontline?hsLang=en#main-content)
- [Getting Started](https://help.otuvy.com/kb/otuvy-frontline?hsLang=en#getting-started)
- [Mobile App](https://help.otuvy.com/kb/otuvy-frontline?hsLang=en#mobile-app)
- [Admin Portal](https://help.otuvy.com/kb/otuvy-frontline?hsLang=en#admin-portal)
- [Uncategorized](https://help.otuvy.com/kb/uncategorized?hsLang=en)
[](https://www.otuvy.com/)
[mailto:email@email.com](mailto:email@email.com)
Copyright © 2026, Otuvy, Inc.