---
title: Report Writer
description: Learn how to build custom report templates in Otuvy QM's Report Writer using datasets, static fields, and functions, viewable directly in Excel.
---
[Skip to content](https://help.otuvy.com/kb/report-writer#main-content)
[More support](https://help.otuvy.com/kb/kb-tickets/new?hsLang=en)

Open main navigation
Close main navigation
- [More support](https://help.otuvy.com/kb/kb-tickets/new)
- [Contact us](mailto:vip@otuvy.com)
[Contact us](mailto:vip@otuvy.com)
How can we help you?
- There are no suggestions because the search field is empty.
1. [Otuvy Knowledge Base](https://help.otuvy.com/kb?hsLang=en)
2. [Otuvy QM - Reports & Dashboards](https://help.otuvy.com/kb/otuvy-qm-reports-dashboards?hsLang=en)
# Report Writer
# Report Writer
#### Transcript:
Today we will go over how to create a custom report in Report Writer. The reports will always be viewed in Microsoft Excel.
To start, go to the **Admin** tab and click **Configuration**. Then under **Job Configuration**, click **Report Writer**. Click **New Custom Report Template** at the top right of the **Search Results** window. This opens a new window.
In the **Report Details** window that pops up, enter the name of the report. I’m going to be creating an inspection report, so I will name it *Inspection Report*. If you know that you want your client customers to be able to access this report, make sure to click **External**, here, to make it external so that they can see it.
Next, click on and highlight **Inspection** and drag and drop it into the white space. A new **Sub Report Details** window pops up. Fill in the name (I would name it the same report name again). So, *Inspections Report* is what we will call it. Add a description, if you like, but it’s not needed as the name already refers to what this is. Then hit **Save**.
Click **Edit** to open the next window. Here you’ll start setting up your custom report.
You will see a brownish-red area where you will create new cells by clicking on the plus sign on the right, to add more cells here. If you know the number of columns you’ll need — let’s say seven — you’ll click six times, because one column is already created. You’ll notice they’re labeled alphabetically at the top.
These brown rows are where you will drag and drop the formulas in.
Click on the top addition button to add a header row. These are your green rows. This is where you will put the title for each column as you create the report.
Next, click on the **Inspection** down arrow in your list to the left.
I’m going to pull in the **Name** of the **Service Location**, the **Dates** of the inspections, **Inspected By** and the scores. I will also name each of the columns after these.
I drag over my service location **Name** and then type this in row 1, under column A.
Next, I will drag in under the **Inspection** file, the dates of inspections. I want the **Full** date, so this is what I drag in. Then type in the name at the top again.
Then I want who performed the inspection. This has **First Name** and **Last Name** cells, so I will put each in a separate column and type in their heading at the top of each.
I want to make sure I pull in the scoring information, so I will pull in the **Inspection Service Detail Score**, name that at the top, and I also want what our goal score is set at this location. So, I pull that information over and title that column also.
I’m done pulling in the information I would like, so I’ll click **Save** in the top left and then click on **Back**and it takes me back to the **Search Results**.
Now, to run this report, I go to **Reports**, **Custom Reports** and click on the report I just created. Mine was *Inspection Reports*.
A new window pulls up where I can enter a date range and then select **Select All** or anything here I’d like to under the **Selection Criteria**.
Once selected, click **View Report** at your top right or bottom right. Then it should pull up your report in Excel. Name it and save it and open it and you’ll see your new Excel Custom Report!
---
## Report Writer Article
The **Report Writer** tool allows you to create **Custom Report Templates** using data found in and captured by Otuvy QM. To begin, let's define some terms which we will use as we talk about Report Writer
**Definitions**
- **Custom Report Template:** This is like a blueprint for your custom reports. It specifies what data you want, how it should look, and where it comes from. It's made up of fixed, customizable, and job-specific fields.
- **Datasets:** These are collections of data sources you can use in your custom report. They cover everything from events to specific custom data tied to clients, including questions from various scenarios. Examples of datasets include inspections, client surveys, and work orders. 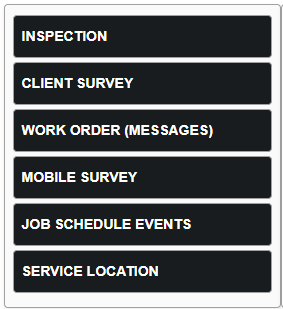
- **Static Fields:** These are standard data fields that all Otuvy QM accounts have. For instance, client names, service location names, and dates are static fields. 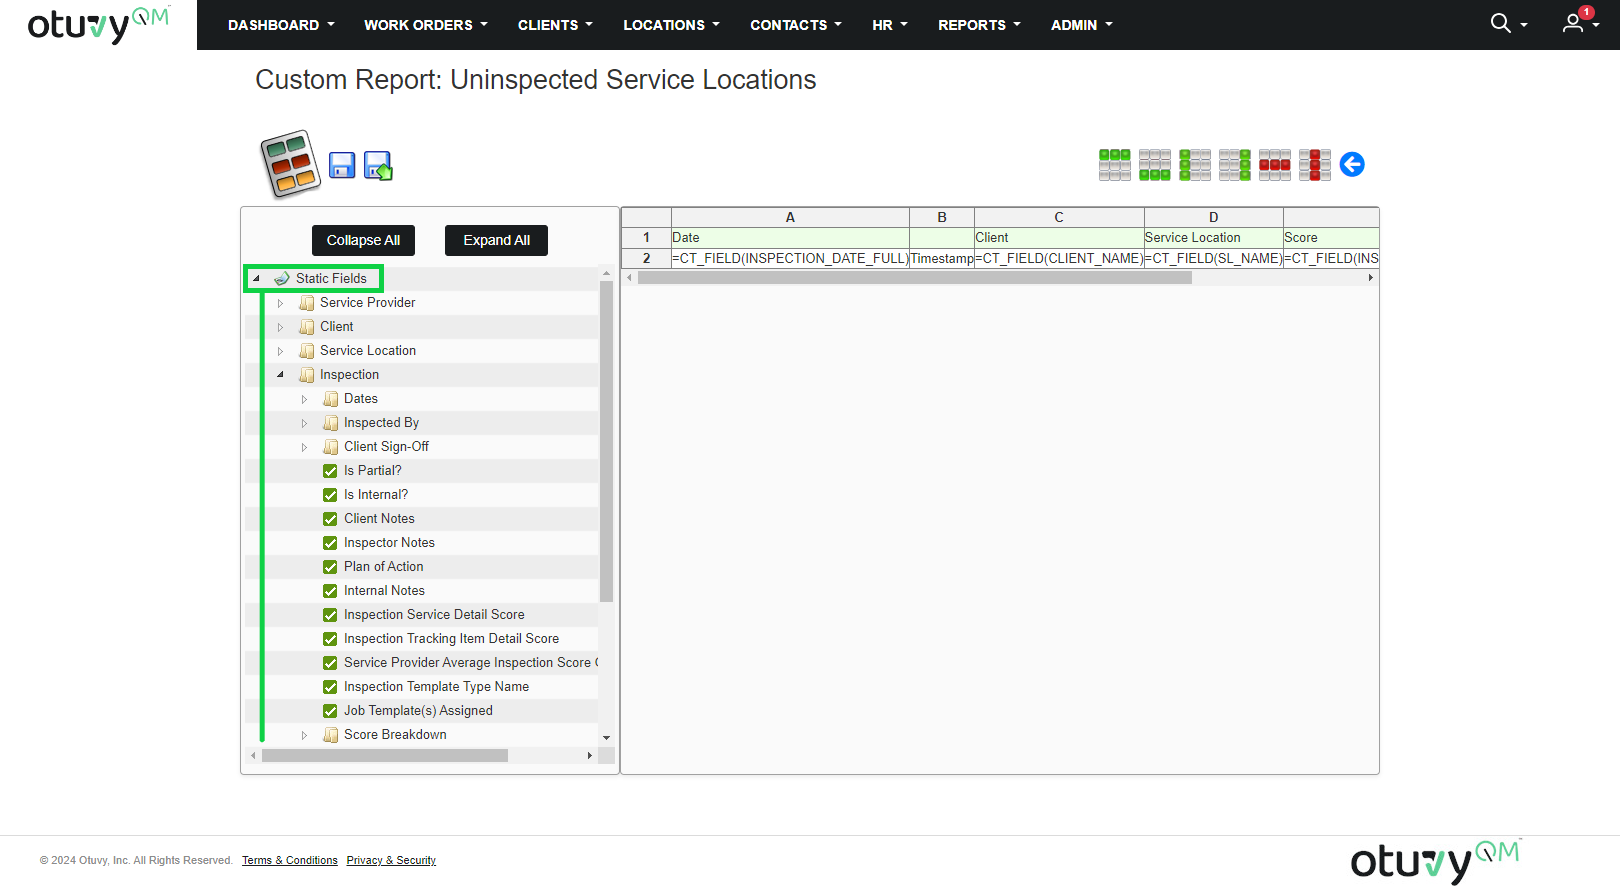
- **Custom Question Fields:** These are questions and their answers that can be linked to different records or events, like service providers, clients, inspections, and surveys. 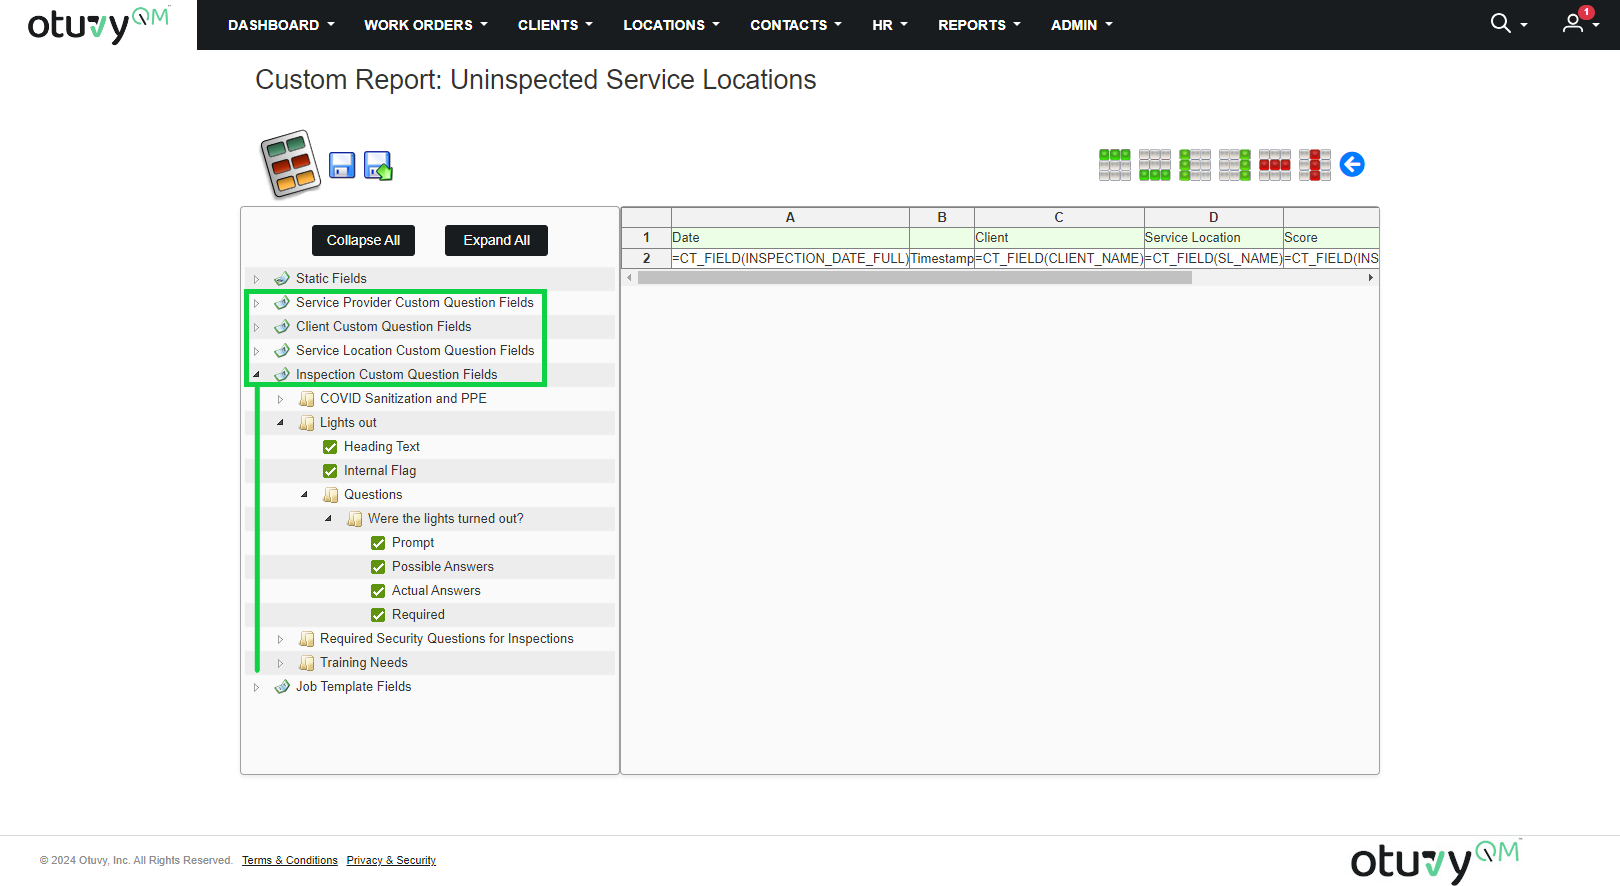
- **Repeating Data Row** : This is a row (the only one with a white background) that repeats for each instance of data you're reporting on. For example, if you're reporting on inspection scores by sublocation, this row will repeat for each sublocation, showing their scores. 
- **Header Row:** These are rows (usually with a green background) that give context to the data in the repeating data row. They are static and don't repeat. You can use them as section headers. 
- **Footer Row:** Similar to header rows, these are rows (usually with a brown background) that usually appear once. They're often used to calculate totals or averages of the rows above them using functions. 
- **Report Flow:** This refers to how the data is organized in the report. There are two main types:
- **Vertical:** This is the standard flow where headers are at the top, data rows follow, and footers are at the bottom.
- **Horizontal:** This flips the report on its side. Headers become leftmost columns, data rows become columns from left to right, and footers become rightmost columns.
- **Functions:** These are tools you can use to manipulate the data in your report. They're like built-in functions in Excel. You can check the list of supported functions by clicking the "View all functions supported by Report Writer" link on the Custom Report Search page.
In short, a custom report template is your plan for what data to include, datasets are the sources of that data, static fields are standard data elements, custom question fields are user-defined data elements, repeating data rows are for data that repeats, headers give context, footers perform calculations, report flow controls the layout, and functions help you manipulate the data.
To create a new Custom Report Template with Report Writer:
1. Click the **Admin** tab to be brought to the **Service Provider Configuration** page
2. In the **Job Configuration** section, click **Report Writer** 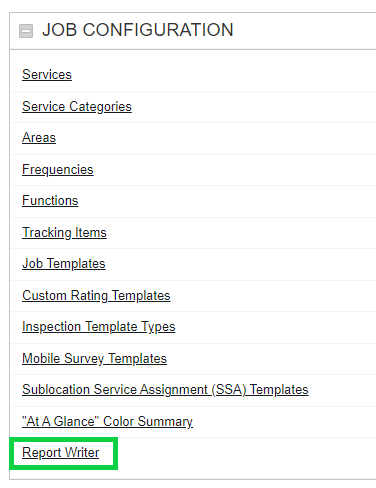
3. This is the **Custom Reports Search** page 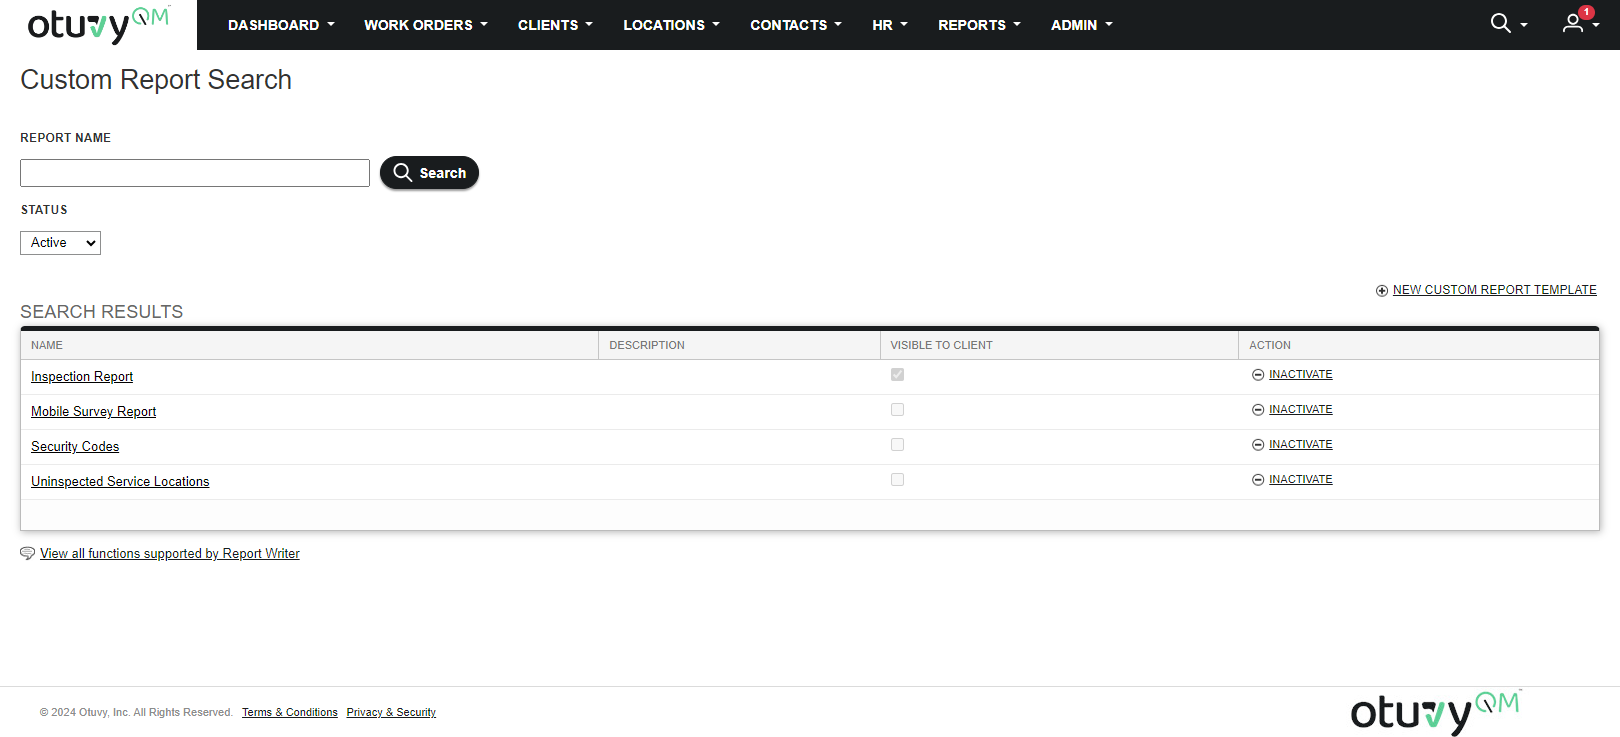 From this page you can:
4. **Search** active and inactive custom reports
5. **Create a New Custom Report Template**
6. **Edit** existing custom reports
7. Make custom reports **visible to your clients**
8. **View all functions supported by Report Writer**
9. Click **New Custom Report Template** from above the **Search Results** pane to start
10. Fill out the **Report Details** : 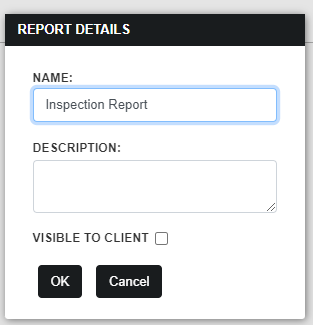
11. **Name:** What your users will see as they pick what custom report to run
12. **Description:** A brief description of what the user should expect to be output from the report
13. **Visible to Client:** Check this box if you want both Contact and Employee Users to be able to see and run this report. Leave it unselected if you only want Employee Users to see it.
14. Click **OK**
15. Drag the **Data Set** from the left you want in your report to the box on the right. You can have up to four (4) Data Sets in any custom report, but most people only use one. 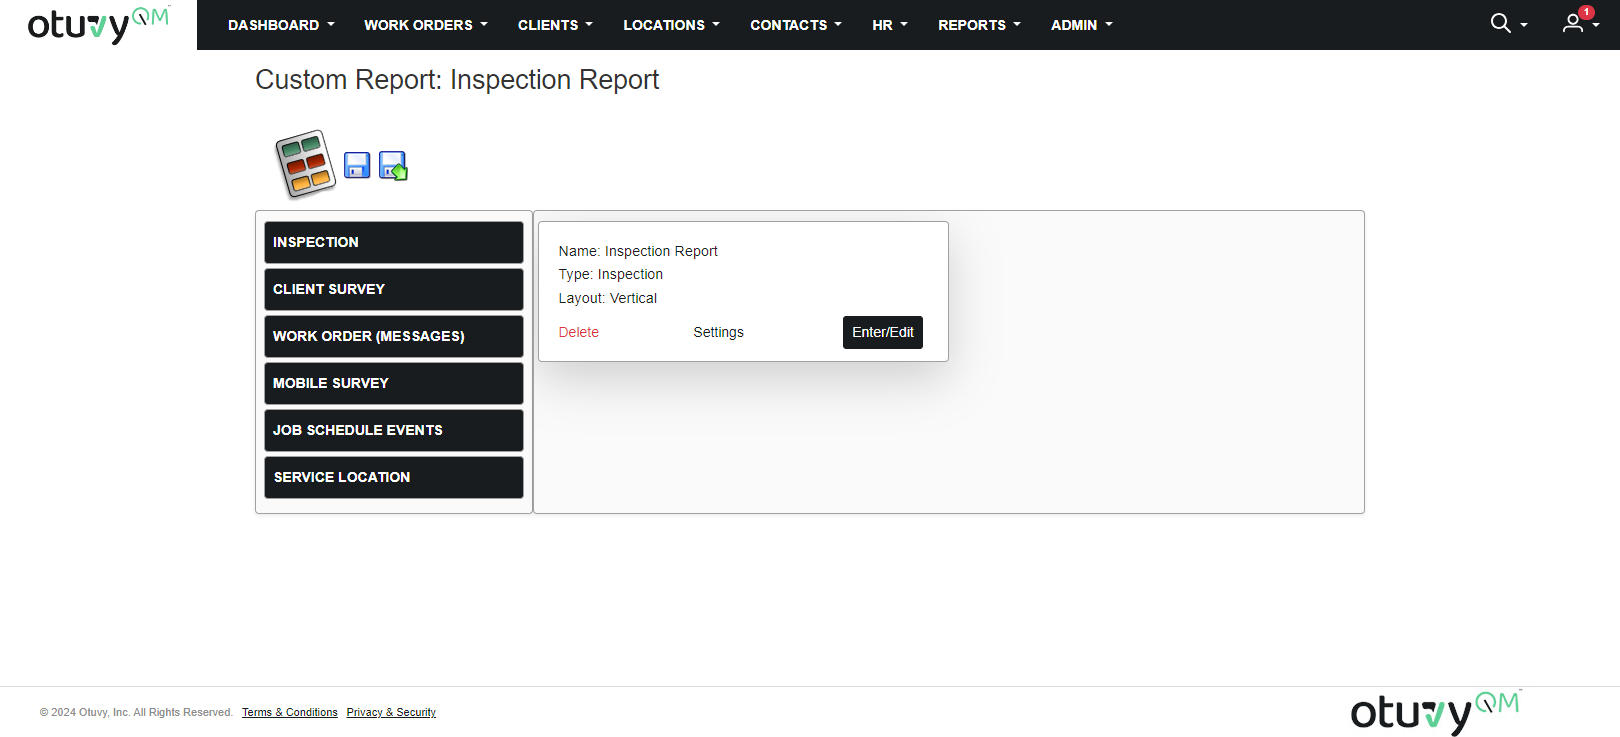
16. Each Data Set you bring in will have the following in common:
17. **Name**
18. **Description**
19. **Report Flow**
20. **Group By:** This allows you to group the data which is output by Client, Location, etc. Or you can have all the information collated together.
21. Some Data Sets have additional features
22. Click **Add Left Column** or **Add Right Column** to add **Columns** of data to the left or right of current columns.  or 
23. New columns will always be added to the left or right of the existing columns. There is not a way to reorder the columns
24. Add **Header Rows** by clicking **Add Top Row** 
25. New header rows will always be added above the existing rows. There is not a way to reorder the rows.
26. Add **Footer Rows** by clicking **Add Bottom Row** 
27. New footer rows will always be added below the existing rows. There is not a way to reorder the rows.
28. Delete Rows or Columns by selecting a cell in the row or column you wish to delete and then click either **Delete Row** or **Delete Column ** or ****
29. Input the expected cell data by 
30. **Manually Input Text:** Most headers will use a manually input text like "Client Name", "Location Name", or "Average Score"
31. **Use Static and Custom Question Fields from the Data Set:** Most of the time this information will be dragged from the left into a cell in the Repeating Data Row.
32. Occasionally some of this will be added to either the Header or Footer Rows. Some examples could be the **Prompts** or **Possible Answers** for your Custom Question Fields
33. **Use Functions:** Manipulate the data and embed Excel functions into the data output.
34. **Save** your template once you have all the information you want
35. **Save:** Saves and updates the template 
36. **Save As:** Keeps the old version of the template and creates a new one with the changes you have made
37. **Hover** over the **Reports** tab and click **Custom Reports**
38. Run the new custom report
39. You'll need to select the correct **Date Range** and **Selection Criteria**
> 
>
> Otuvy QM's Report Writer tool lets you create powerful, custom reports for inspections, surveys, and work orders. It's like magic for data analysis, and you can view your reports seamlessly in Excel! Want a one on one session with our experts? Feel free to contact us at [support@otuvy.com or book a](mailto:support@otuvy.com)[Report Writer Specific Training where we can walk you through the process of creating you very own custom reports.](https://calendly.com/customersupport-ct/custom-dashboards-reports)
- [Otuvy QM - Getting Started](https://help.otuvy.com/kb/otuvy-qm-getting-started?hsLang=en)
- [Otuvy QM - Setup & Administration](https://help.otuvy.com/kb/otuvy-qm-setup-administration?hsLang=en)
- [Otuvy QM - Contact Access](https://help.otuvy.com/kb/otuvy-qm-contact-access?hsLang=en)
- [Otuvy QM - Inspections](https://help.otuvy.com/kb/otuvy-qm-inspections?hsLang=en)
- [Otuvy QM - Work Orders](https://help.otuvy.com/kb/otuvy-qm-work-orders?hsLang=en)
- [Otuvy QM - Mobile App](https://help.otuvy.com/kb/otuvy-qm-mobile-app?hsLang=en)
- [Otuvy QM - Reports & Dashboards](https://help.otuvy.com/kb/otuvy-qm-reports-dashboards?hsLang=en)
- [Otuvy QM - Advanced Features](https://help.otuvy.com/kb/otuvy-qm-advanced-features?hsLang=en)
- [Otuvy Frontline](https://help.otuvy.com/kb/otuvy-frontline?hsLang=en#main-content)
- [Getting Started](https://help.otuvy.com/kb/otuvy-frontline?hsLang=en#getting-started)
- [Mobile App](https://help.otuvy.com/kb/otuvy-frontline?hsLang=en#mobile-app)
- [Admin Portal](https://help.otuvy.com/kb/otuvy-frontline?hsLang=en#admin-portal)
- [Uncategorized](https://help.otuvy.com/kb/uncategorized?hsLang=en)
[](https://www.otuvy.com/)
[mailto:email@email.com](mailto:email@email.com)
Copyright © 2026, Otuvy, Inc.