---
title: Reporting in Otuvy Frontline Mobile
description: Learn how to generate Completion Reports and Employee Scorecards in Otuvy Frontline Mobile to track list progress, task notes, and employee performance.
---
[Skip to content](https://help.otuvy.com/kb/reporting-in-otuvy-frontline-mobile#main-content)
[More support](https://help.otuvy.com/kb/kb-tickets/new?hsLang=en)

Open main navigation
Close main navigation
- [More support](https://help.otuvy.com/kb/kb-tickets/new)
- [Contact us](mailto:vip@otuvy.com)
[Contact us](mailto:vip@otuvy.com)
How can we help you?
- There are no suggestions because the search field is empty.
1. [Otuvy Knowledge Base](https://help.otuvy.com/kb?hsLang=en)
2. [Otuvy Frontline](https://help.otuvy.com/kb/otuvy-frontline?hsLang=en)
3. [Mobile App](https://help.otuvy.com/kb/otuvy-frontline?hsLang=en#mobile-app)
# Reporting in Otuvy Frontline Mobile
# Reporting in Otuvy Frontline Mobile
Reports in Otuvy Frontline Mobile allow you to see the big picture with your lists. You can see how much of your lists have been completed, who completed which tasks, review notes on those tasks, and even see where those users were when they completed those tasks. You can email these reports to whoever needs it right from the app, even if they don't have a user.
There are 2 standard reports in Otuvy Frontline the **Completion Report** and the **Employee Scorecard**.
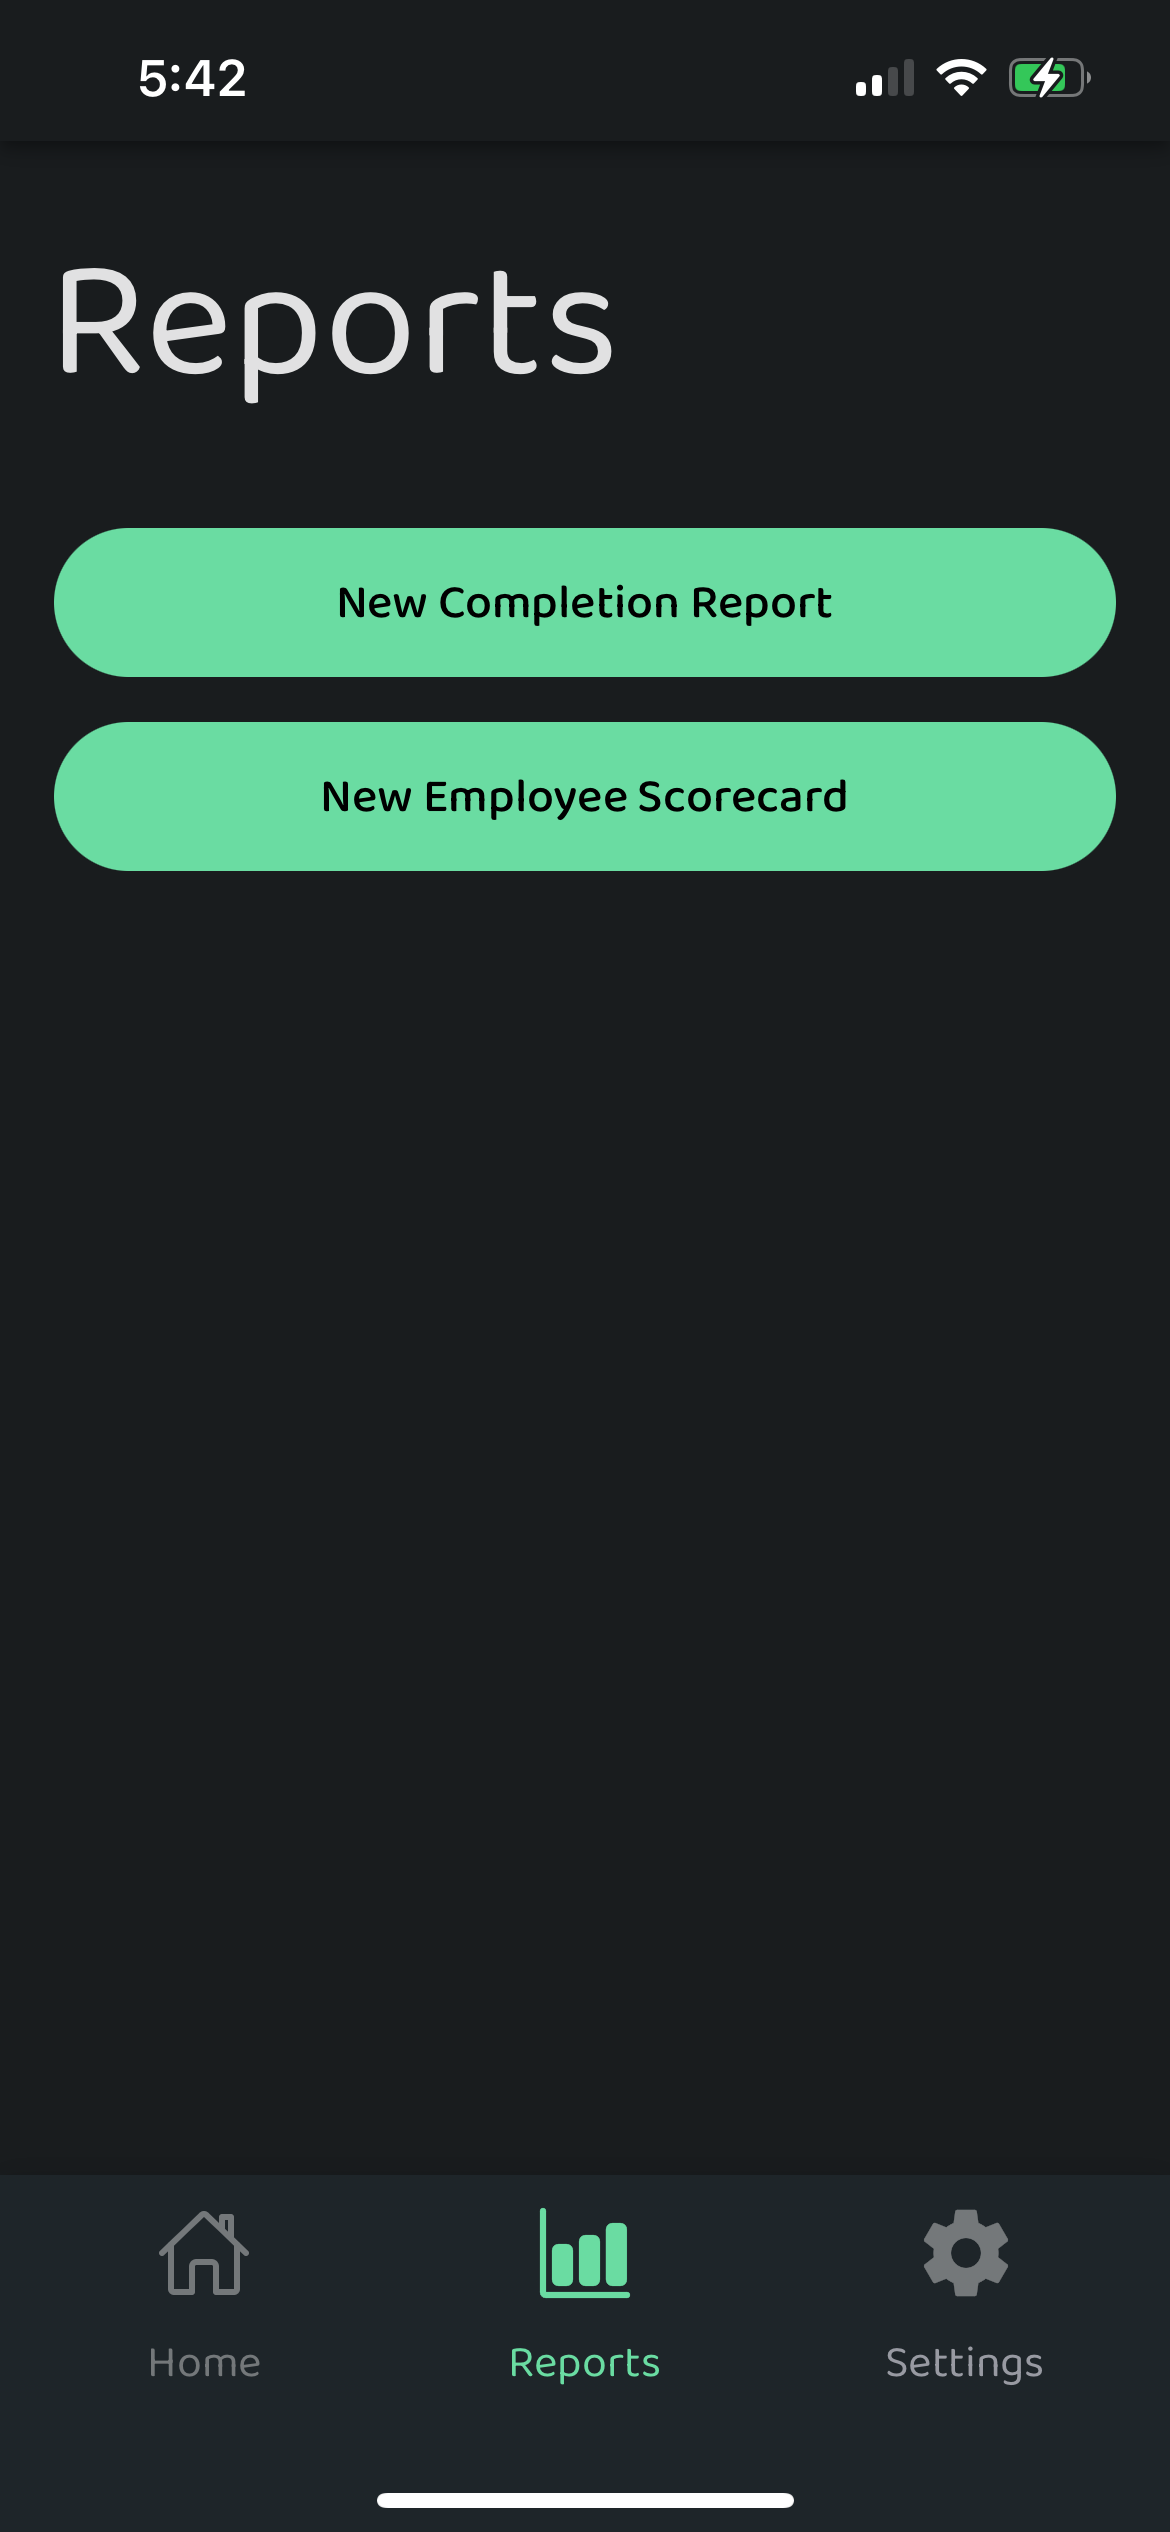
## Completion Report
You can run the **Completion Report** from the **Reports** tab of Otuvy Frontline Mobile and email them to yourself, your employees, supervisors, customers, or stakeholders.
> 
>
> In both reports, you can navigate through the steps by tapping the right green arrow to navigate to the next step or the left green arrow to navigate to the previous step
To generate the Completion Report, from the Home screen of the app:
1. Tap the **Reports** button at the bottom of the screen
2. Tap **New Completion Report**
3. Select the **Date Range** for the report 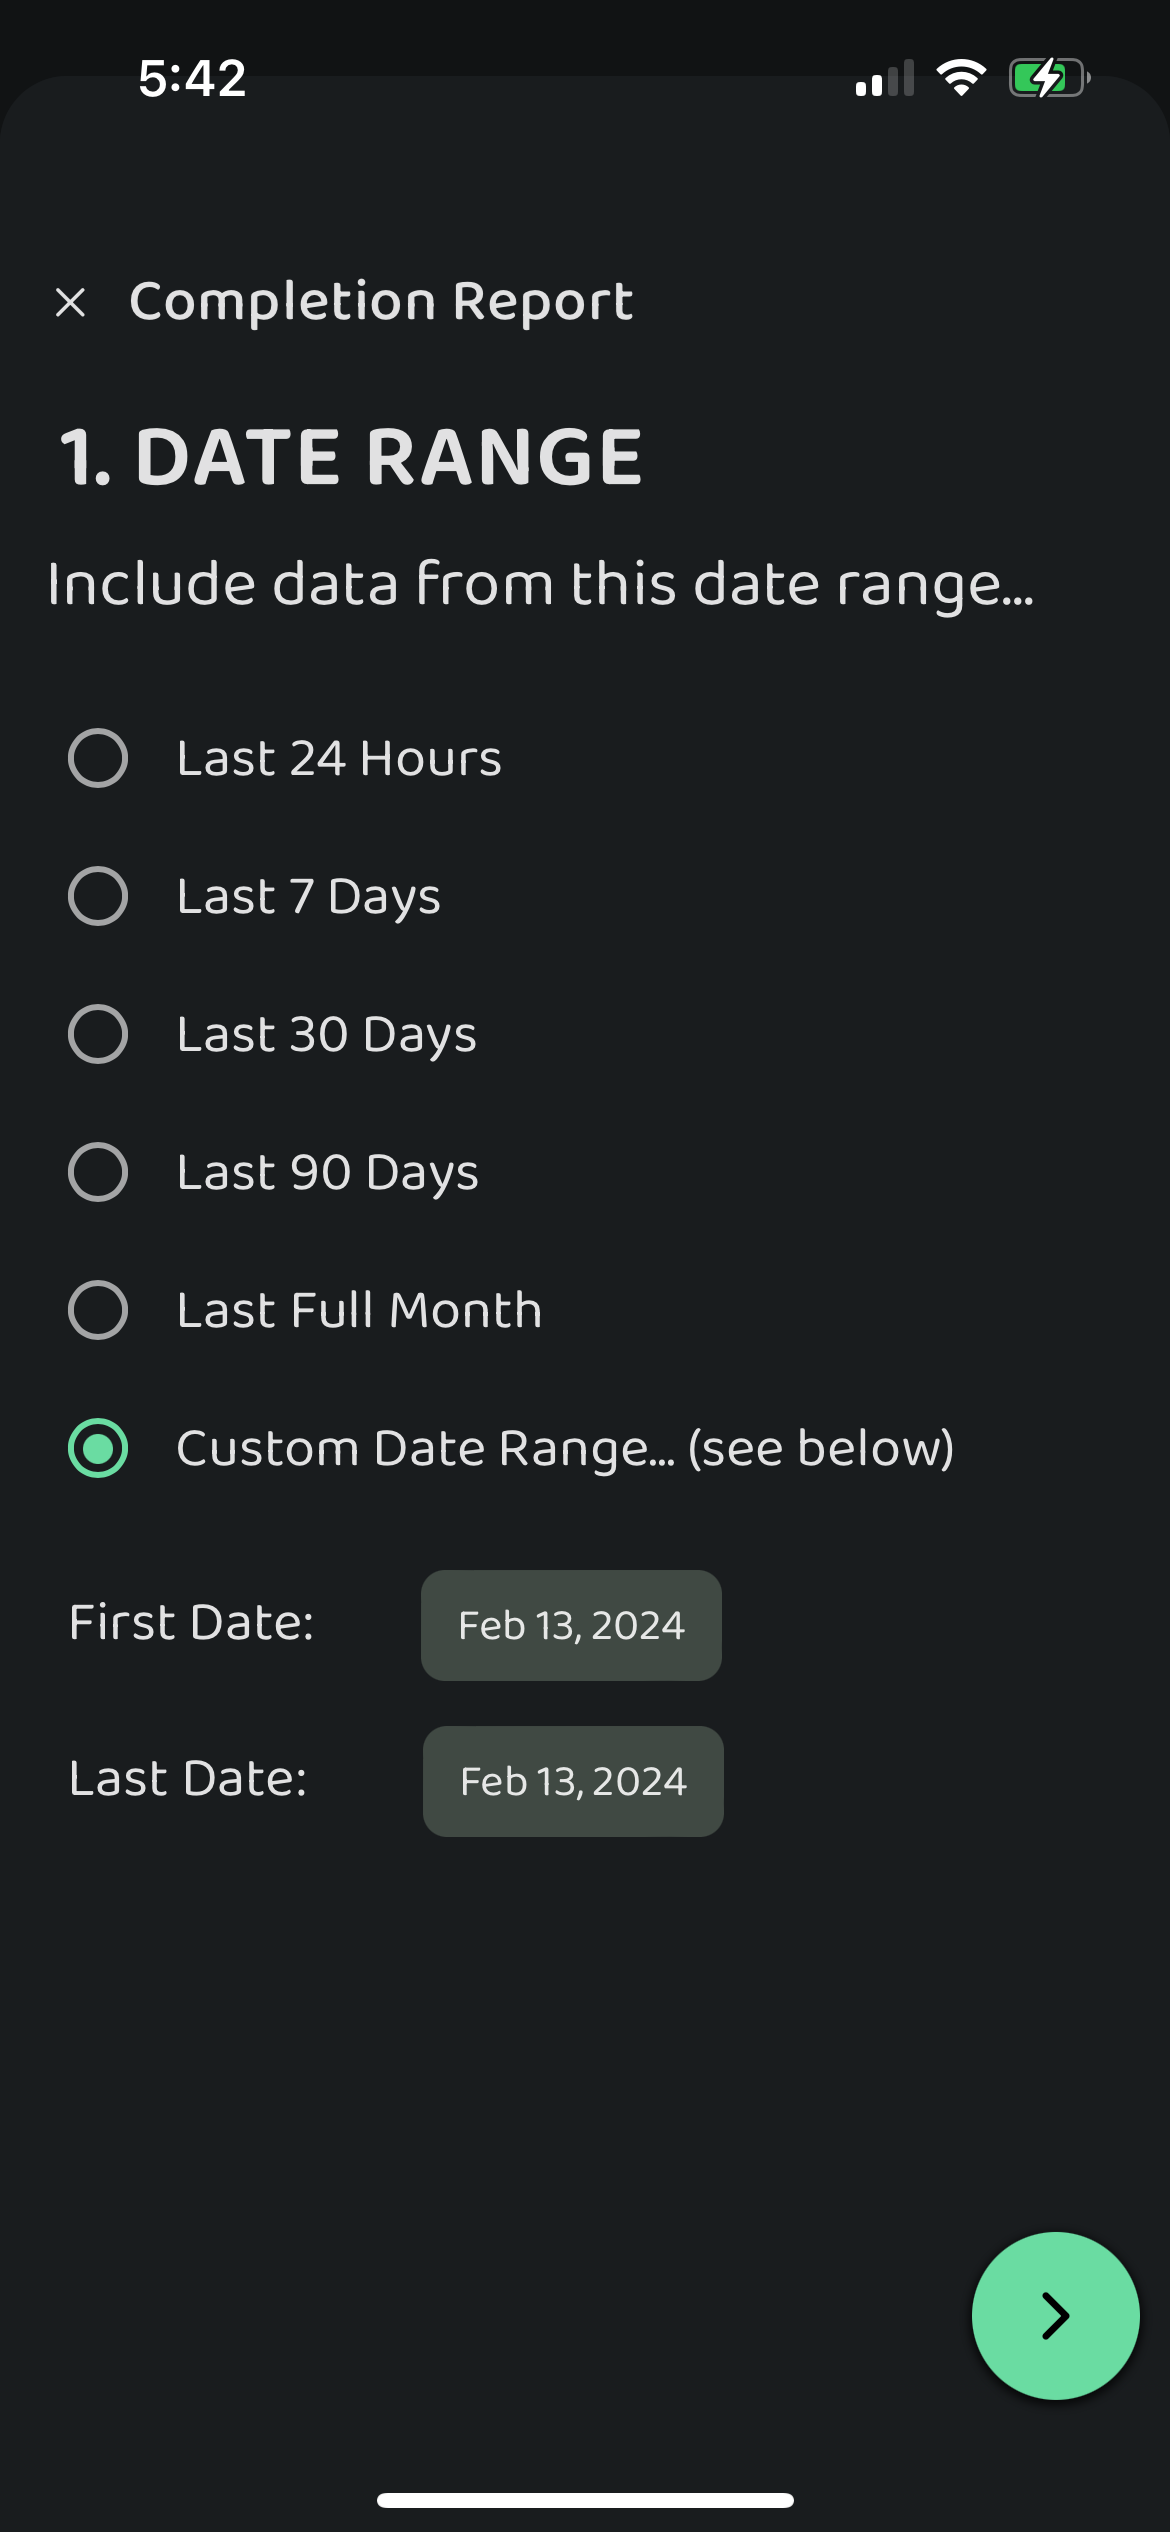
4. Choose **Which Lists** to include in the report 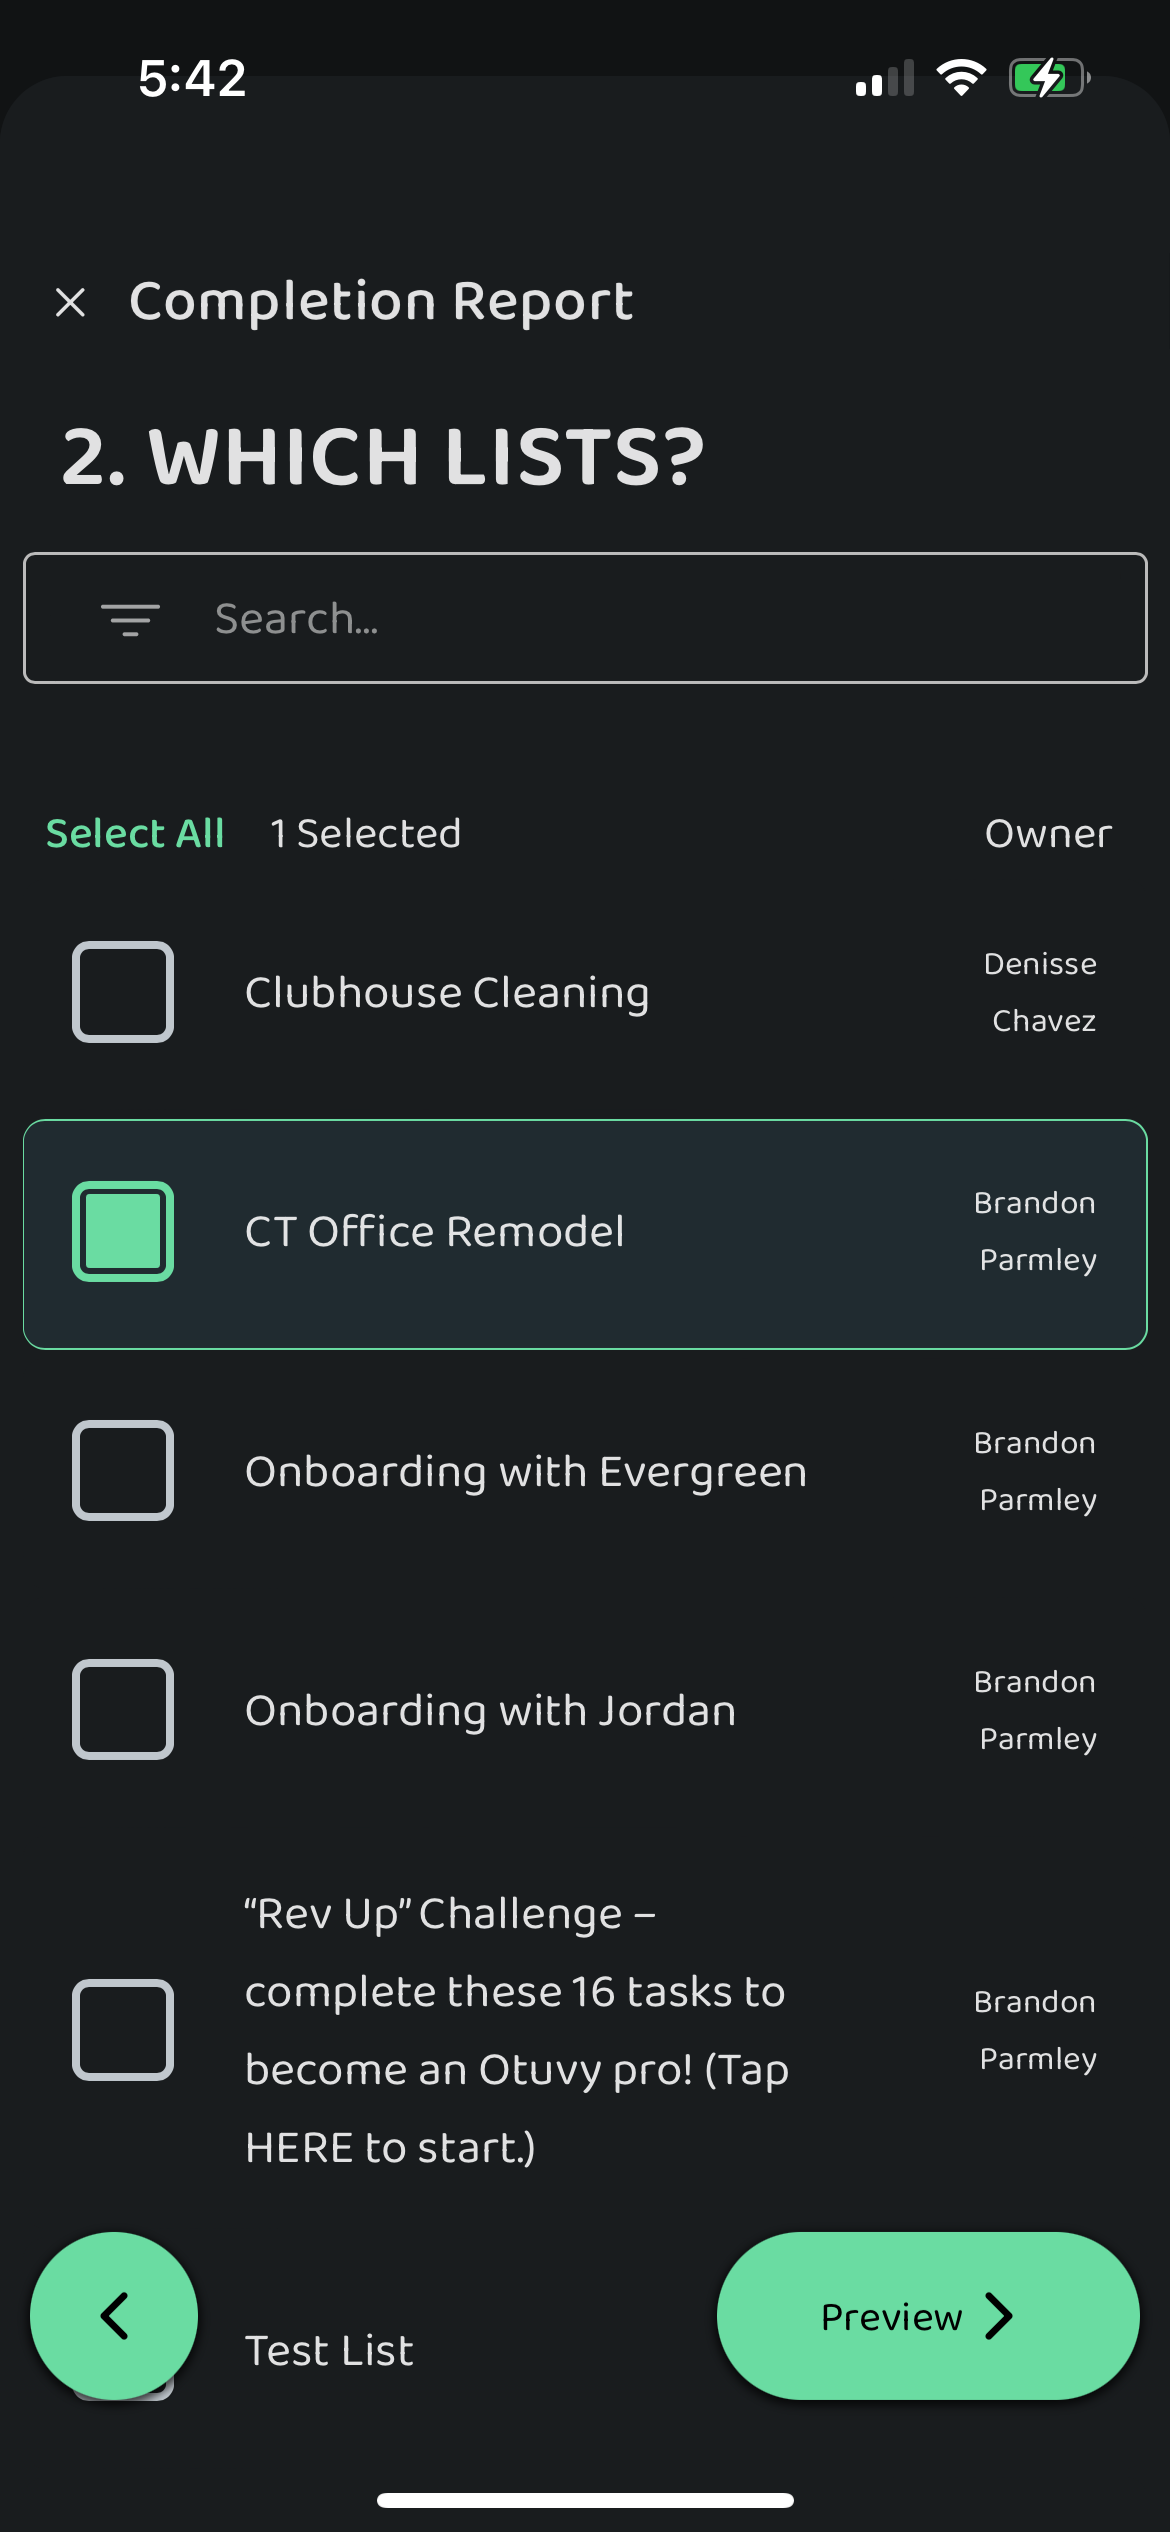
5. Preview your report and choose what details to **Show** in the report: 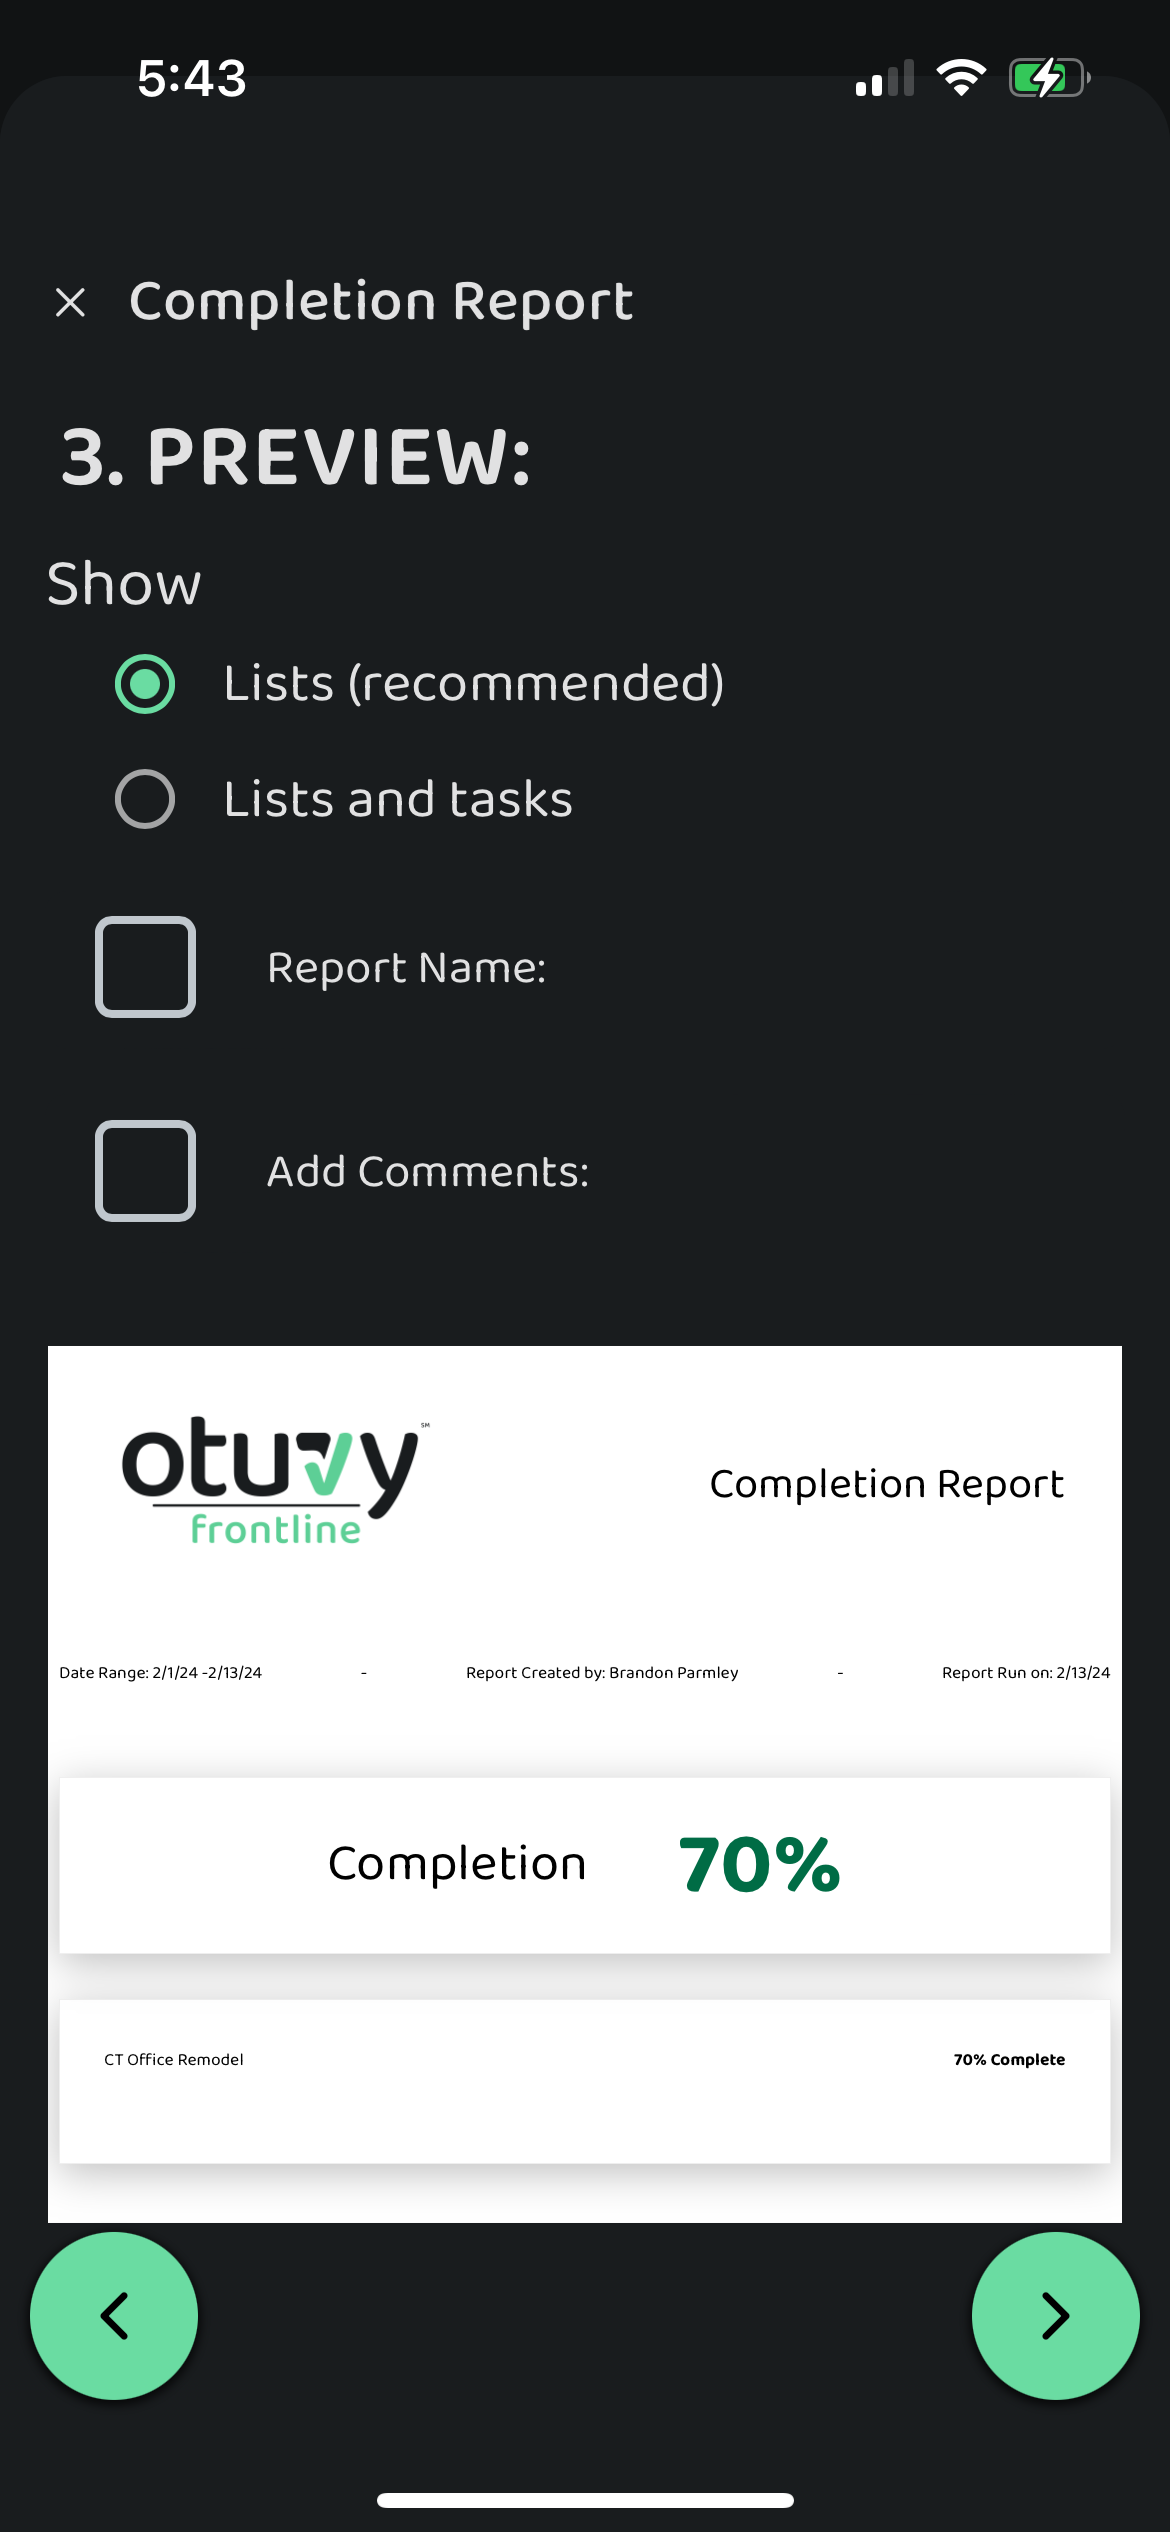
6. **Lists (recommended)**: This will show a high level overview of each list and how much of those lists have been completed
7. **Lists and tasks**: This will show both the high-level overview as well as each task in the list(s) in the report. This setting is required to show the geolocation of where each task was completed.
8. **Task notes**: This will include any notes left on each task in the report
9. **Include Completed By**: This will show the name of the user who marked the task as complete in your report.
10. **Report Name**: You are able to set a custom report name before generating the report
11. **Add comments**: You can add general comments about your findings in the report
12. As you set your report's customizations you can scroll through the preview of the report to see how it looks 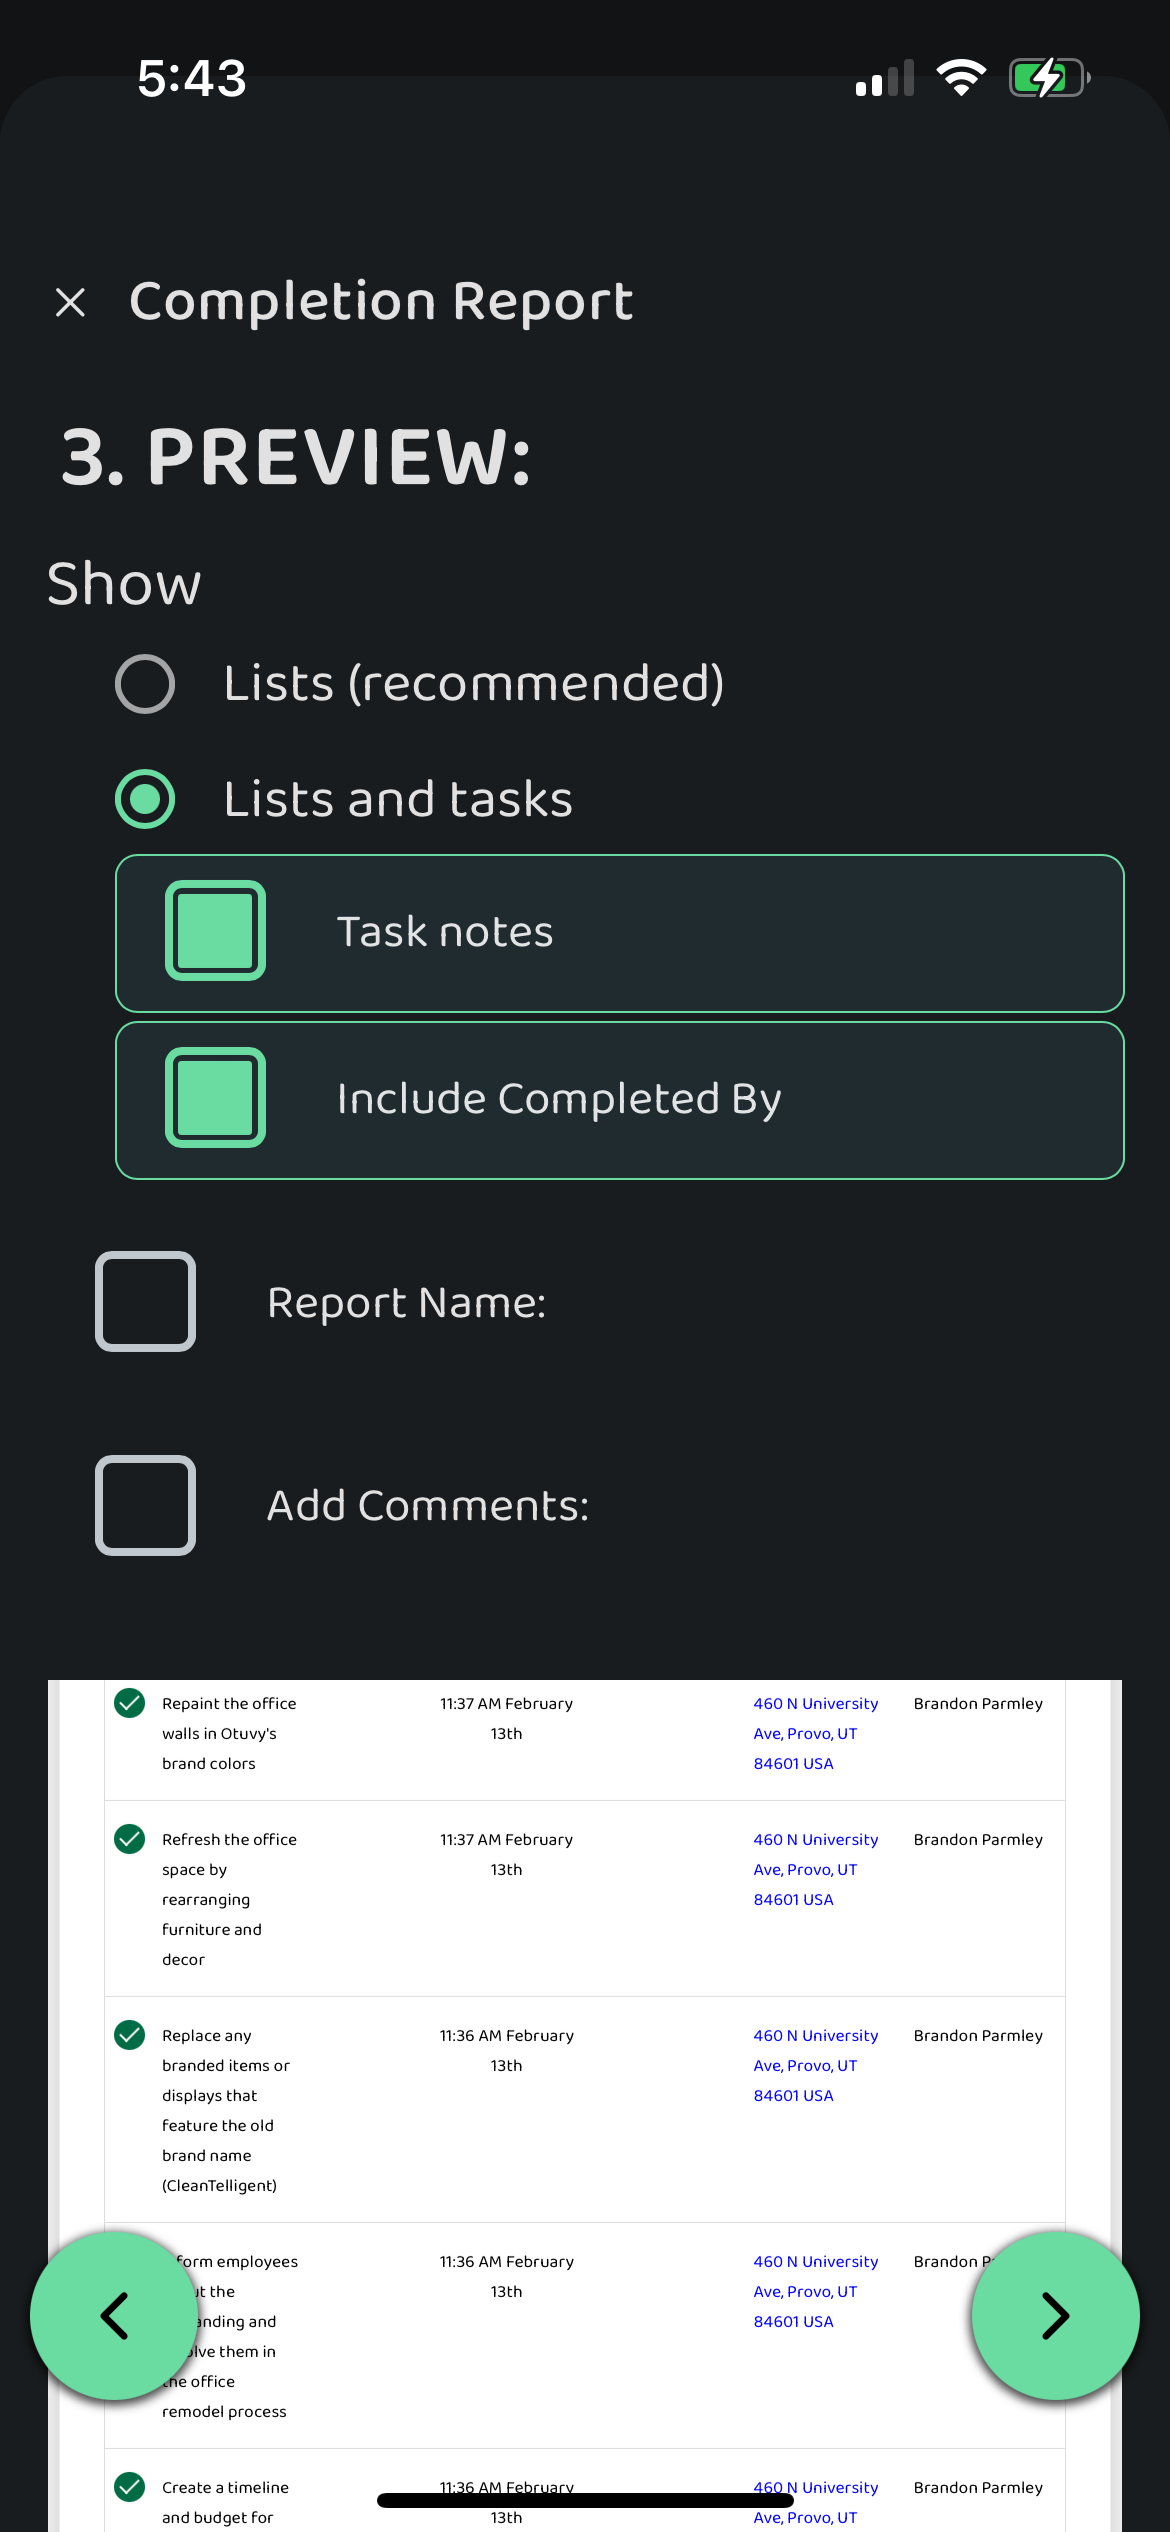
13. If you scroll down on the space outside of the report preview, you can see the report criteria listed below the preview 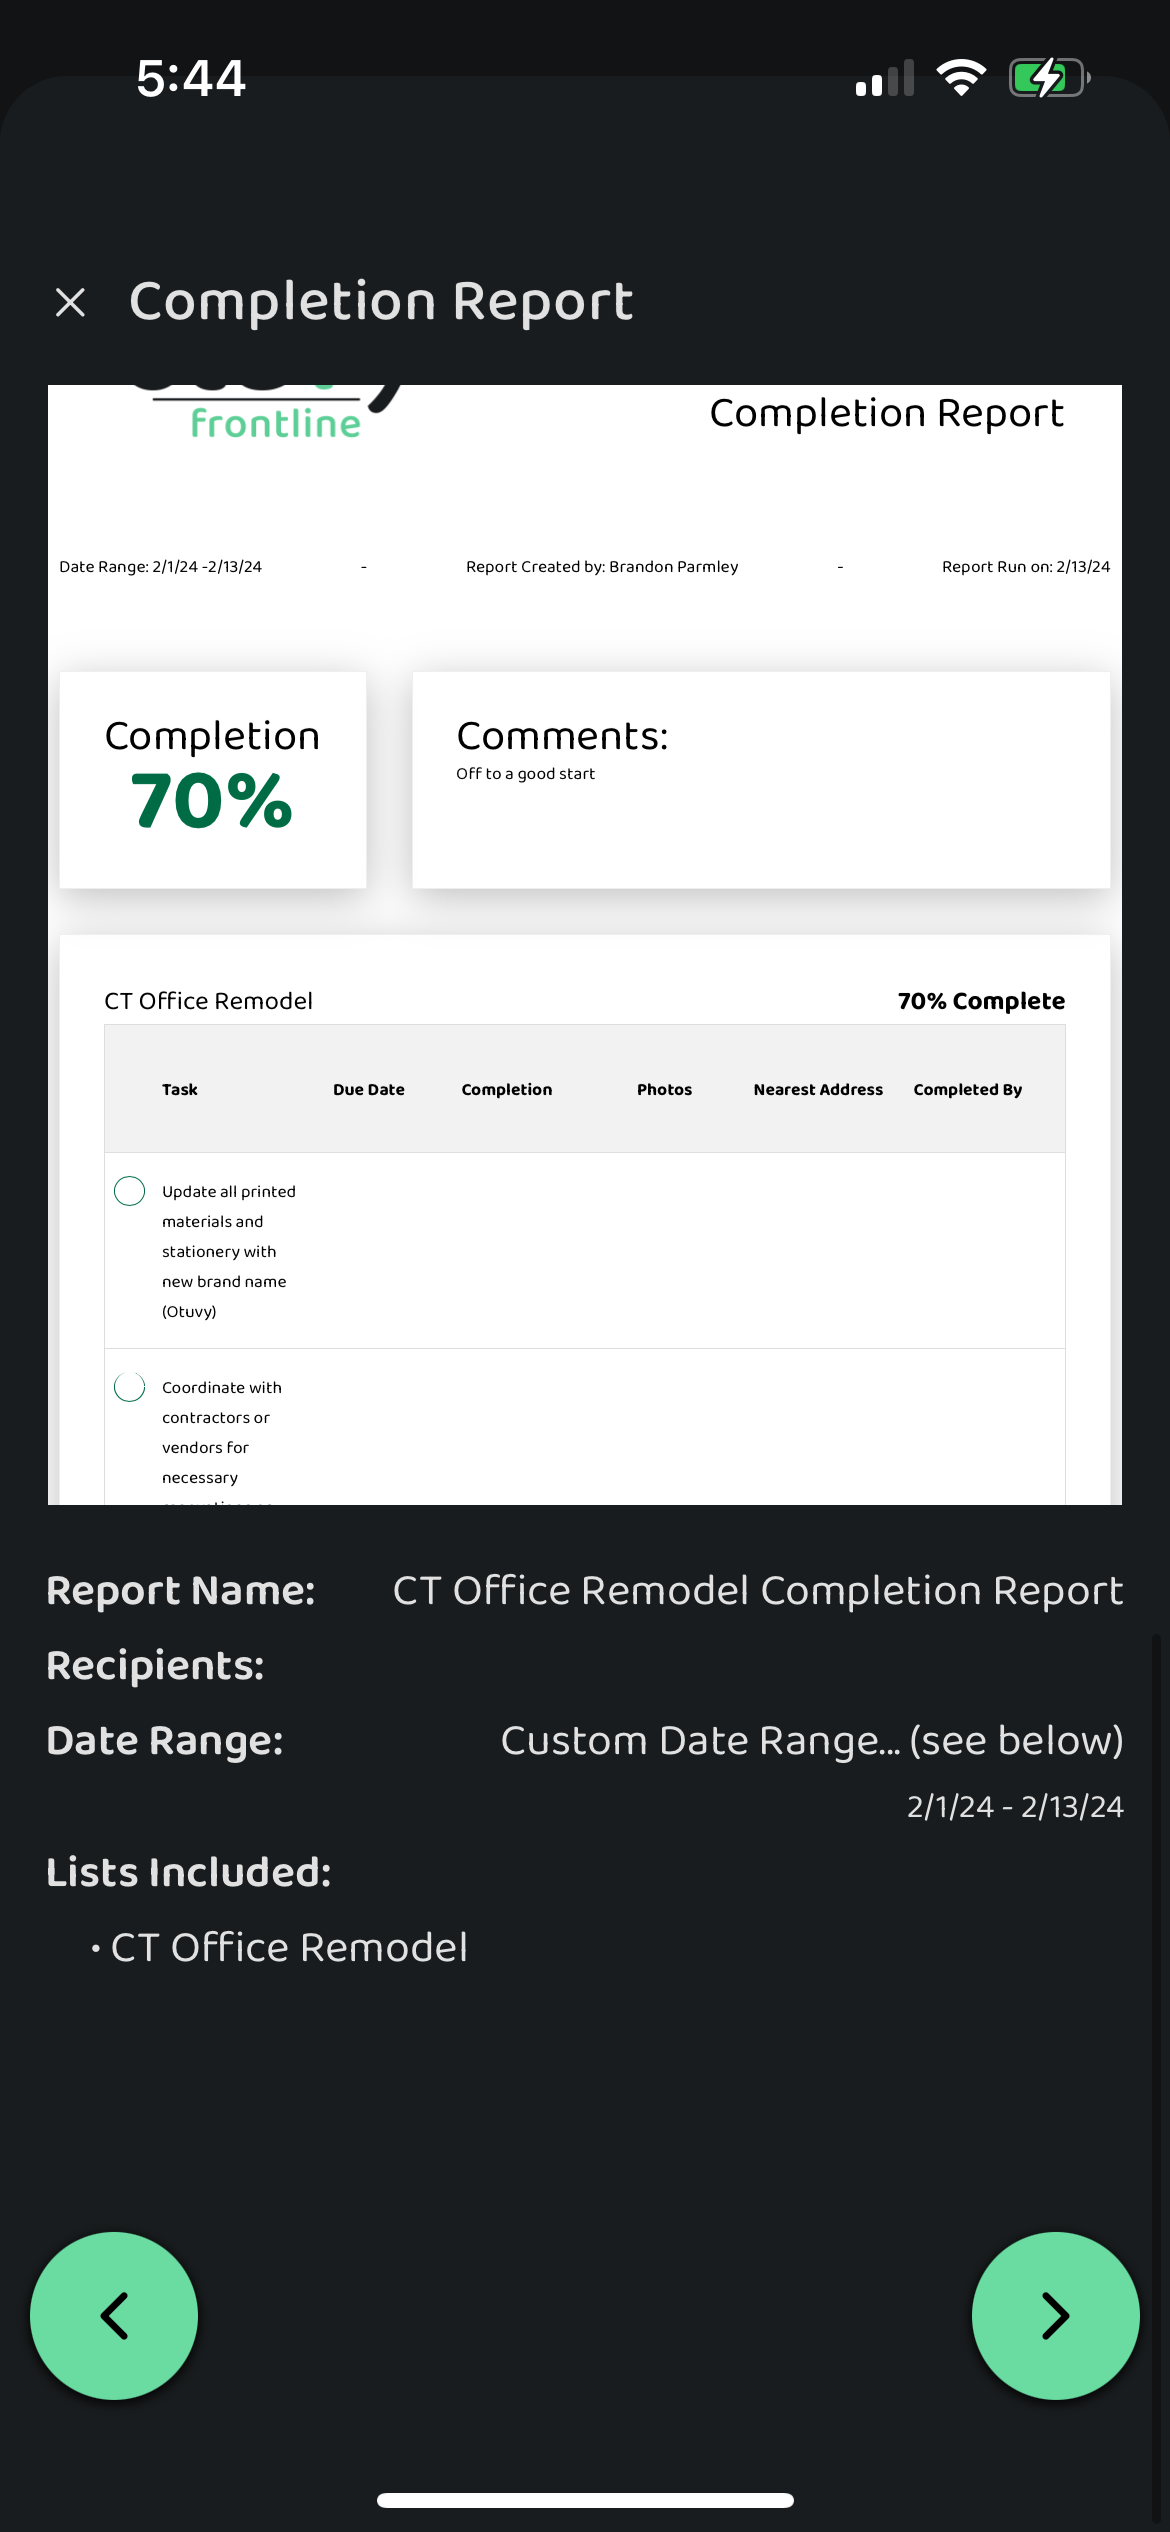
14. Once you have it just the way you want it, tap the right green arrow and determine **Who Gets It** 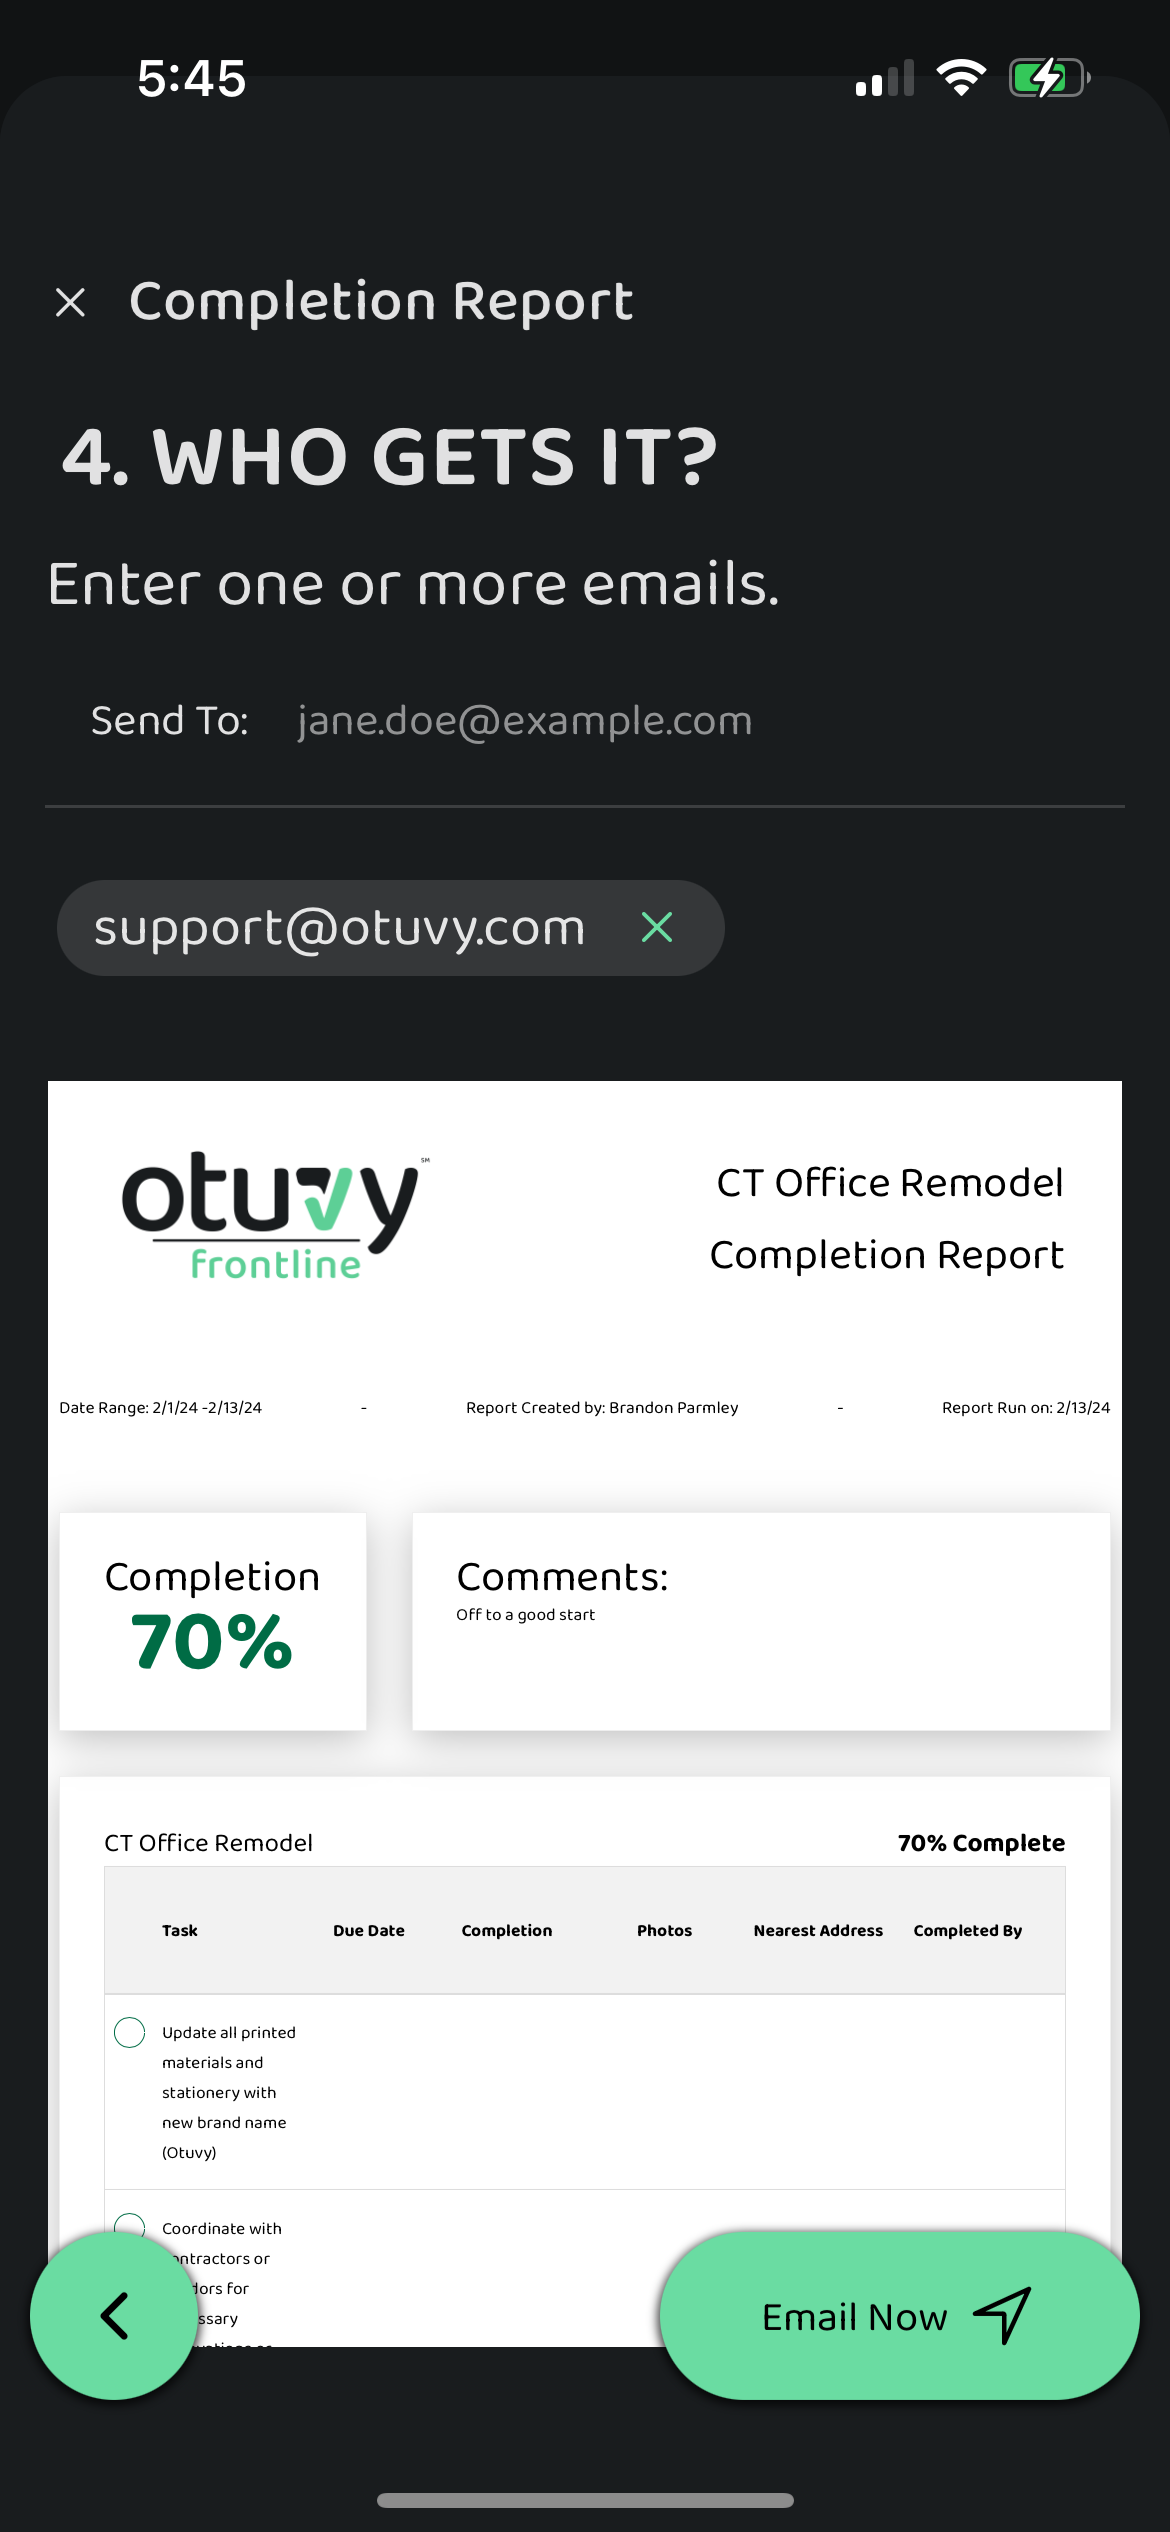
15. After you've entered everything in and added all the recipients, tap on **Email Now** to send the report
> If you ever need to exit the report builder tool just click on the X in the top of the screen. This will discard all your progress with the report.
We've attached a copy of this report for you to see what it could look like. It's called CT Office Remodel Completion Report - 2024-02-12 -- 2024-02-13.pdf
## Employee Scorecard
The **Employee Scorecard** allows you to see how well a specific employee is doing and celebrate their successes with them. It shows how many of their tasks have been completed, whether they were on time or not, and if they were the one who completed them. This report can show all the tasks directly assigned to a specific employee.
To generate the Employee Scorecard, from the Home screen of the app:
1. Tap the **Reports** button at the bottom of the screen
2. Tap **New Employee Scorecard**
3. Select the **Date Range** for the report 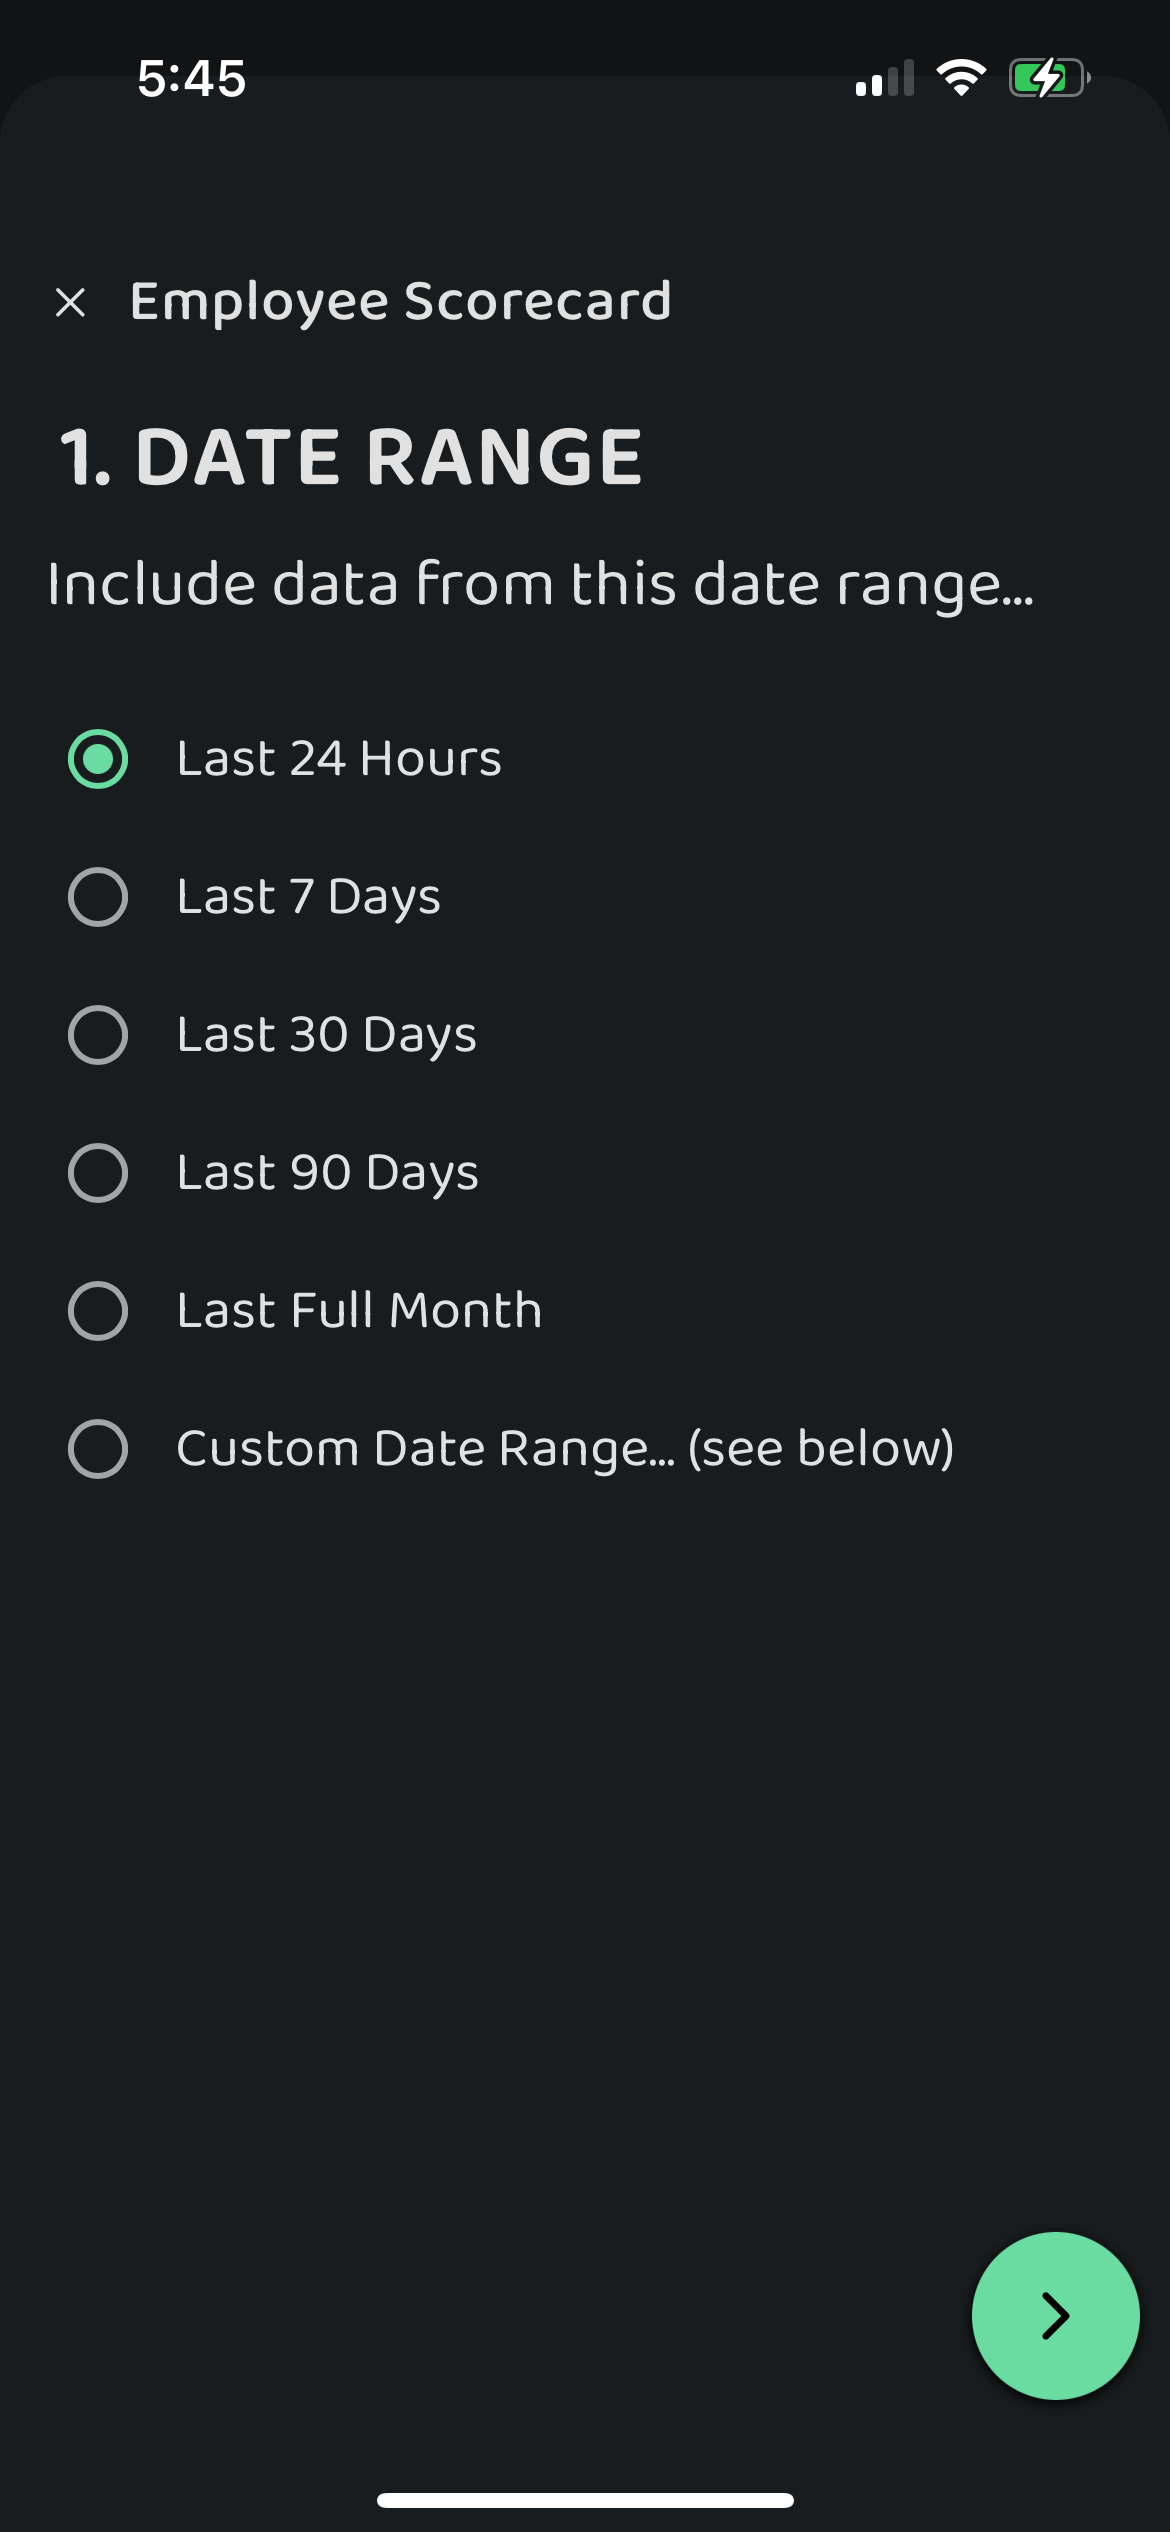
4. Choose **Whose Data** to show in the report. This will pull all the tasks assigned to the selected employee 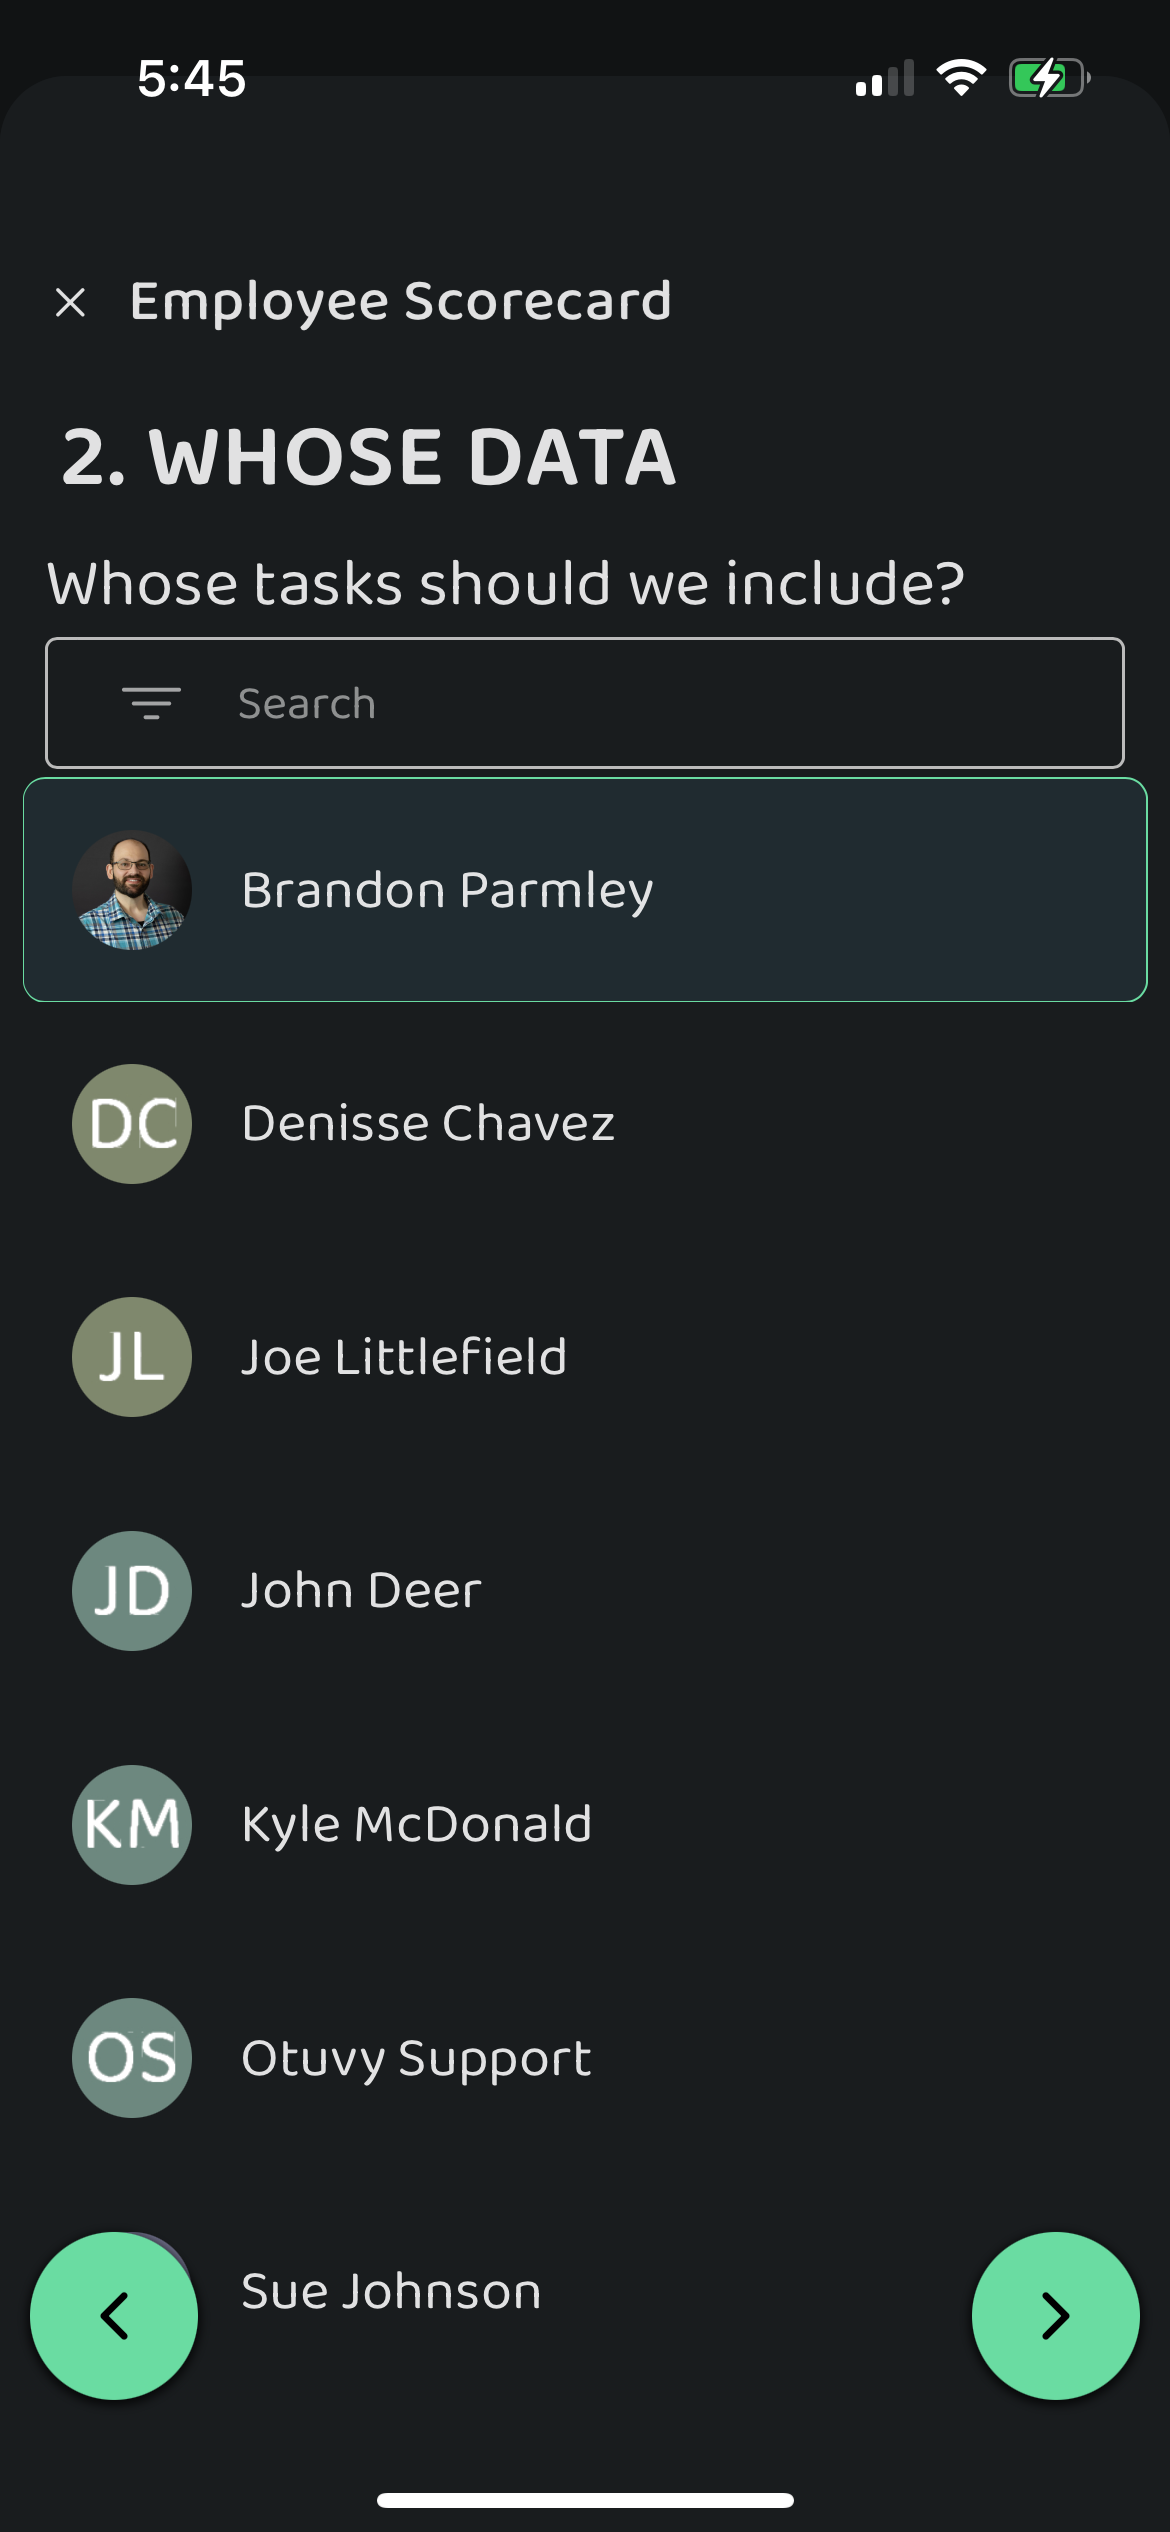
5. Choose **Which Lists** to include in the report 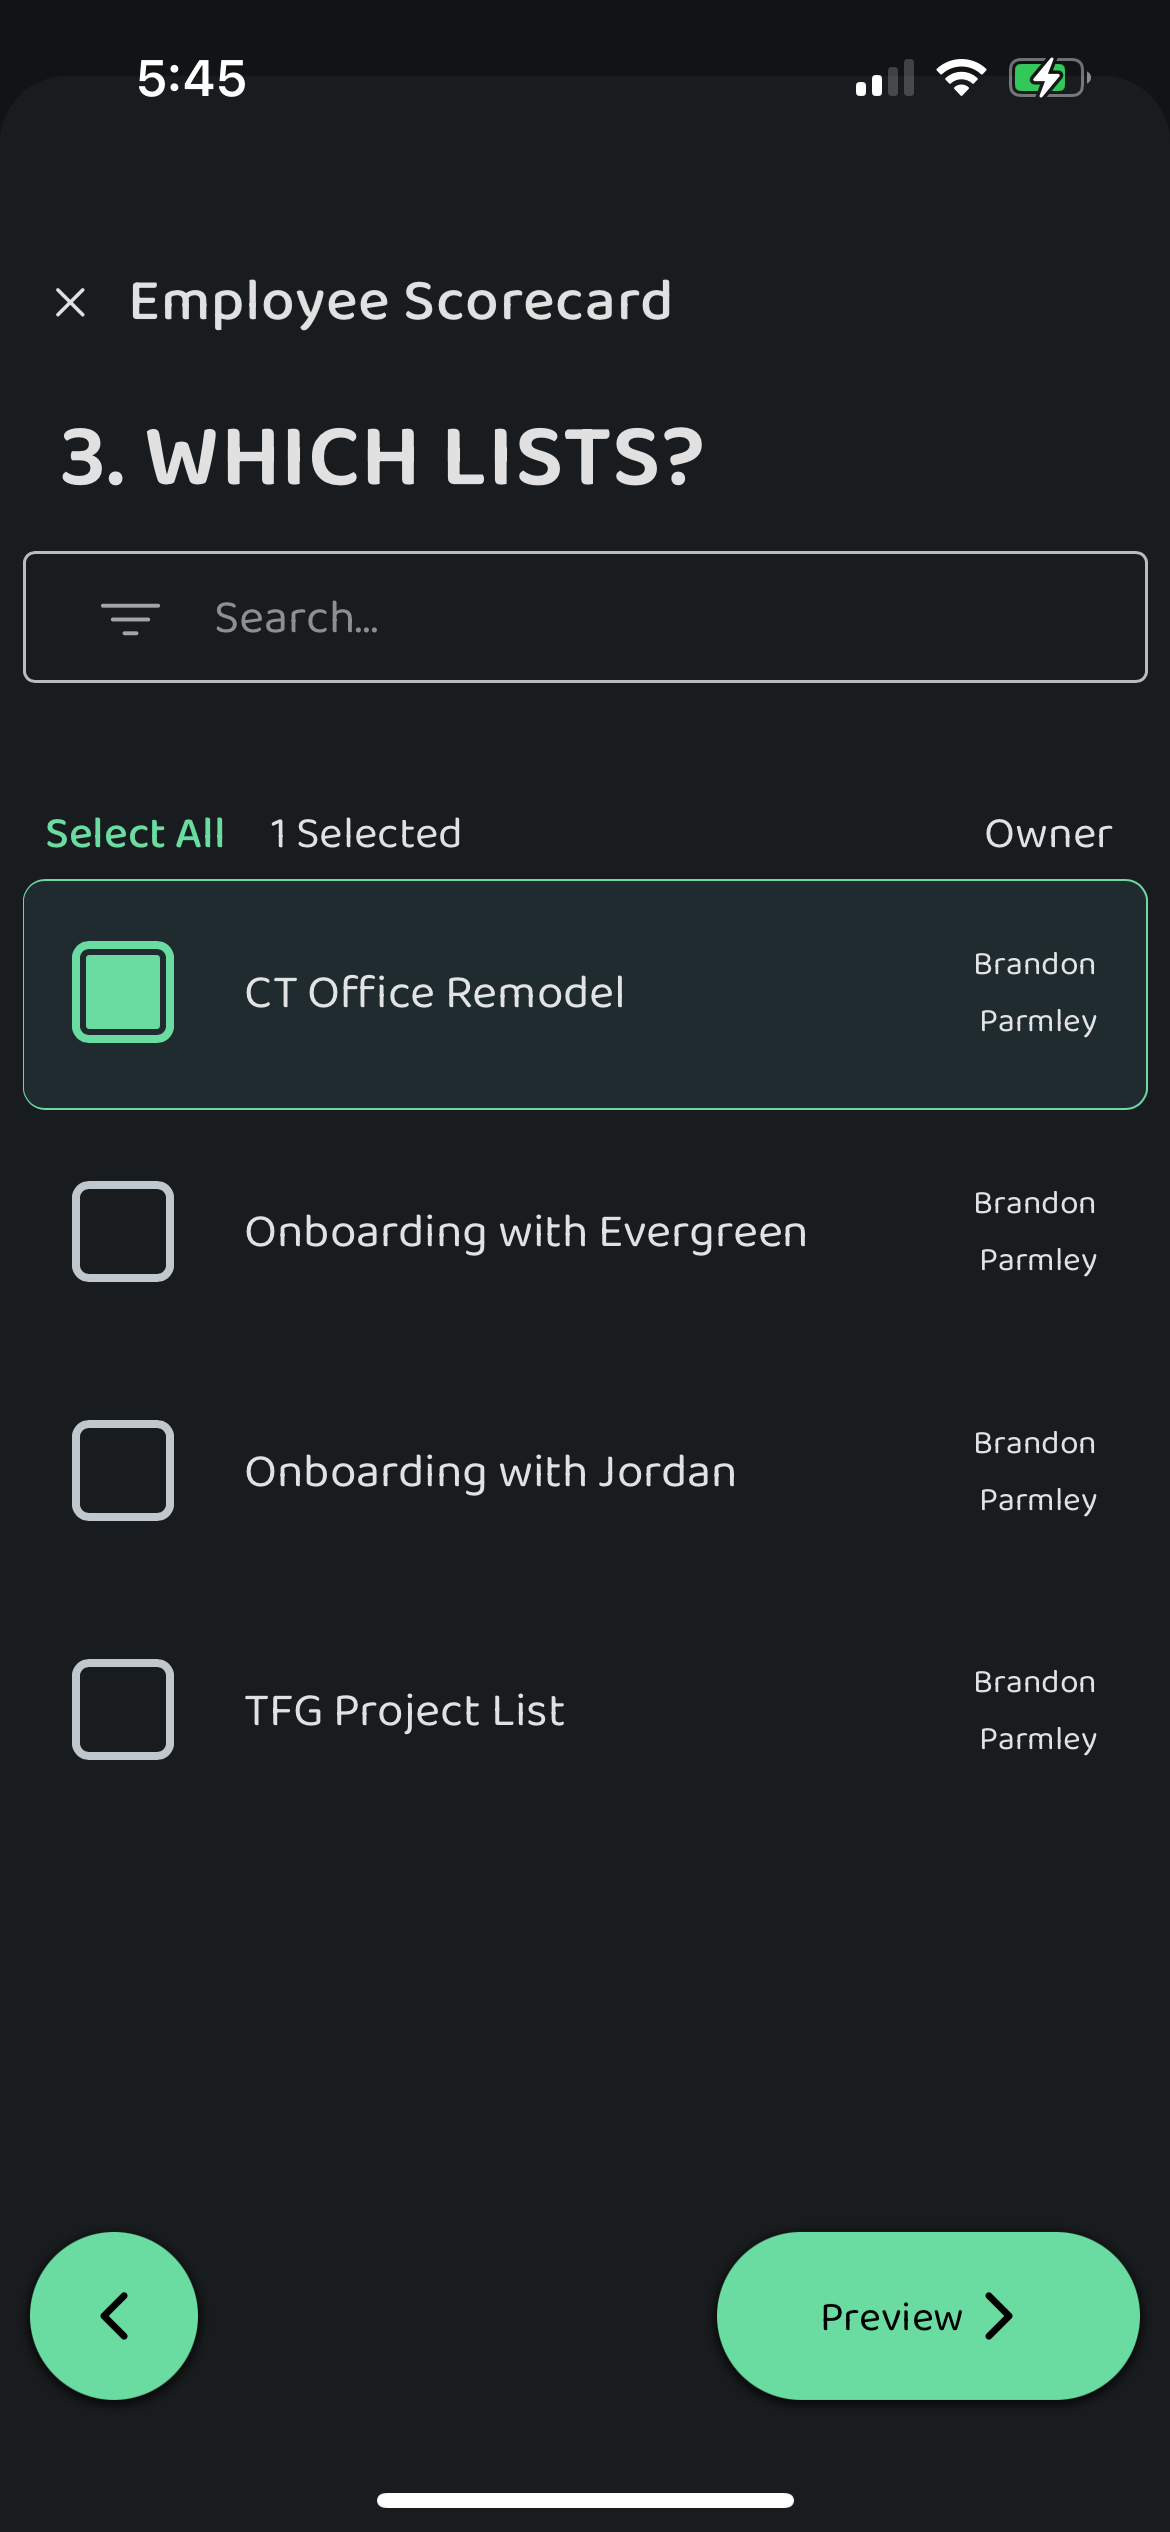
6. Preview your report and choose what details to **Show** in the report: 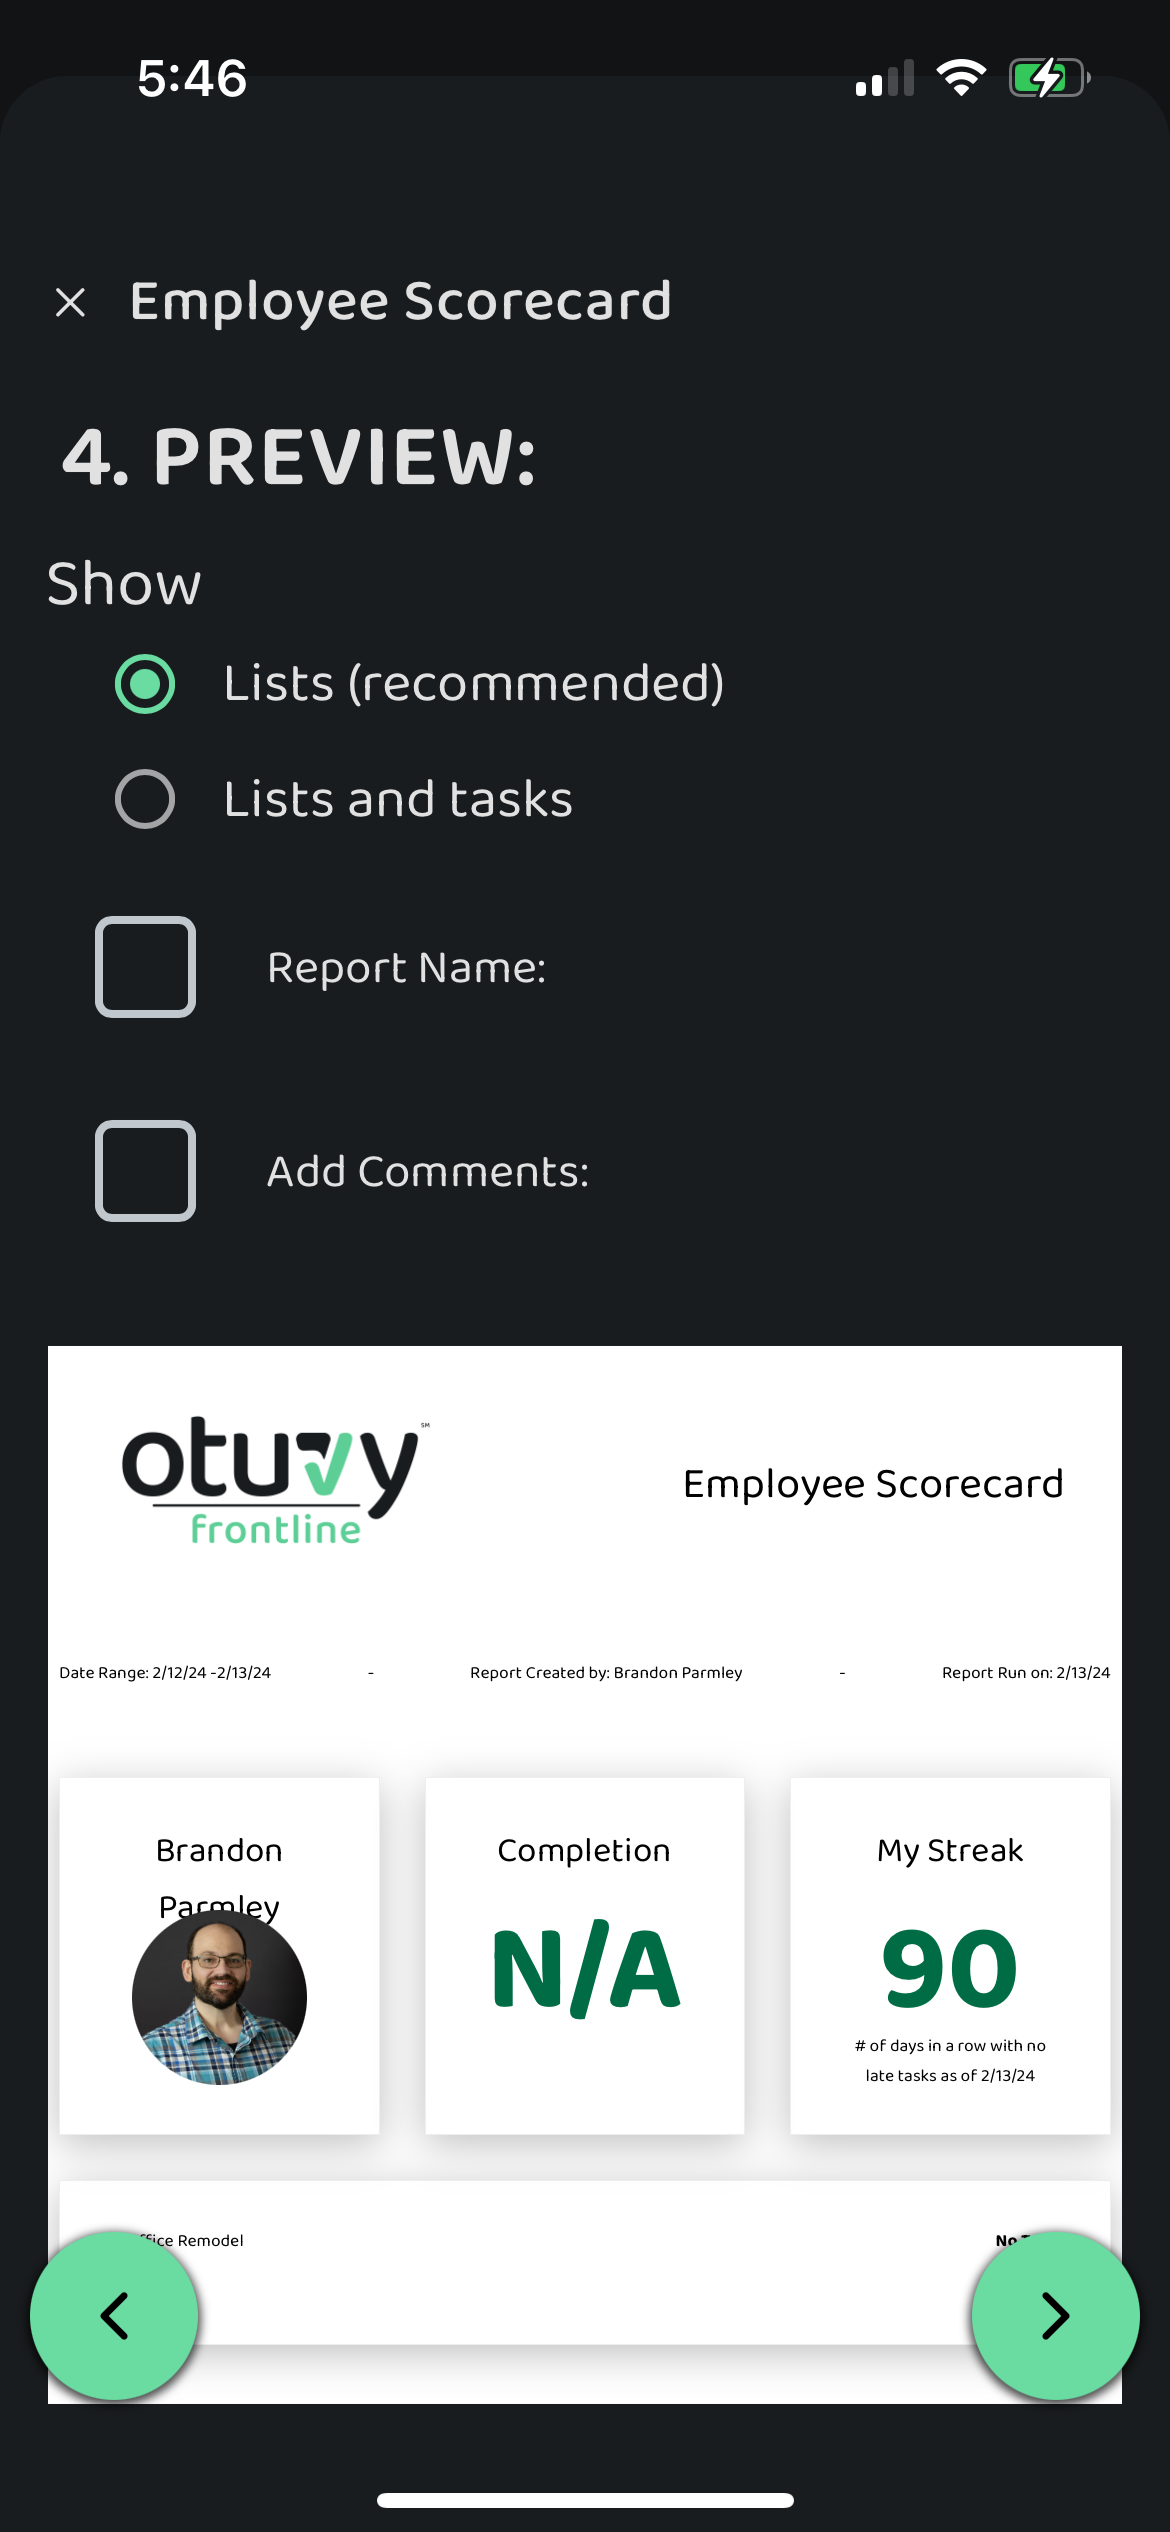
7. **Lists (recommended)**: This will show a high level overview of each list and how much of those lists have been completed
8. **Lists and tasks**: This will show both the high-level overview as well as each task in the list(s) in the report. This setting is required to show the geolocation of where each task was completed.
9. **Task notes**: This will include any notes left on each task in the report
10. **Report Name**: You are able to set a custom report name before generating the report
11. **Add comments**: You can add general comments about your findings in the report
12. As you set your report's customizations you can scroll through the preview of the report to see how it looks 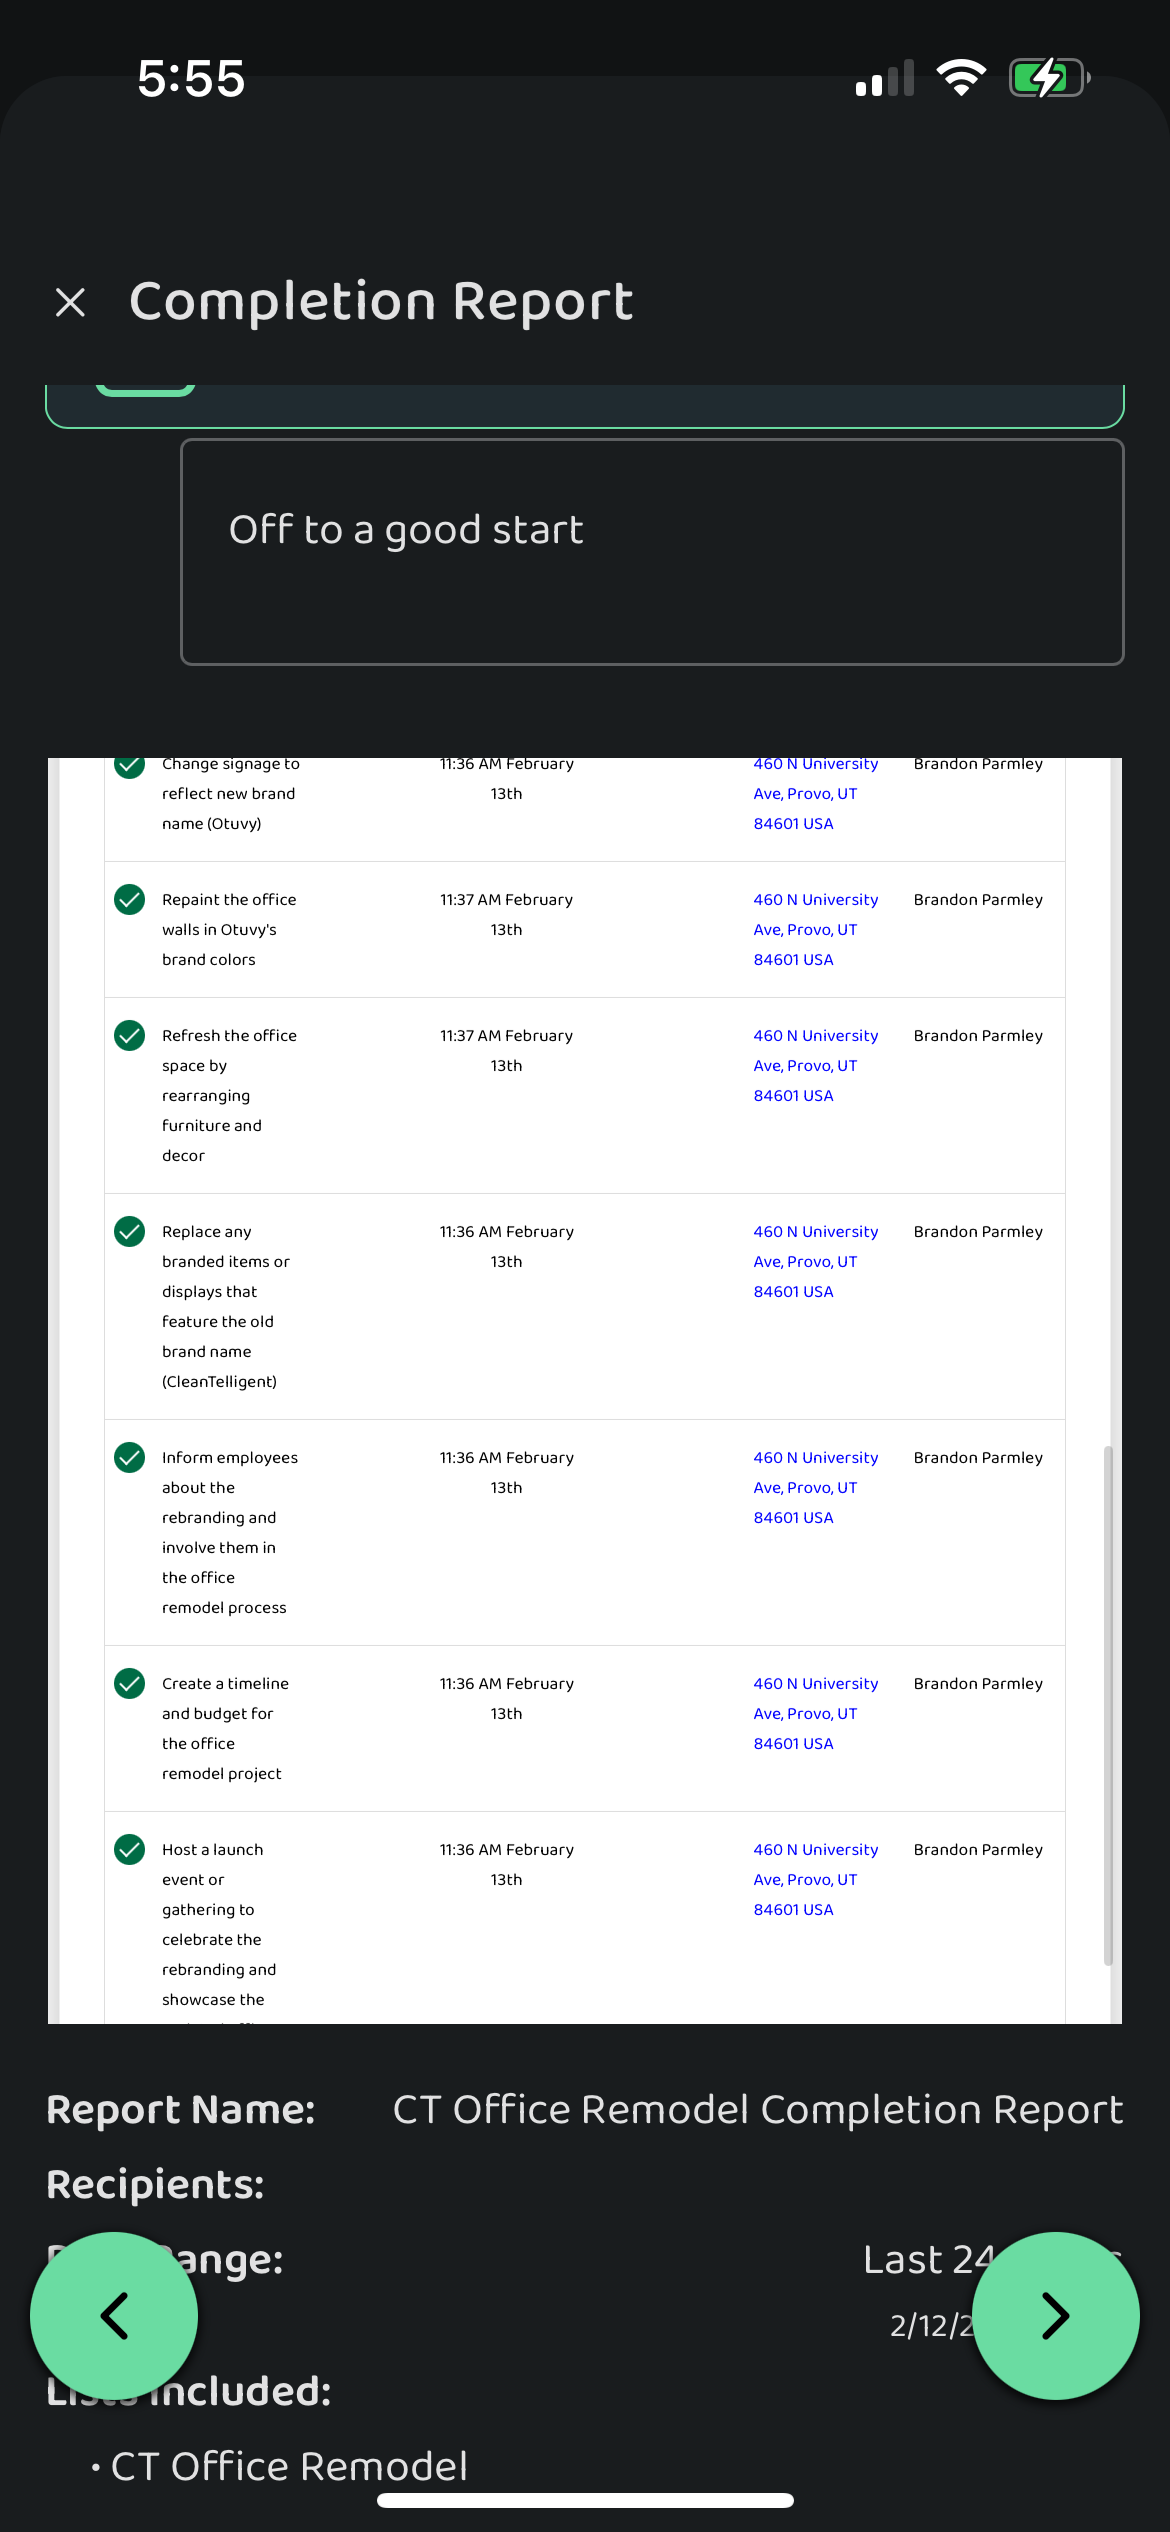
13. If you scroll down outside of the report preview, you can see the report criteria listed below the preview 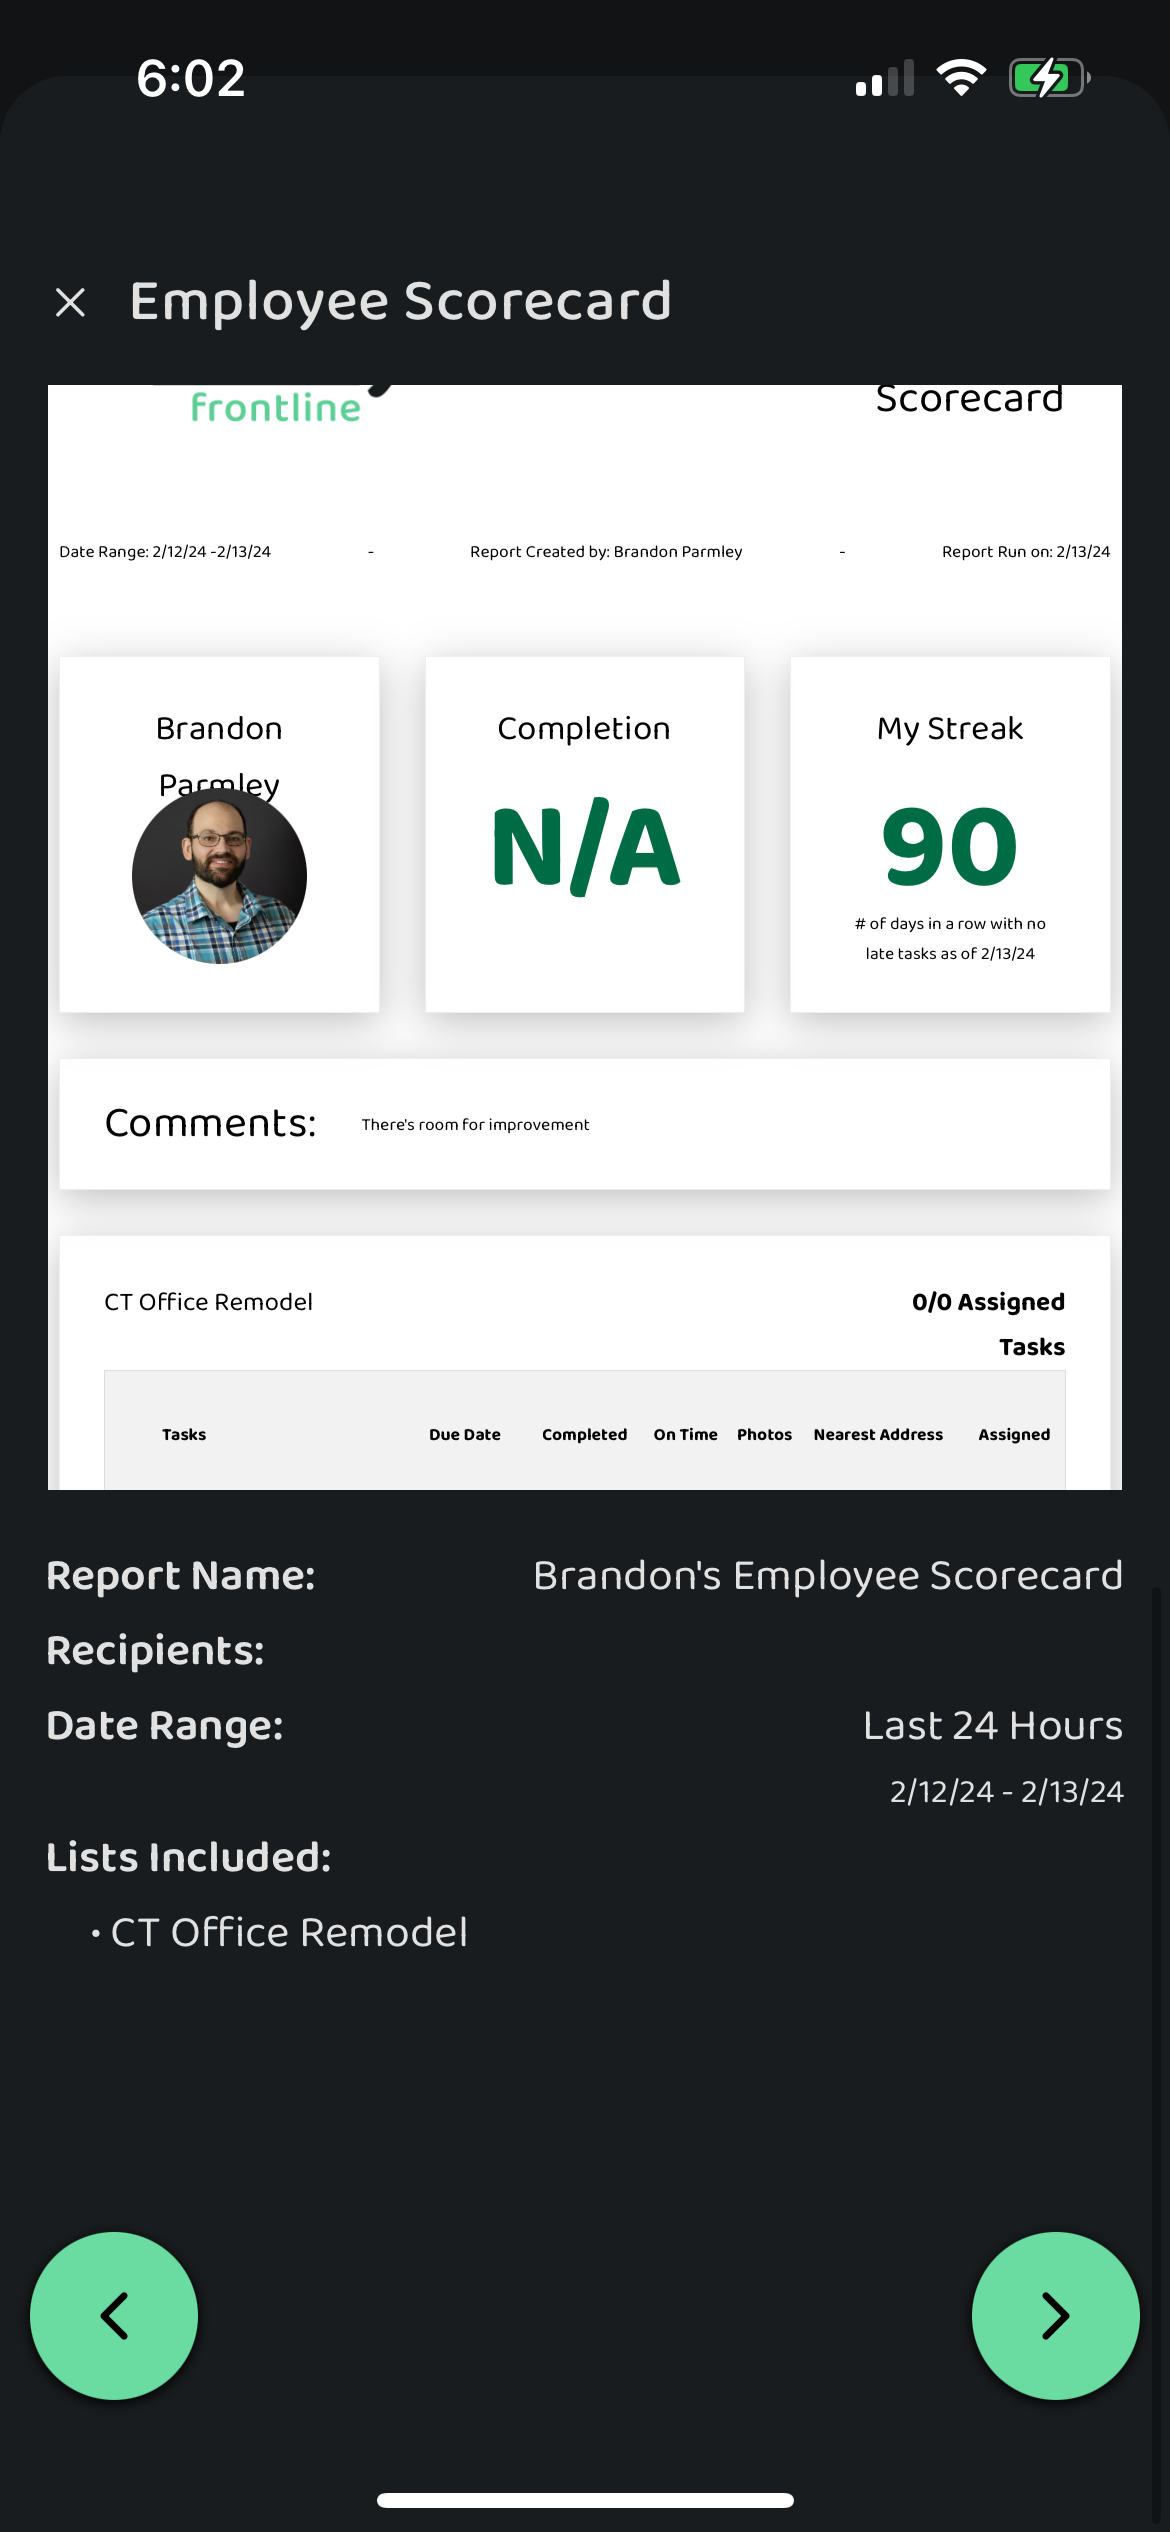
14. Once you have it just the way you want it, tap the right green arrow and determine **Who Gets It** 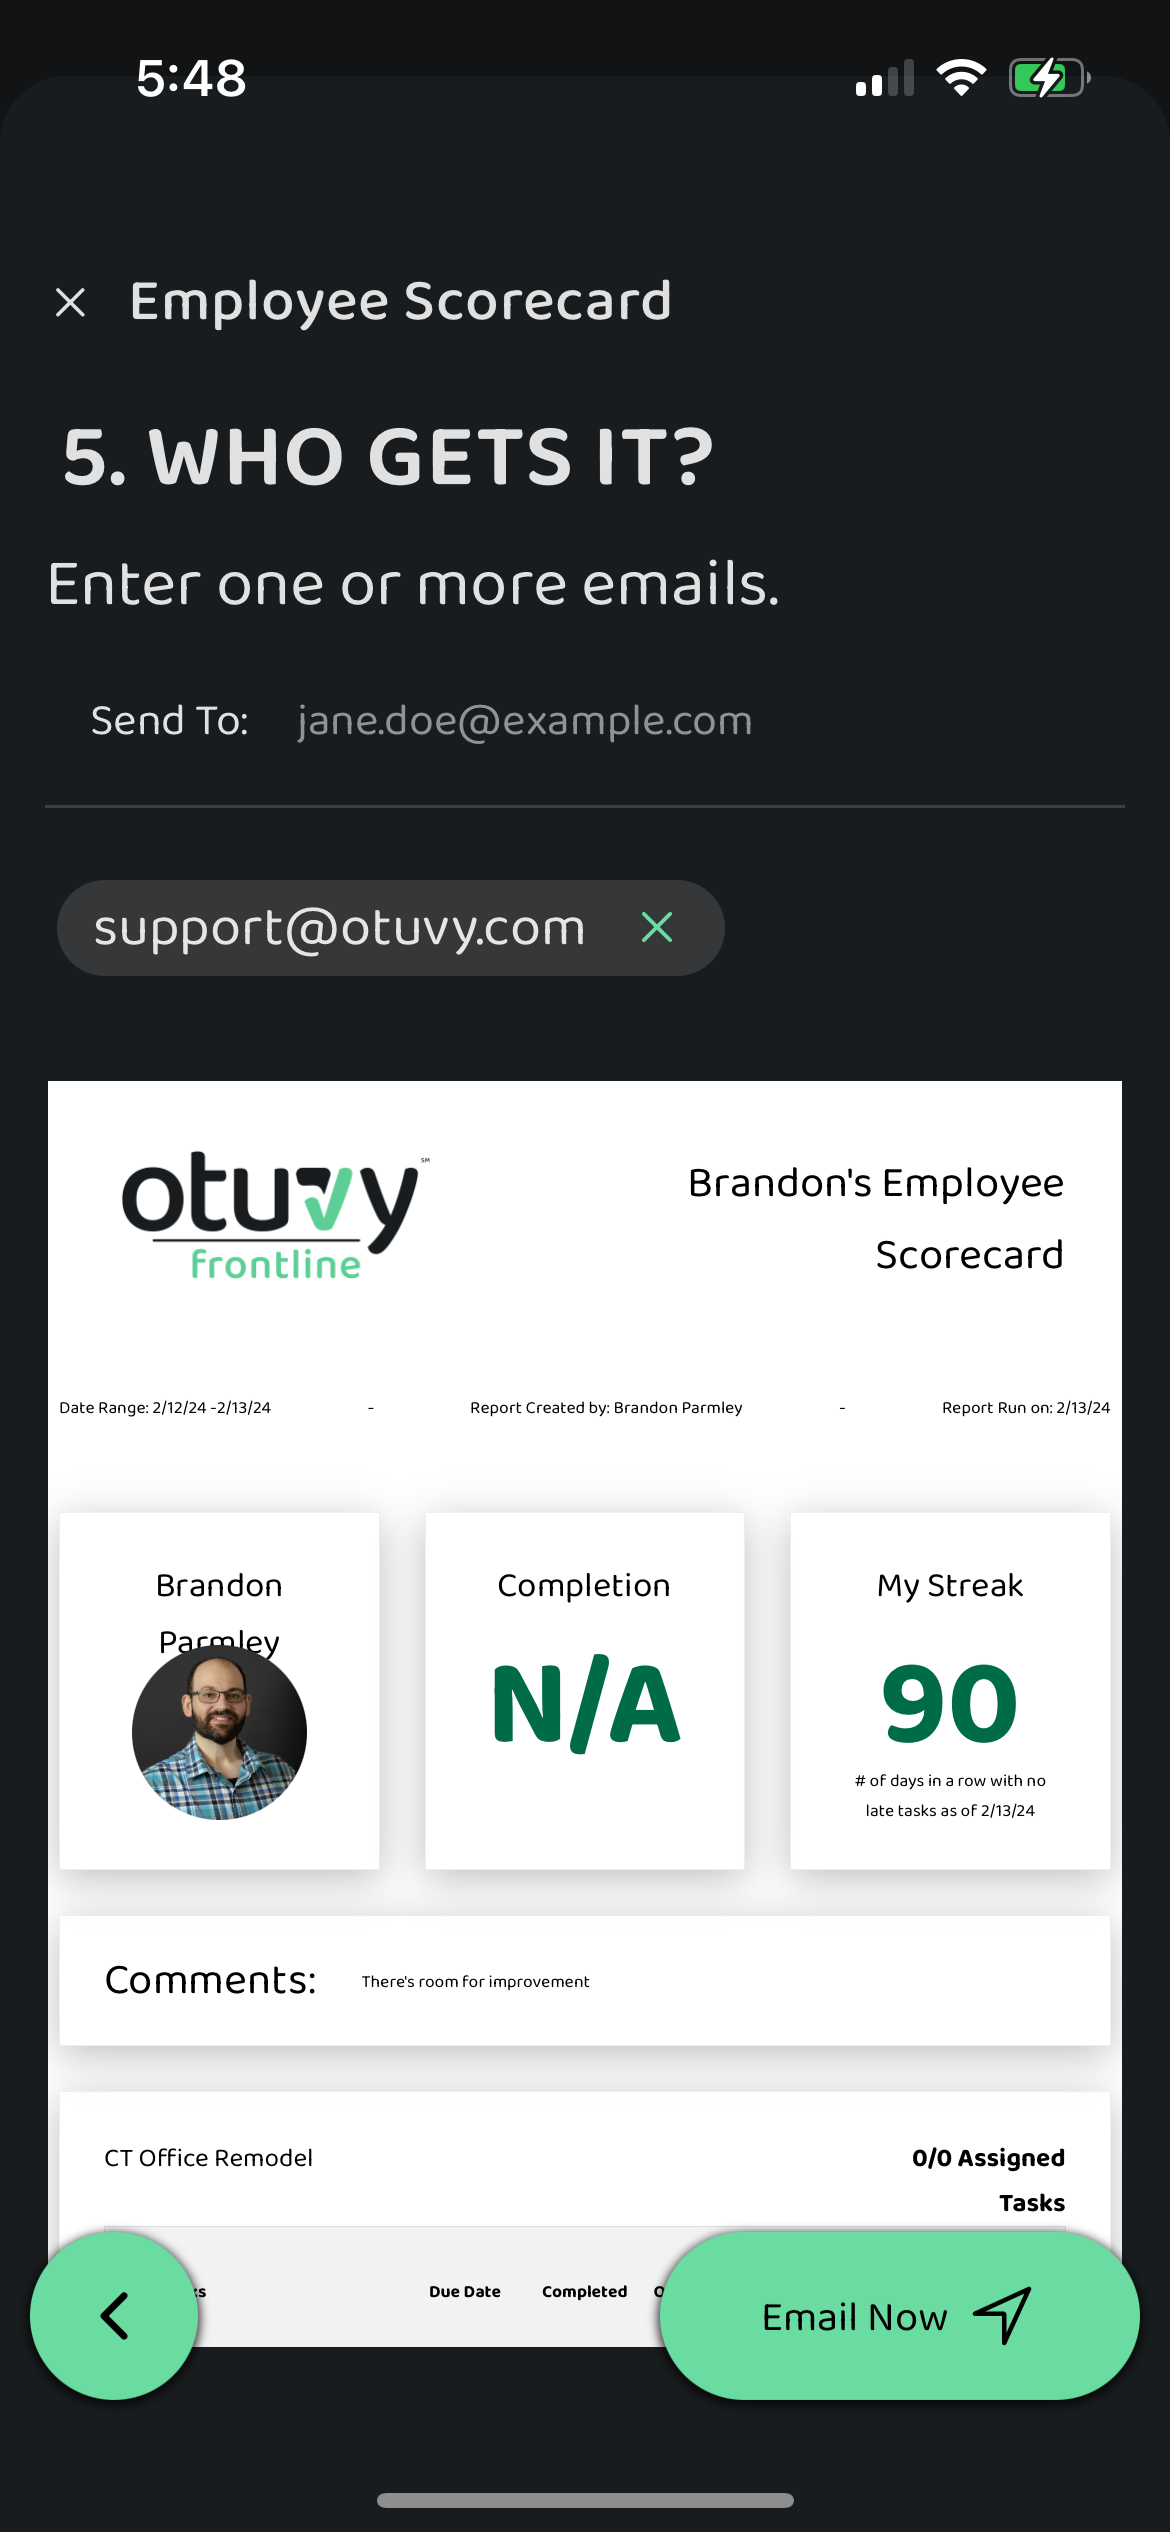
15. After you've entered everything in and added all the recipients, tap on **Email Now** to send the report
> If you ever need to exit the report builder tool just click on the X in the top of the screen. This will discard all your progress with the report.
We've attached a copy of this report for you to see what it could look like. It's called Brandon\_s Employee Scorecard - 2024-02-13 -- 2024-02-14.pdf
- [Otuvy QM - Getting Started](https://help.otuvy.com/kb/otuvy-qm-getting-started?hsLang=en)
- [Otuvy QM - Setup & Administration](https://help.otuvy.com/kb/otuvy-qm-setup-administration?hsLang=en)
- [Otuvy QM - Contact Access](https://help.otuvy.com/kb/otuvy-qm-contact-access?hsLang=en)
- [Otuvy QM - Inspections](https://help.otuvy.com/kb/otuvy-qm-inspections?hsLang=en)
- [Otuvy QM - Work Orders](https://help.otuvy.com/kb/otuvy-qm-work-orders?hsLang=en)
- [Otuvy QM - Mobile App](https://help.otuvy.com/kb/otuvy-qm-mobile-app?hsLang=en)
- [Otuvy QM - Reports & Dashboards](https://help.otuvy.com/kb/otuvy-qm-reports-dashboards?hsLang=en)
- [Otuvy QM - Advanced Features](https://help.otuvy.com/kb/otuvy-qm-advanced-features?hsLang=en)
- [Otuvy Frontline](https://help.otuvy.com/kb/otuvy-frontline?hsLang=en#main-content)
- [Getting Started](https://help.otuvy.com/kb/otuvy-frontline?hsLang=en#getting-started)
- [Mobile App](https://help.otuvy.com/kb/otuvy-frontline?hsLang=en#mobile-app)
- [Admin Portal](https://help.otuvy.com/kb/otuvy-frontline?hsLang=en#admin-portal)
- [Uncategorized](https://help.otuvy.com/kb/uncategorized?hsLang=en)
[](https://www.otuvy.com/)
[mailto:email@email.com](mailto:email@email.com)
Copyright © 2026, Otuvy, Inc.